MiniArt 1/72 East European Village House
| KIT #: | 72016 |
| PRICE: | $ |
| DECALS: | None required |
| REVIEWER: | Scott Van Aken |
| NOTES: | Vacuformed roof and floor |
| HISTORY |
Thatching is the craft of building a roof with dry vegetation such as straw, water reed, sedge (Cladium mariscus), rushes and heather, layering the vegetation so as to shed water away from the inner roof. It is a very old roofing method and has been used in both tropical and temperate climates. Thatch is still employed by builders in developing countries, usually with low-cost, local vegetation. By contrast in some developed countries it is now the choice of affluent people who desire a rustic look for their home or who have purchased an originally thatched abode.
During WWII, thatched roofs were very common place in eastern European villages, especially in the steppes where wood was not an easy to get commodity.
| THE KIT |
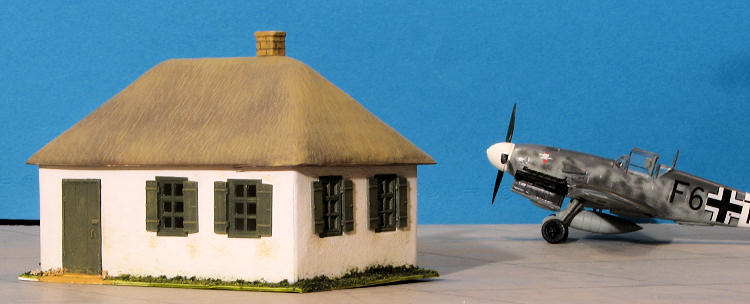
 MiniArt has been known for its superb 1/35 diorama scenes. These have been heavy gauge vacuformed plastic for the base and main structures and injected styrene for the detail bits. This is one of their first 1/72 diorama features and it is a single East European style house with a thatched roof. This house would be useful for dioramas from WWII back several hundred years and possibly even today where thatching is still considered a valid method for roofing.
Now I can hear some of you "Vacuform, A UUUGH!". Well, in this case the vacuforming is minimal at best with only the base and the roof being vacuformed. The rest of the walls, doors and windows are injected plastic. Even the chimney is injected, though being of four sections, seems a bit much when one would think a single casting would do. The builder will have to cut open the doorway and two are provided if needed. The injected parts are fairly well done, and really, once all the pieces have been removed from the sprue and cleaned, the house itself could be built in just a few minutes of gluing. I'd wait until the main walls were painted before attaching the shutters, though.
| CONSTRUCTION |
One thing I've learned is to never underestimate what appear to be simple kits. This one certainly looks that way, but there are pitfalls. But let's get started. First thing I did was to cut away the vacuformed roof and base using a large pair of scissors. The base will come in very handy during construction. I then cut away and cleaned up the parts for the walls. The long walls each have an area for the door. You could put in two doors if you want as two are supplied, but from what I understand, most of these cottages had but one. Using the UMM SCR-01 (plug), I started scribing away at the door opening until it became thin enough to use a standard scalpel to remove the section and then sanded the edges square.
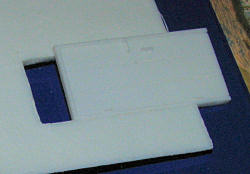 Well, somewhere along the line, the engineer neglected to tak
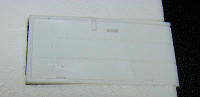 e the door frame into consideration when determining the size of the opening. As you can see by the rather washed out image, the door is far too wide. This means either trimming the door or the opening. I took the opening option and after some time, got it wide enough to fit the door. Then it was realized that the opening was too short (see the image). More trimming until it was able to fit flush with the bottom of the walls. More apologies for the images as white is a real challenge to properly photograph with a flash.
The next step was to assemble the walls. I did this in two stages, gluing one of the short and long walls together before attaching all four. While the glue was hard enough to keep the bits toge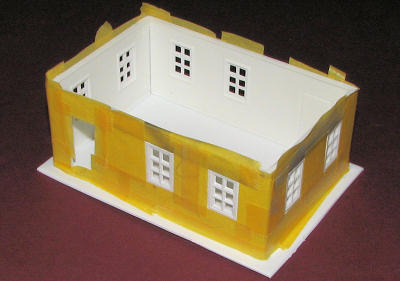 ther, yet not fully cured, I cemented the walls to the base, ensuring all was square. Naturally, the wall joins had gaps so those were filled with putty and later sanded. To return some of the rough texture to the areas smoothed out, I brushed some glue over the affected areas a couple of times and let it naturally etch the somewhat soft plastic.
While all this was going on, I removed the flash from the shutters and door and cemented the four chimney pieces together. Be sure these are properly square as well. The shutters and doors were then given a coat of olive green, though in reality, any contrasting color would be good.
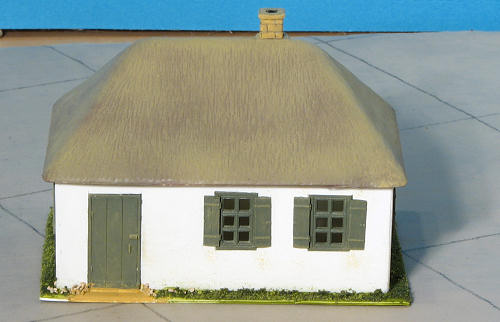
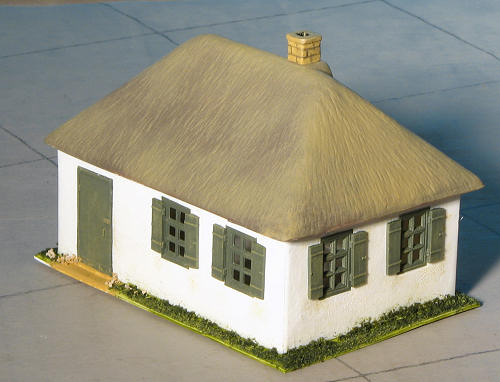
Once that was done, the walls were then glued to the base with plenty of cement. Then, they were painted a white then masked so I could paint the windows. Meanwhile, the roof was painted a brown and then lightly airbrushed with a tan color to hopefully give a contrast. No way would I be able to duplicate the thatched roof as shown on the box art. Back at the walls, the windows were painted green. You do have to mask everything to keep overspray from being a problem unless you hand paint the windows.
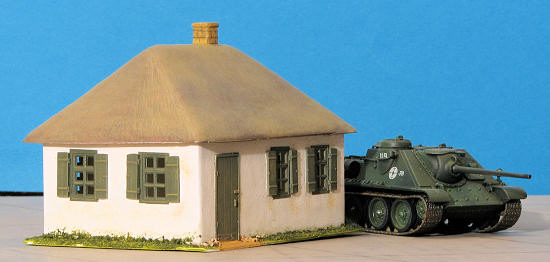 With the windows and the roof painted, I started by installing the door. It was still a very tight fit so had to do a bit more trimming to get it to fit. Then the shutters were glued in place. These are handed, believe it or not, so be sure to get them all on the proper side or things might not look so nice when done. With the shutters installed, I glued the roof in place. There is no positive locator for this and you just have to move it around until it looks good. I did that and still got the back overhanging more than the front, but it isn't really noticeable unless you look at the house from the bottom
I then painted the base around the house with a green using a tan for the area in front of the door. Then I used Woodland Scenics grass over the green area, installing it with white glue. For in front of the door, I tried some gravel, but it looked too large so I removed it and just painted more tan. I also used this shade to dry brush all the windows, shutters and door in an attempt to add a bit of interest. The chimney was painted black on the inside and before it dried, I used some tan for the chimney itself, using the still wet black to help smear things a bit. The brick pattern was added with a pencil. And that was it.
| CONCLUSIONS |
 I can tell that not everyone is going to be really enthusiastic about something like this, but to those who like to build dioramas, features like this are very nice to have as they add interest to the diorama. War gamers will also appreciate this sort of structure as it fits right in with their usual scale. Overall, it wasn't a difficult kit though took a bit longer than I would have originally thought due to the fit issues with the door. Want something very different? Here it is.
| REFERENCES |
http://en.wikipedia.org/wiki/Thatched_cottage
June 2011 Thanks to www.dragonmodelsusa.com for the review kit. I'm sure it is still available if you ask for it. If you would like your product reviewed fairly and fairly quickly, please contact the editor or see other details in the