 1/6 MHX-13 Multi (P unit B)
1/6 MHX-13 Multi (P unit B)
| KIT # | |
| PRICE: | $42.00 |
| DECALS: | N/A |
| REVIEWER: | Scott Van Aken |
| NOTES: | Resin anime figure kit |
| THE KIT |
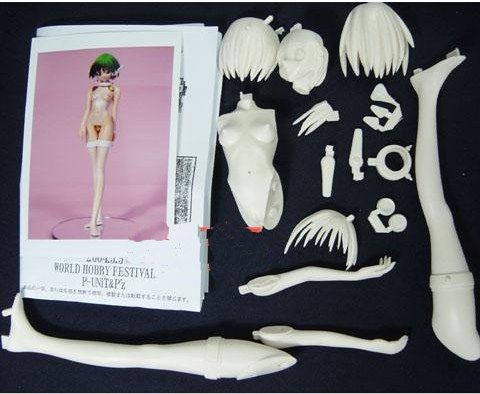 As it typical of these resin anime kits, the parts were very well molded in an ivory resin with no air bubbles, no large resin pour stubs and only some seam work to do, that being very little as these kits tend to have most of the seams removed prior to shipment.
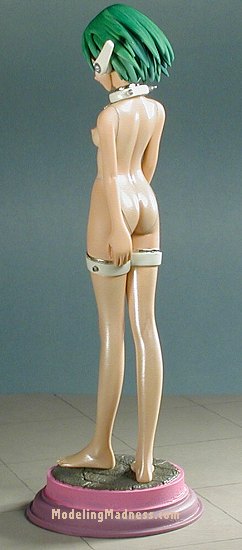
I've not a clue as to what the figure actually is, though I do know it is from a series called 'To Heart', and is the younger 'sister' to Serio. Both are robots or androids. The only options are small triangular-shaped 'plates' that fit on the shoulders and crotch, this last one probably being for those who want to cover up some of the 'naughty bits'.
| CONSTRUCTION & PAINTING |
 With all resin kits, the first step is to remove as much of the mold line and resin attachment points as you can. If you are like me, you get them all off, primer the kit, remove the rest of the little ones and then get surprised when the thing is finished by a mold line that you missed! Once all the parts were cleaned up, it was time to decide just how to go about things.
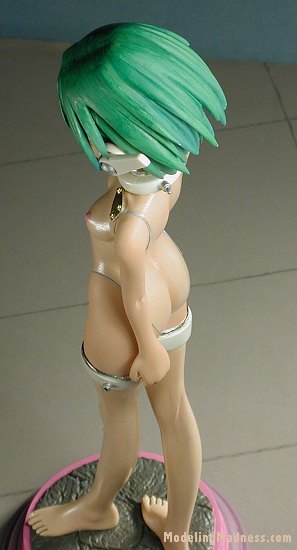
There are times when you want to put together some of the parts that will be painted the same color and then others when you want to pre-paint everything. For this kit, it was the pre-paint everything strategy that would prove to be the way to go. The main reason for this is that the torso and lower legs were to be painted differently from the rest of the body. Yes, this kit is basically a nude, but the material covering the aforementioned bits had to look different from bare skin.
 Well, first off, all the parts were given a white undercoat using Floquil Reefer White lacquer. It allowed me to spot some areas that needed more clean-up and provides an excellent base for the flesh tones. Once ready for paint, I used Badger Freak-Flex acrylics that I mixed to provided the tones I wanted. Out of the bottle they seem just too dark for my tastes. I uses some of the darker skin shades in areas like the spine, back of joints and ankles, just to mention a few spots. These were then misted over with the main flesh tone to cut down on the starkness of things. I'm not really sure why some figure painters overdo the shadings as they just look terrible. Guess it is like those who over-weather aircraft or over-accentuate panel lines. Some folks like that, but I've always felt that a light hand on these things was the best way to go.
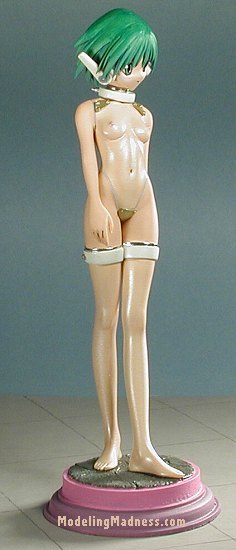
Anyway, with that done, it was time to figure out how to make a translucent covering for the torso and lower legs. Thanks to a friend's suggestion, I used pearlescent clear lacquer from Testors in a rattle can. I sprayed this on and it looked just great. Unfortunately for me, I put it on too thick and got some nasty runs. I just am not used to using the unregulated spray that comes from rattle cans. It meant some sanding and respraying. While it looks OK, the next time I'll have to settle with many thinner coats to prevent running. 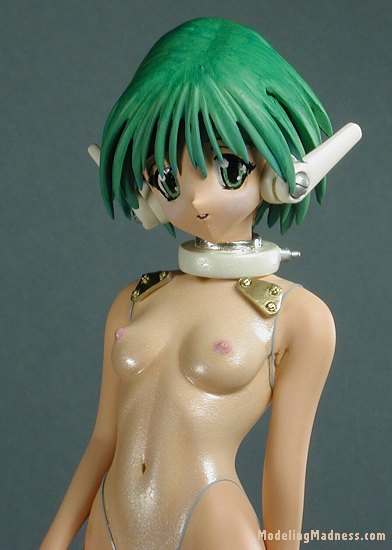
OK, now to the face. I painted in the eyes with white and then, over several days, managed to paint in the eyes. I'm still not very satisfied with the results I get, but as with everything, practice will eventually win out. I then masked off the lower and upper legs. The bands around the legs and the one that will eventually go around the neck were painted Ivory using Vallejo acrylics and then given a shot of the pearlescent clear. Then the very thin upper portion was covered in Bare Metal Foil's Chrome and the little 'stubs' painted aluminum. When all that was dry, I then assembled the body. I used super glue for this though I could have used epoxy as well. There were alignment holes pre-made so that I could pin the joints, but I think the super glue will hold up as well as anything.
Now the problem with doing this is that there are joints that will have to be dealt with. The options are to fill them with putty, sand and then repaint the areas. While that would have worked OK, I wanted something a bit different so took very thin (1/64") light blue tape and wound it around the join areas. That way it looked like a part of the torso's covering and is rather effective.
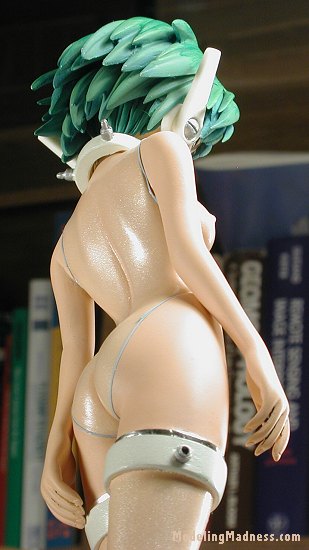 The last thing to paint and assemble was the hair. I wanted a green, but though I tried several colors, just couldn't get exactly what I was looking for. Using Vallejo acrylics, I first tried an Emerald Green, but it was too dark. I then dry-brushed a Lime Green over it to lighten it up, but didn't really like the look. Thinking things would improve if I assembled the four sections that made up the hair, I glued all the bits together and placed them on the head part. Not too bad, but not what I wanted.
Then I took a Light Green and put that atop the other two shades. This improved things, but was now a bit too light. The last thing I did was to streak on Transparent Green and this seemed to be where I'd stop playing around as I don't think I'll get it any better. Perhaps I should try airbrushing all this, but the thought of masking the face didn't appeal to me.
Now for the ear thingies. I have no clue what they are supposed to be, but can tell you that they need to be fit on before all the hair is glued in place. This will allow the builder to heat up and bend the hair parts that get in the way as the fit is exceedingly tight. I eventually got them on OK and they don't look too bad. It seems as if each figure I do is a major learning experience of some sort.
 The last things were the little metal triangles. I tried to cover them with Bare Metal Foil, but the little studs on them are not conducive to foil so I ended up painting them with Brass Metallizer. They were then glued in place with white glue so that the cement wouldn't damage the underlying finish when they will inevitably get knocked off.
The last things I did were to drill holes in the feet for the metal pins. These would help hold the figure on the base. I bought several resin bases from Jimmy Flintstone at Wonderfest this year as they were cheap and seemed to be just what I needed. Deciding to add some color to things, I painted the lower parts Mauve and Pink. Then the stones were painted dark brown and then dry-brushed with a light grey. Final step was to glue the figure to the base and I was done.
| CONCLUSIONS |
It seems that every resin figure kit I do has its problems that need to be solved. I can happily say that I'm getting better at things and each figure seems to go smoother than the last one. If you are interested in anime resin figures and want to know more about where to find them, I'd be happy to share what I little I know.
Copyright ModelingMadness.com. All rights reserved.
If you would like your product reviewed fairly and fairly quickly, please contact the editor or see other details in the