The Juggler
| KIT # |
|
| PRICE: | $35.00 |
| DECALS: | N/A |
| REVIEWER: | Scott Van Aken |
| NOTES: | resin figure, about 1/5 scale |
 In the last year or so, I've become very much interested in figure kits. Not the usual military types, but in animé resin kits. There is just something that is interesting about them, not the least of which is that they are generally female and generally pleasantly formed (nudge, nudge, wink, wink, know what I mean?).
Now resin figures of this type come in several different varieties and one needs to know what to look for in a figure of quality. Generally speaking, you get what you pay for. The more a figure costs, the better the quality of the figure. This is not something I knew a year ago, but I'm learning.
A vast majority of figures of this type are molded in Japan. This is not surprising as Japan is where animé is king. You've undoubtedly seen some of this stuff yourself if you have kids. They have been watching these shows for years on Saturday mornings, and while most of these have featured robots of some sort, the general characterization is pure animé.
The masters for these types of figures have a pretty short life, generally around 100 complete kits (often less) before the mold gets too messed up to use. These original kits are usually bought up quickly and rarely make i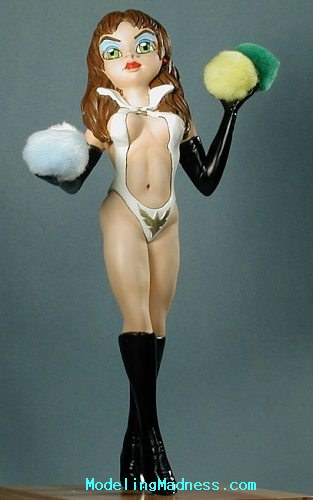 t out of Japan. When they do, several hundred dollars is not unusual for an original kit. What this has done is open up a market for remolded kits. An original kit is used as a master to make a new mold. In most cases, these kits are made in Hong Kong and are often nearly as good as the originals.
Many decry the use of these kits as often the original mold maker gets no profit from them. However, without them, they would not be available at all except to those few who happen to live in Japan and are able to buy them. These recasts are usually about 1/3 to 1/2 the cost of the original, bringing them into the $40-80 range, though there are some that cost more.
Then there is the poor recast. These kits have a wide variety of problems and are generally more trouble to fix than they are worth. They are often quite inexpensive ($20-40), but are not worth it. I've been burned by this myself and have learned.
There are two main ways to prevent problems. One is to carefully inspect the kit prior to purchase. Look for air bubbles, incomplete casting, mold shift, and rough surface texture. Also look at the type of resin used. The quality kits will generally use a smooth, white resin. Others will use a tan, grey or even brown one. Though color is not always indicative of quality, it seems from my experience that the ones molded in a dark brown are best to be carefully examined before purchase!
The second way to prevent problems is to order your kit from a reputable source. I've dealt with a number of different mail order places around the world and have found a couple that have always given good service and provided a quality product. If you want more info on these folks, contact me and I'll tell you what I know.
 While prowling the vendors area at Wonderfest 2001, I came across several kits and ended up buying three. One ended up being a total waste and was everything bad about a kit there could be. The air bubbles were terrible and made the hair of the figure totally unusable. It is in a box awaiting disposition. A second was fairly well molded, but had a surface texture of a pimply faced teenager. It can be fixed, but I haven't had the nerve to work on it. The third one was the subject of this kit. It came in a bag with no instructions or painting info. However, I liked the look of it and so bought it.
Construction may seem painfully simple as the kit was basically a full body with only the arms as separate pieces. However, close inspection pointed out a rather large hole in one thigh that was tough to fill. I was only partially successful after many superglue and putty fillers. There was also a rather large mold seam that needed removed and some other minor dents and gouges that needed filling. I used A+B epoxy putty to take care of these defects, though on some, several applications were needed.
The benefit of epoxy putty is that you can mold it with a wet finger, it doesn't shrink and so can be pretty well smoothed out reducing any sanding that is needed. Downside is that you have to mix it and often you need to enlarge the hole or gap to get it to properly stick tight.
With only two arms to attach, assembly was very quick once the figure was properly puttied and smoothed out. On these figures, the pieces are usually keyed so once the resin plug is removed and the attachment surfaces cleaned up, superglue can be used without any real problem. Many of us prefer a bit of extra help so will often drill the two attaching pieces and insert a section of stiff wire to help hold parts together. At this time I also drilled holes in the feet so that I could attach it temporarily to a base when painting got underway.
This explanation sounds simple, and to some it is, but for me, it took the better part of 6 months to get the figure to where it was ready for some paint. I also need to mention that this was not a high priority item so I worked on it when the mood struck me.
 With the figure nicely finished, it was give a coat of primer to highlight any areas that needed fixing. Being a figure, I used Floquil Reefer White as a primer as the lighter colors would work well on this surface. Naturally I found several things I missed so had to take care of them. With those errors fixed, I had to come up with colors. Actually, I had no idea what the figure was supposed to be. The position of the arms is quite odd and no other bits came with the kit. However, I did figure out something, but I'll wait until later to go into that.
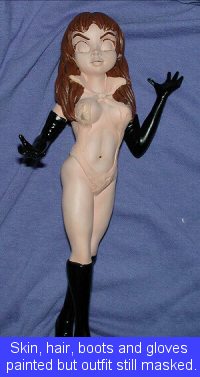
Most painters will tell you to go from light to dark when painting something. With this in mind, I started with white. Actually, I just masked off the white parts, which in this case was her clothing. I used Tamiya masking tape and it worked quite well. Next, was the skin. For this I used Badger Accu-Flex acrylic paint. I used a normal flesh color and sprayed that over the entire kit. Then I went back with a lighter shade for some highlights and slightly darker shade for some shadows. 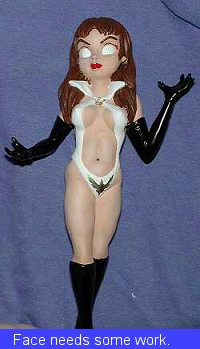 Then I misted just a touch of white on some of the highlighted areas. I don't like this gross embellishment of light and shadow that one often sees on figures. If you look at your own skin, it is pretty close to the same color all over. As with people, I'll let available lighting create most of the color differences.
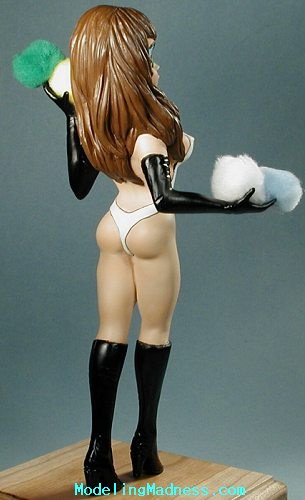
With that done (or at least close to it), I masked off the skin and painted the gloves and boots black. I then brush painted the hair using Testors leather from the enamel line. The masking was then taken off all but the outfit and the hair was given a wash using thin, black acrylic. Some other touch up was done before the masking was removed. Naturally, some touch-up was done to the outfit. In fact, I found that I had to do a LOT of touching up this, that, and everything else. The eye areas were brush 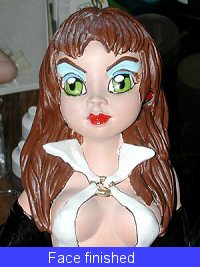 painted with Floquil reefer white in prep for the eyes and some Gunze red was used for the lipstick and earring.
I used a gold paint pen to paint the bird on the clothing and the ring on the model's chest that holds the outfit together. Some additional shadow work was done with a dark flesh using a brush. I also used a fine artists pen to outline the models clothing, but I'm not sure that was such a great idea.
The hardest part was the eyes. I probably painted those things a half dozen times before I got the results you see. I'm still not really satisfied with them and will be trying some different techniques on the next one. The eye liner and eye shadow are a couple of shades of blue from the small Testors enamel bottles. The eyes were then given a coat of Future to make them glossy in comparison to the rest of the figure.
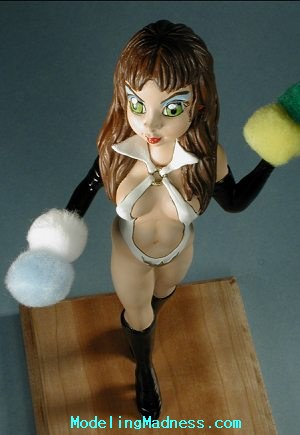 Now that the figure was painted, I drilled a couple of holes in a nice cherry base using the old mounting pins. Actually, I used some very small nails that seemed to work pretty well. It looked rather silly with empty hands so I tried to find something to put in them. I first thought of a bar girl, but the hands were not positioned right to hold a tray. I could have modified the hands by replacing the fingers, but didn't want to do the extra work.
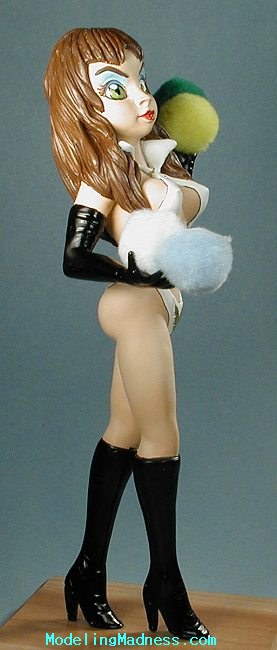
It finally came on me that perhaps this person would be a juggler. All I had to do was find something for her to juggle. A trip to Hobby Lobby and I found some pom-poms that I thought might not be a bad idea. After discarding the idea of painting the pom-poms to look like tribbles and make her a tribble sales woman, I simply glued two in each hand and there it is!
What you now see is the end result of about a years work. With figures, I work in fits and starts with long delays in the project. Was it fun. Sure it was. Almost all modeling is fun. I also learned a great deal as to what works and what doesn't. For me that is the most important part. It should make the next one turn out even better.
I have since learned that this is supposed to be Vampirella. Whoda thunk it!
June 2002
Copyright ModelingMadness.com. All rights reserved.
If you would like your product reviewed fairly and fairly quickly, please contact the editor or see other details in the Note to Contributors.
Back to Main Page
Back to Reviews Page
2019