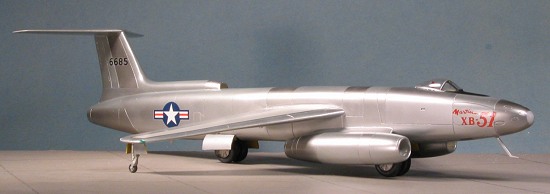
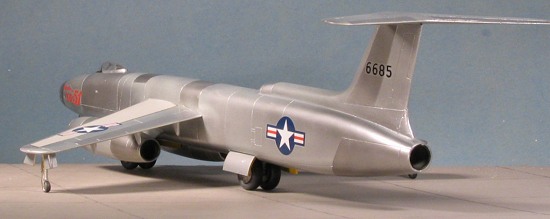
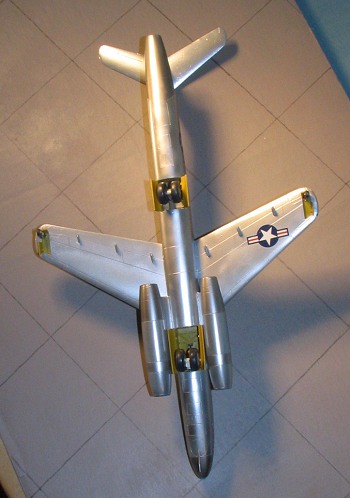
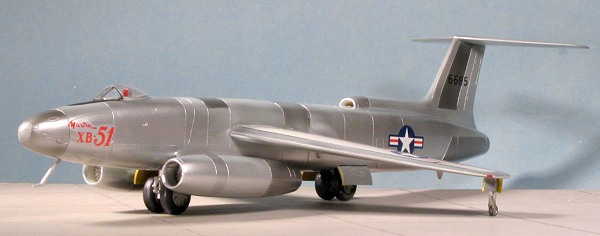
Anigrand Craftworks 1/72 Martin XB-51
| KIT #: | AA-2035 |
| PRICE: | $73.00 |
| DECALS: | One option |
| REVIEWER: | Scott Van Aken |
| NOTES: | Resin short run kit with vac canopy |
| HISTORY |
The XB-51 was developed in response for a replacement for the A-26 medium bomber that was currently in service with the USAAF. With the advent of turbo-jets, it was felt that the replacement should be jet powered. The proposal that won the initial competition was originally designated XA-45, in fitting with the attack category. It would be inevitable that the USAAF would modify the requirements and with those revisions, two prototypes of what was now the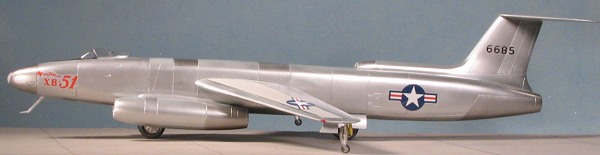 XB-51 were made. Initial flight testing started in September of 1949, three years after the original proposal was made. At the time of its flight, it was the fastest aircraft of its type in the world.
The outbreak of war in Korea during 1950 saw a need to develop a night intruder and so the XB-51 was pitted against the British Canberra bomber. Here, speed wasn't paramount and the three-engine XB-51 was at a disadvantage to the twin-turbojet Canberra. After a fly-off in 1951, the Canberra was chosen, much to the dismay of Martin, even though Martin eventually produced the Canberra for the USAF. With the loss of the fly-off, the XB-51 project was cancelled in 1952, though the aircraft itself continued to fly test missions at Edwards AFB and starred as the 'Gilbert XF-120' in a William Holden movie on test pilots called 'Beyond the Unknown', probably one of the top ten aviation movies ever made (lots of lovely prototypes and X craft!).
Pleasecheck the preview for a look at what comes in the box.
| CONSTRUCTION |
As is the norm with kits like this, step one is to clean up the parts. This particular kit suffered from some rather large air holes in the cockpit area and in the wheel wells. I decided to do nothing about them and left them as they were. If you are a contest modeler, you'll need to fill these and the best thing to use on them is some sort of epoxy putty as you can form it while it dries and it will not shrink.
 There wasn't too much trouble with broken parts though I did have a poorly molded pitot tube break on me and a few of the various gear doors had hinges broken off. This is the norm for these kits and nothing really to worry about as one does become rather adept at repair after a while. There were also the usual air bubbles and as many of them were filled as possible. I find that super glue works fairly well on those on the edges while very thin filler/thick paint, such as Mr. Surfacer, works for the rest. I didn't get them all, but did get most.
Because of the limitations of the molds, the very long fuselage is molded in four parts. The first thing I did was to mate the forward and aft portion of each half. I did have to do some sanding and open up the mating holes for a good fit, but working on a hard, flat surface, I was able to get each half assembled without too much trauma at all. I then moved to the cockpit and cemented in the seats. The instrument panel mounting slot is too shallow and you'll never get the interior in the fuselage half as it is. Taking a motor tool, I enlarged the mounting slot back towards the seat. After several test fits, it was glued in place along with the control wheel. There is a minimal detail on the instrument panel and none on the side consoles. After painting the interior with Testors Interior Green enamel and the seats a grey that I had sitting around, the instrument panel, side console tops and control wheel were painted black and the interior glued in place once the inside walls were painted. There is a rectangle above the bombardier that needs to have the clear piece trimmed to fit and it is best to make sure that fits before the fuselage halves are glued together.
 After MANY test fits, I noted that the fuselage wasn't totally straight. Not a problem if one is careful. First, I glued in the bombardier's window, making sure it was a good fit. Then, starting at the front, I glued the fuselage in sections using super glue. This was quickly followed by accelerator to be sure things were aligned. This allowed the fuselage to be 'bent' a bit while I glued and so the minor warp was removed. The gaps were filled with super glue, hit with accelerator, washed with water and sanded smooth. I did not install the exhaust at this time as I'd found I could slide these pieces in later.
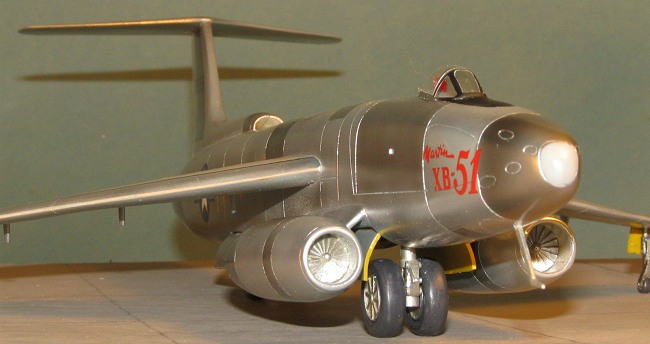
Moving to the engines, these were cemented together. I did not install the compressor faces, though I could have with little problem. These needed to be sanded down a bit around the edges to fit. There are large circular keys on one engine half and equally large holes on the other to accept these keys. They are on the pylon and since the keys were not fully molded, required much filler. In fact, even after multiple applications, I could still see where they were. Next time I'll use epoxy filler for this and not rely on super glue or standard filler. The engine intakes took a bit of work to get to where they didn't look quite so chunky.
Meanwhile, I decided to glue on the fin and fill the gap between that and the central intake. Then the stabilizer was glued to the top of the fin. I thought I'd gotten everything aligned, but as normal, it is off a bit.
 Now for the big decision. What is more important, filling the seams on the engine pod attachment or the underside of the wings? Because of the close proximity of these items, you can't really do both. I chose the engine pods. There is a nice slot and tab arrangement for these to help alignment. Both engine pods are the same so it makes no difference which goes on which side. One thing I did notice is that on one side, the fuselage mating surface was a bit longer than the engine pylon and on the other it was a bit shorter! You'll find, as did I, that getting the seam near the gear bays is difficult, but not impossible.
Now for the wings. These have pegs that fit into holes in the fuselage. The fuselage holes need to be enlarged a bit and a motor tool is perfect for this. What I did was to put a lot of superglue onto the wing and then press the wing in place. This allowed the super glue to ooze out the bottom of the wing and I blew it along the join to even things out. After it dried, it left a seam at the top of the wing that was easy to take care of. The underside of each wing has three flap hinges. The location is marked on the wing. It was a simple matter to clean these up and glue them in place. I now had a complete airframe and it was time to think about painting.
| COLORS & MARKINGS |
 Before painting I cut the canopy to shape, masked it as best I could, and glued it in place with super glue on the very front and rear. The rest of the gaps were filled with white glue, brushed on and then given a swipe with a wet finger to smooth things out.
In the past I've had trouble getting Alclad II to stick to resin, despite sanding and cleaning the surface. This time, I tried two things. One was an undercoat of Floquil Reefer White, followed by a gloss enamel. The other was just straight gloss enamel. Both stuck quite well and didn't pull up when tape was applied. However, I found out later that the straight enamel tended to scratch easier so the Floquil undercoat before the enamel seems to be the best way to go.
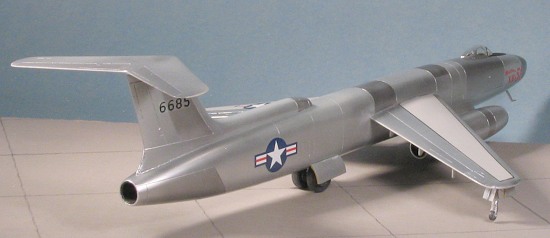
I used Testors Light Gull Grey enamel as the upper coat. This was used because it is a tad thick and will do two things. One is fill in the rather rough surface of the flat Reefer White. The other is that it will hide many of the scratches on the resin caused by the rather frequent sanding! Even with this, when I sprayed on the Alclad II Polished Aluminum, scratches and other surface imperfections leapt out at me. It is the price one pays!
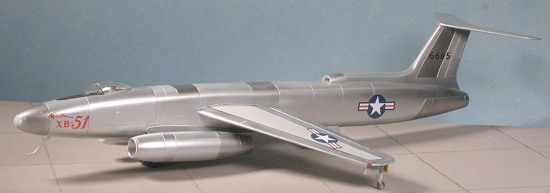
Giving the first coat a bit of time to dry (like an hour), I put on a second. Next, it was time to add more metallics. I used four other Alclad II shades: Jet exhaust for the exhaust, White Aluminum, Dark Aluminum and regular Aluminum. These were done on various bits to provide tones in the metallic surface. I also used Light Aircraft Grey enamel by Humbrol for the wing center section.
| FINAL CONSTRUCTION |
 This was all taken back to the bench so that I could attach the landing gear. The gear was painted in Aluminum as were the wheels and outriggers. The tires were painted with Floquil Weathered Black lacquer. I wrapped the oleos with Bare Metal Foil Chrome. I had to trim the axles quite a bit in order to get the wheels to fit properly. They are supposed to be quite close to the strut. The wheels were glued in place and then the struts. These fit well as Anigrand had done their homework on these. The front gear has a support strut that fit into a hole in the roof of the wheel well. I actually got these on pretty straight.
Moving to the outside of the wings, I put the model on a hard, flat surface to make sure the outriggers would fit well. I saw no fit problems so glued these into their slots.
Now that things were on their wheels, I put on the decals. These consist of four insignia, a fin serial number and a name for the side of the nose. The decals are well printed, a tad thick and worked well with Solvaset setting solution. What was missing from the sheet were the very prominent wing and fuselage walk areas. These can be made from black decal stripes. I had a few left from an ancient Scalemaster stripes sheet. These had turned yellow and I knew they'd shatter once they got wet. Taking a pretty new bottle of Microscale Decal Film, I used a cotton swab a liberally coated the two remaining stripes that I had. Once dry, they were cut to shape and despite wanting to stick to the backing, I got them onto the wings. I didn't have enough for the fuselage or top of the stabilizer. I should mention that the upper wing insignia wasn't put on until after the wing stripes. The decals are nice and opaque so no bleed through. I should also mention that despite the fact that the decals had been wrinkled in packaging, they did not come apart when they were soaked prior to application.
With the decals on and dry, I gave the entire airframe a coat of gloss clear using Testors Metallizer Clear Coat. This material works quite well on glossy surfaces and doesn't have the tendency to bead up that one finds at times with Future. I painted the nose anti-glare panel with flat black after masking it off. I should mention that I'd forgotten to mask the bombardier's window so that got painted over.
 I then attached the gear doors. The main gear doors are all wrong on the inside. I watched the movie "Toward the Unknown" to get color information for the gear wells and doors (yellow zinc chromate) and noted that the main gear doors are very thick. Not at all like the thin doors with framework that Anigrand provides. I also noted that the outrigger doors, have the aft small door hinged wrong. It is hinged as if it opens to the outside like the forward door, but it actually opens to the back. That hinge will need removed before gluing in place.
For the last steps, I pushed the compressor faces into the engine pods. Then, I shoved the exhaust into the back of the aft engine and one pod. Tight fit, but no problem and no glue. However, on the left pod, when I pushed it in, it split the seam on the pod! ARRGH! I left it alone and just shook my head. These things always happen at the end. Final steps were to remove the masking from the canopy and glue on the lower nose pitot. Having broken one of the side pitots, I left those off. A bit of touch-up painting and I was done.
| CONCLUSIONS |
Once again, a fine prototype model for my shelves. Not an easy build, but really, not one that was very difficult either. It is an excellent basis for the super detailer, and as long as you pay attention to what you are doing, it will make into a very nice model.
May 2005
#1365 in a series
Copyright ModelingMadness.com. All rights reserved.
If you would like your product reviewed fairly and fairly quickly, please contact the editor or see other details in the