Sword 1/72 FJ-3 Fury
| KIT #: | SW 72108 |
| PRICE: | $18.00 plus shipping |
| DECALS: | Three options |
| REVIEWER: | Scott Van Aken |
| NOTES: | Short run kit with resin parts. 2017 tooling. |
| HISTORY |
The North American FJ-2 and FJ-3 Fury were a series of swept-wing carrier-capable fighters for the United States Navy and Marine Corps. The FJ-2 resulted from an effort to navalize the United States Air Force's F-86 Sabre. These aircraft featured folding wings, and a longer nose landing strut designed to increase angle of attack upon launch and to accommodate a longer oleo to absorb the shock of hard landings on an aircraft carrier deck.
 Although sharing a U.S. Navy designation with its distant predecessor, the
straight-winged North American FJ-1 Fury, the FJ-2/-3 were completely different
aircraft. (The later FJ-4 Fury was, again, a complete structural redesign of the
FJ-3). The FJ-2 was one of the aircraft used to evaluate the first steam
catapult on a US Navy aircraft-carrier.
Although sharing a U.S. Navy designation with its distant predecessor, the
straight-winged North American FJ-1 Fury, the FJ-2/-3 were completely different
aircraft. (The later FJ-4 Fury was, again, a complete structural redesign of the
FJ-3). The FJ-2 was one of the aircraft used to evaluate the first steam
catapult on a US Navy aircraft-carrier.
Even while development of the FJ-2 was ongoing, the development was planned of a version powered by the Wright J65, a license-built version of the British Armstrong Siddeley Sapphire turbojet. The Sapphire promised to deliver 28% more thrust than the J47, for little gain in weight. The new version was designated FJ-3, and an order for 389 aircraft was placed in March 1952.
To test the new engine a single FJ-2, BuNo 131931, was modified, but the
first true production FJ-3 flew on 3 July 1953. The only externally visible
change required by the new engine was a deeper intake to accommodate the larger
mass flow. Early FJ-3s had the same wing as the FJ-2, but from 1955 onwards the
FJ-3 was built with a so-called "6-3" wing, with a leading edge that was
extended 6 inches at the root and 3 inches at the tip. This modification, first
introduced on the F-86F, enhanced maneuverability at the price of a small
increase in landing speed because the leading edge slats were deleted. The
version introduced on the FJ-3 was different from that fitted to the F-86F, as
camber was applied to the underside of the leading edge to improve low-speed
handling. On the FJ-3, the new wing leading edges also held extra fuel. From the
345th aircraft onwards, the
 wings were provided with four stations for external
loads, up to 1000 lb on the inboard stations and 500 lb on the outboard
stations.
wings were provided with four stations for external
loads, up to 1000 lb on the inboard stations and 500 lb on the outboard
stations.
Deliveries began in September 1954, and the FJ-3 joined the fleet in May 1955. An FJ-3 was the first fighter to land aboard the new supercarrier USS Forrestal in 1956. Problems were encountered with the J65 engine, including failures of its lubrication system under the acceleration of launch or during manoeuvres, and failures of the turbine blades. Nevertheless, the Navy was more satisfied with the FJ-3 than it had been with the FJ-2, and in March 1954 it ordered an additional 149 aircraft. Because of its more powerful engine, the FJ-3 was superior to most models of the F-86, except the F-86H. A total of 538 FJ-3s were built. Of these 194 were modified to FJ-3Ms with the ability to carry AIM-9 Sidewinder air-to-air missiles. Some FJ-3s were later modified to control Regulus missiles (KDU-1), and F9F-6K Cougar target drones. In 1956 the Navy retro-fitted all its FJ-3s with probe-and-drogue air refueling equipment, a long probe being fitted under the left wing.
| THE KIT |
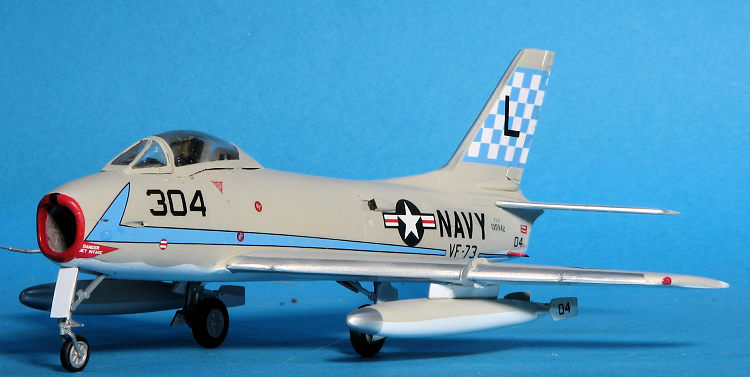
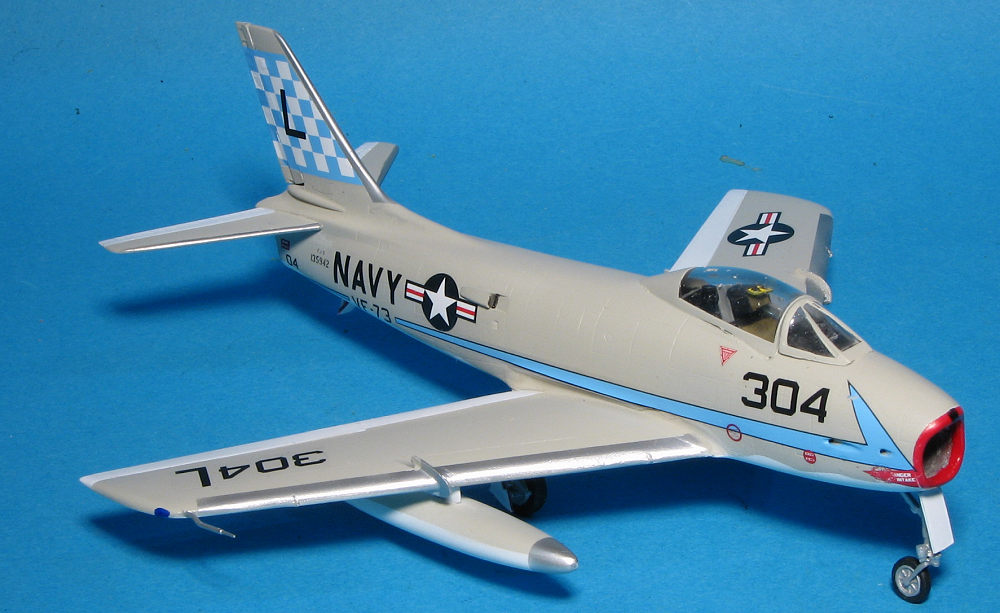
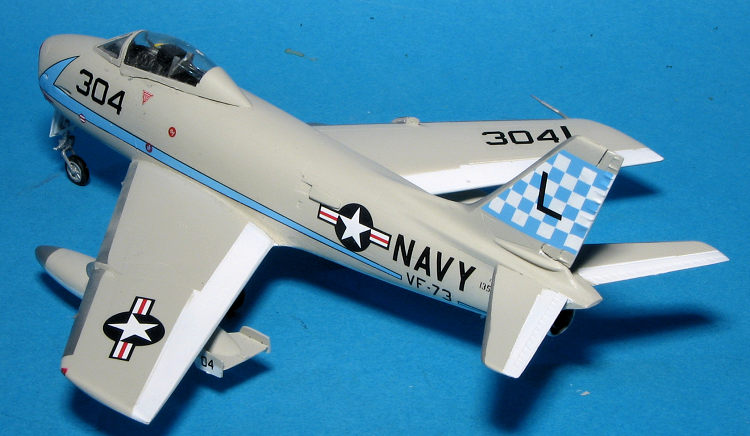
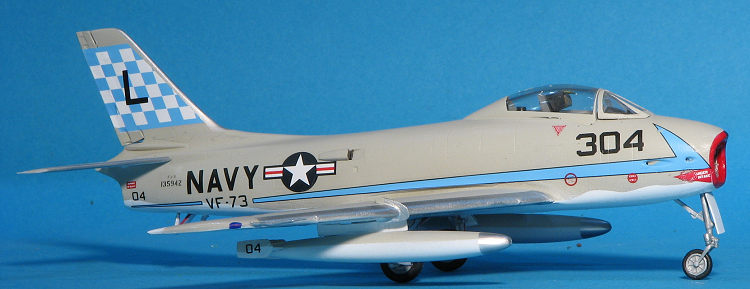
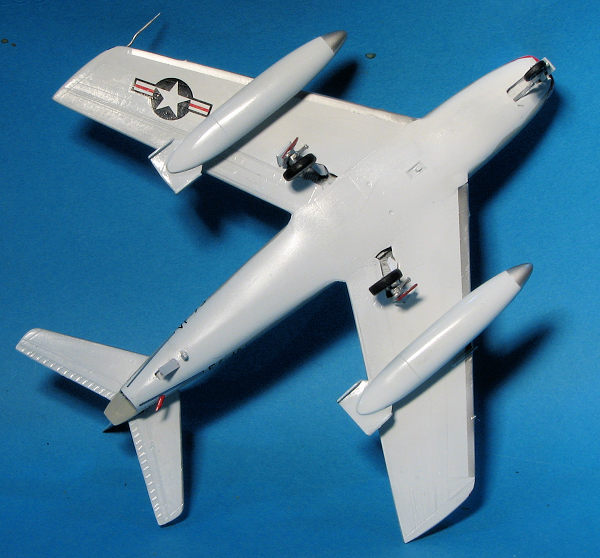
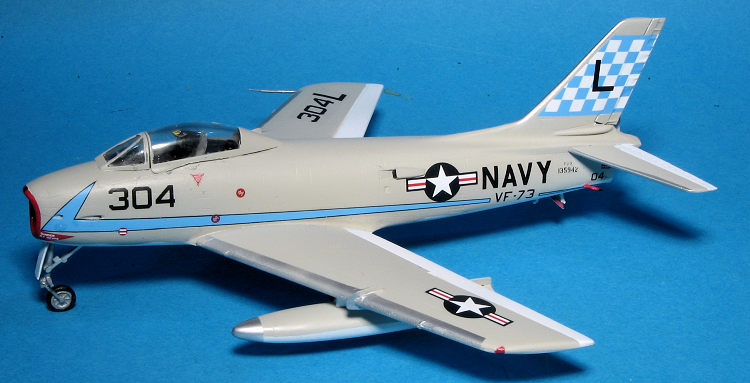
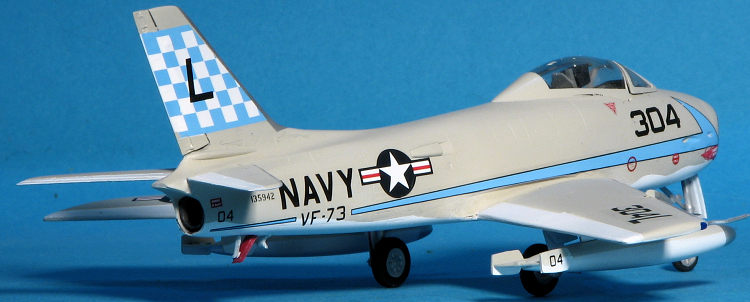
As in the earlier preview, the instructions are well done with generic color information and color views of the painted items during the build. This time, only the edges of the gear doors are painted red. I use a Sharpie for these. All planes are light gull grey over white. Unlike the FJ-2, all the markings are provided as decals except the red nose warning areas. The three options are from VF-21 aboard the USS Forestall in 1956, VF-191 aboard the USS Yorktown in 1957 and VMF-333 in 1957. All options have unpainted metal leading edges to the flight surfaces which Sword thinks should be middle grey, but these are actually coated aluminum.
| CONSTRUCTION |
 To be frank, I like the Fury, but I'm not all that jazzed about Sword kits in
general. I've found them to be somewhat of a challenge and expected this one to
be pretty much the same. I was not disappointed. All the mating surfaces need to
be properly smoothed out and everything needs to be test fit, often multiple
times.
To be frank, I like the Fury, but I'm not all that jazzed about Sword kits in
general. I've found them to be somewhat of a challenge and expected this one to
be pretty much the same. I was not disappointed. All the mating surfaces need to
be properly smoothed out and everything needs to be test fit, often multiple
times.
I started conventionally by building up the cockpit and assembling the drop tanks and the wings. I found that once I got the cockpit together, getting it and the shelf behind it to fit snugly were an issue. The minimal cockpit alignment piece (which is a raised area at the back of the cockpit) really isn't all that good. Especially when one considers that the intake fits below the cockpit and needs to be so fit as to not have a large seam where it joins the front of the fuselage. I also found that the shelf is too small for the opening and that the small section above the exhaust was not one that wanted to fit well. However, sufficient use of your favorite filler (in my case super glue), files and sandpaper will eventually get things to a level that is acceptable. Note that before I glued the fuselage halves together, I crammed as much weight as I could into the space forward of the cockpit as I could. This was not enough and I added a section behind the cockpit which, unfortunately, broke free during the build process.
The wings have a two piece gear well wall that fits on either side of the well opening. I completely spaced one of them until the upper wing was too well attached to remove, though did get the other side in place. That one took some sanding to get to where the upper wing fit properly. You don't really notice the lack of a well wall in the other side unless you really look. With the wing assembled, I proceeded to install it. One has to sand down the area where the wing fits in the front and back or it will produce a considerable step. I also found the fuselage a bit too wide. Perhaps I did not sand the mating surfaces enough and that accounts for the rear shelf being too narrow.
With the wings in place, I drilled out the little dimples for the attachment of the tailplanes and had to do a bit of carving to get the rudder to fit. I chose the reinforced versions as I intended to do the VF-191 option. With all those bits installed, I put tape over the cockpit section and gave the airframe a coat of primer to be sure I didn't miss anything.
 Moving on, the drop tanks were finished up. Fitting the fins is a bit on the
fussy side, but slow work will pay off. I then attached the pylons after
drilling out the mounting holes. Returning to the airframe, I tried to put on
the wing fences. These broke into pieces. The issue is that the opening is
narrower than the leading edge of the wing. On the next Fury, I'm simply going
to cut a notch in the wing and use plastic card to reproduce these. I pieced
together the fences and applied super glue to help fill the broken areas.
Moving on, the drop tanks were finished up. Fitting the fins is a bit on the
fussy side, but slow work will pay off. I then attached the pylons after
drilling out the mounting holes. Returning to the airframe, I tried to put on
the wing fences. These broke into pieces. The issue is that the opening is
narrower than the leading edge of the wing. On the next Fury, I'm simply going
to cut a notch in the wing and use plastic card to reproduce these. I pieced
together the fences and applied super glue to help fill the broken areas.
Next, I worked on the cockpit area. This proved to take some effort as the seat was too tall and so I ground away as much of the bottom of it as I could. Even then, I had to push down on the seat to get it to fit enough to have the canopy fit. I masked and attached the canopy while clamping it in place. The windscreen also did not fit too well at all. I had to grind down on the area under it to get it in place. At that, it still does not fit well.
I then build up the landing gear. These items are overly complex and the nose gear in particular is made up of many tiny parts. While doing that, I painted the airframe.
| COLORS & MARKINGS |
 Once the airframe was painted, I installed the landing gear. These have no
positive contact areas and I had to resort to super glue to hold them in
place. I then started with the decals. I usually start with the insignia and
work over to the unique markings. The Caracal decals worked superbly.
I did use a few of Sword's markings as their stencils are more well defined.
They are also incredibly thin and I ruined several simply trying to apply
them.
Once the airframe was painted, I installed the landing gear. These have no
positive contact areas and I had to resort to super glue to hold them in
place. I then started with the decals. I usually start with the insignia and
work over to the unique markings. The Caracal decals worked superbly.
I did use a few of Sword's markings as their stencils are more well defined.
They are also incredibly thin and I ruined several simply trying to apply
them. | CONCLUSIONS |
| REFERENCES |
https://en.wikipedia.org/wiki/North_American_FJ-2/-3_Fury
8 March 2019
Copyright ModelingMadness.com. All rights reserved.
If you would like your product reviewed fairly and fairly quickly, please contact the editor or see other details in the Note to Contributors.
Back to the Main Page Back to the Review Index Page Back to the Previews Index Page