Kitty Hawk 1/48 F9F-8T Cougar
| KIT #: | KH80129 |
| PRICE: | $45.95 SRP |
| DECALS: | Four options |
| REVIEWER: | Scott Van Aken |
| NOTES: | New tool kit |
| HISTORY |
The Grumman F9F/F-9 Cougar was an aircraft carrier-based fighter aircraft for the United States Navy. Based on Grumman's earlier F9F Panther, the Cougar replaced the Panther's straight wing with a more modern swept wing. The Navy considered the Cougar an updated version of the Panther, despite having a different official name, and thus Cougars started off from F9F-6 upward.
F9F-8s were withdrawn from front-line service in 1958-59, replaced by F11F Tigers and F8U Crusaders. The Naval Reserves used them until the mid-1960s, but none of the single-seat versions were used in the Vietnam War.
 The only version of the Cougar to see combat was the two seat TF-9J trainer (until 1962, F9F-8T). Detachments of four Cougars served with US Marines Headquarters and Maintenance Squadrons H&MS-11 at Da Nang and H&MS-13 at Chu Lai, where they were used for fast-Forward Air Control and the airborne command role, directing airstrikes against enemy positions in South Vietnam during 1966 and 1968. The TF-9J had a long service with the U.S. Navy, but the proposed Cougar modification (reengined with a J52 engine) was rejected, and the Navy selected the TA-4F Skyhawk. The last Cougar was phased out when VT-4 re-equipped on February 1974. A F9F-8T, BuNo 147276, is displayed at the National Museum of Naval Aviation, Pensacola. There are several others extant in museums as well including the one at Pima, Arizona.
The only foreign air arm to use the F9F Cougar was the Argentine Naval Aviation, who used the F9F Panther as well. Two F9F-8T trainers were acquired in 1962, and served until 1971. The Cougar was the first jet to break the sound barrier in Argentina. Serial 3-A-151 is on display at the Naval Aviation Museum (MUAN) at Bahía Blanca.
| THE KIT |
Many of us have been awaiting this kit with much anticipation. The Cougar has not been treated well in 1/48 with only the old off-scale Revell kit being offered as a mainstream kit with the very short run FM kit 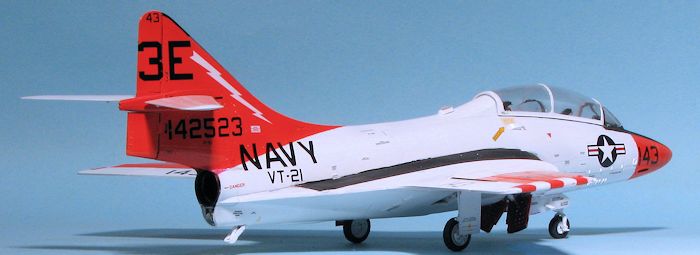 and the pricey resin Collectaire version being done in the past. Now Kitty Hawk starts with the two seater to be followed by the recce version and I'm sure a standard fighting won't be far behind.
The kit is quite typical of Kitty Hawk moldings, which is to say that the detail is excellent. A photo etch fret is included as per usual and is basically interior bits like seat harnesses, as well as the wing fences and the upper wing speed brakes. Personally I could do without the wing brakes as I always seem to bend those during installation!
The kit has a very nicely done cockpit with two different seats provided. No information is given on which markings option gets which seat, but I'll bet that a 'net search will be helpful. Control sticks and rudder pedals are separate and you have photo etch for the instrument panels and consoles. In addition, you are provided with decals to go over these. I approve. Sidewalls are also part of the package.
One has to build up the nose gear well and the main gear well out of separate flat pieces, but they interlock well. The nose well assembly also includes the lower fuselage speedbrake well. It is quite normal to see these items bled down when the plane is on the ground. The nose well assembly fits under the cockpit assembly when the forward fuselage halves are glued together. A ball bearing was in my kit and I assume that is the nose weight as it is not shown in the instructions.
 The rest of the fuselage is split horizontally and provides the opportunity to display the wings folded if one so chooses. There are nicely done spar sections to fit into the ends of both the main fuselage assembly and the outer wings. There are separate flaps for the wings and though not shown deployed, they were frequently seen that way when the plane was on the ground and the wings not folded. The kit is designed to be built with the wings folded and to do otherwise will require a bit of cutting. Something I wish KH wouldn't do is to already have the lower wing holes for the pylons opened. I'd much rather make that choice myself and not have to fill in holes that I won't be using.
In order to make most of the pieces usable for both two and single seat planes, the assembly of the rear fuselage requires the use of a lot of inserts. This will make things rather fiddly for some so care will need to be followed during the building of this section. The instructions show a fully built forward fuselage section and a fully built aft fuselage section (landing gear and doors and all) being assembled near the end of the build. Most of us will undoubtedly wait until after painting to install the gear and gear doors. The canopy and windscreen are separate and the instructions only show the canopy closed. There is a mold seam on the canopy that will need to be sanded away. This was necessary to capture the proper shape.
For things under wings we have two fuel tanks, and then either Sidewinders or a variety of rocket pods. For the non-FAC options, you'll want to check your references as the trainer versions often did not carry all the pylons. Some also had the gun ports faired over.
 Instructions are nicely done and provide Gunze and FS 595 paint references. Markings and painting options are full color. Markings are provided for four aircraft. One is the box art plane with H&MS-13 based in Vietnam which is shown as being in light gull grey (FS 36440) over USAF light grey (FS 36622). I have my doubts about the underside color as white would have been the usual shade, but one never knows. Another is Blue Angel #7, while a third is with VT-10 in white and international orange. In overall sea blue is an Argentine navy version. All of the latter three planes are based on markings on museum aircraft. You can find images of all these on the Internet. The decals are very nicely done and one will need to paint any walkways onto the aircraft. The decals are very nicely done and any of the options will result in a colorful model.
| CONSTRUCTION |
There has been much said about the difficulty of building this particular kit, so I waited a bit after getting it before giving it a go. I had received a list of steps that were 'guaranteed' to allow for a successful build, so began with that listing. I should also mention that this plastic has an odd smell when sanding it. I have a suspicion that it might be ABS plastic rather than polystyrene. This means that some glues may well not work very well and would be a reason some modelers report difficulty with parts not staying glued together. Tamiya water thin cement is what I use and it works fine with ABS.
The first step, it said, was to cut off all the tabs on the upper fuselage pieces after gluing the tail halves together and building up the lower fuselage (minus the gear wells). I dutifully built up the lower fuselage, installing the wheel wells and the tailpipe, and glued the tail halves together. The lower fuselage is a rather difficult built on its own and takes some care with a bit of super glue reinforcing on the inside when it comes to the forward section around the intakes. I glued on the upper wing root and the small wing bulkhead piece at the same time. Those wanting to build the kit with the wings extended will want to sand off the small tab on the outer side of the upper wing root piece. Others may be tempted to leave 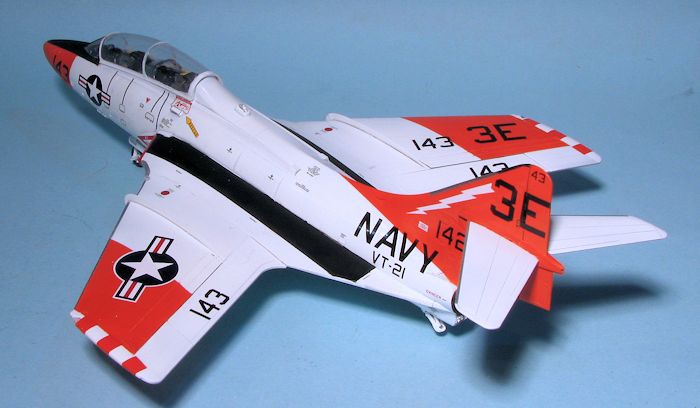 off the small bulkhead as well in order to install sheet plastic tabs for the outer wing sections, but this part is crucial to the stiffness of the upper wing root piece.
Now I'm a curious sort and wondered why cutting off the alignment tabs for the tail and upper fuselage section would be a good thing. I inserted one side of the tail tabs and noticed that if I cut the tabs off, the lower fuselage would be too wide as the tabs help squeeze together the fuselage on the upper portion. This allows it to be the proper width forward so that when the forward fuselage is installed, it will properly mate up. Cutting the tabs seemed to me to be more of a problem than a solution so I didn't. Instead, I installed the tail hook piece and then glued on the tail. It was not the best fit, but by having the open fuselage, I was able to snug things up properly. Some of the more reticent join areas required a tad but of super glue.
While all that was drying, I assembled the outer wing sections, including the large flaps. There is an underside seam on both these sections that will need attention from filler. One will also need to fill the slot on the upper inner wing if doing the wings lowered option. Back at the main fuselage, I installed the center upper section that fits just behind the cockpit. I had to trim the tabs just a little to get it to fit. I also glued on the two rudder sections.
I then turned my attention to the cockpit section while all that was drying. The instructions seem to have a fixation on FS 36622, which is an underside color for USAF Vietnam era planes. Ignore all references to it as Navy planes did not use it. This means that FS 36321, dark gull grey is what you need to use for the cockpit and not this lighter grey as directed in the instructions. From what I've seen the seats have black 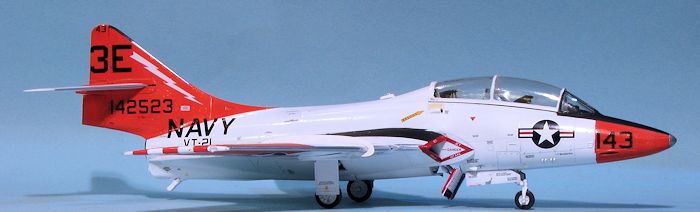 frames. I painted the seat cushions with a brown-violet color. The rear cockpit bulkheads were installed for the pilot and student/EWO, followed by the control sticks. These have the proper left cant to the grips. I wasn't sure if I wanted to use the p.e. consoles or the decals so installed the p.e. versions. I found that the rear ones had to be trimmed a bit or the instrument panel piece wouldn't fit. Interestingly, after painting the brass and installing the decals, I did not have issues in the back with the decals being too long.
I then installed the rudder pedals, followed by the aft instrument panel and anti-glare panel. There are small supports that fit in the back of the instrument panels. I ran into issues with this and several other small parts in that the sprue gates are quite large and often numerous for small parts. Removing some of these parts stresses the parts so much that they break. Other companies seem to have no problem producing sprues without huge gates. Doing this would be a major step forward.
 The kit provides side walls and those fit quite well. I then attached the rest of the cockpit bits save for the seats, which will be installed once the airframe is complete. I then glued the interior and the nose gear well into place on one side. Note that the nose gear well does not fit flush on the sides or the front and I'm not sure why. The fuselage halves were then glued together and left to dry. Once dry, I test fit it to the rear fuselage section. There is a rather large step/gap on the underside that concerned me at the
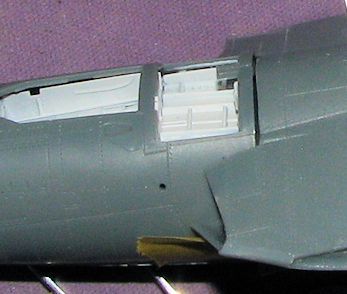 time, but proved to be a non-issue later in the build.
Back at the nose section, I installed the splitter plates on the nose section. These needed the holes in the fuselage enlarged and I ended up cutting off the lower rear pin so that they would fit flat against the fuselage. Then the nose was attached to the rear fuselage. This took a bit of planning. What I did was first glue the upper sections in place. For this I used both Tamiya glue as well as super glue and accelerator. I had to use some pressure to keep the pieces properly aligned while the super glue dried. This was needed even more on the underside to squeeze the rear fuselage a bit so that the parts would not have the step shown in the above image. If not using super glue, then aligning all this will be more difficult. I used Mr. Surfacer 1000 to take care of any gaps still left over.
The next step was to add the flying surfaces. The tail planes are a loose fit so be prepared to fiddle with them a bit. I then attached the wings. As mentioned, these are a butt join so alignment is critical. I initially tacked them in place with standard cement, then when I thought I had a good join, I used super glue to firmly fix them. This was followed by some filler and sanding. While washing off the dust from this, I managed to drop the model on the kitchen floor and the nose promptly broke free along with one wing. After much muttering and grumbling, these bits were reattached the the seams attended to once again. I love it when I screw things up!
 Since I was going to build a trainer scheme, I attached the main and nose gear legs along with their struts. The nose gear does seem to be a bit short. There are several scoops to add, most of which are larger than the depression into which they are to fit. Note that the #A9 part is marked 09 on the sprue. There is also an issue with the upper and lower collision lights. Part 9 is shown as fitting on the top with a hole already drilled to accept it. Problem is that this piece is a bit too small and has no pin on the bottom. On the bottom is shown a part that looks like part 10 with a hole already drilled for it, however, there is no hole. I think KH got these two parts backwards.
I then sanded away the seam on the main canopy (and it is a rather large one), removed it and the windscreen and masked them both. The various bits that fit atop the two instrument panels were installed.The clear bits were then attached and it was time for the paint.
| COLORS & MARKINGS |
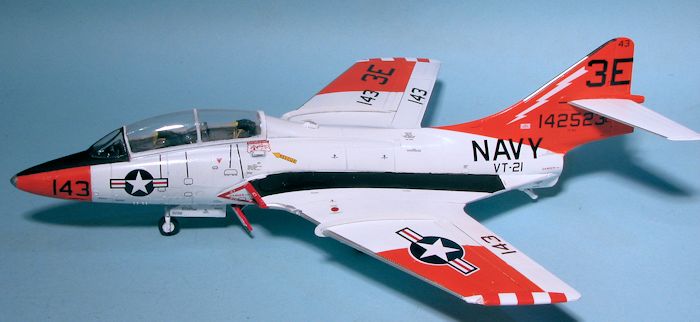
I painted the kit white overall, taking several coats to get good coverage. I used Tamiya gloss white in both the rattle can and X-1 bottles. Once properly dry, I masked most of the airframe in preparation for the international orange. In hindsight, I should have left off the stabs as it would have been one less thing to mask. Testors Model Master paint was used for this. I also masked the nose anti glare panels and the wing walk areas and painted those. Lastly, I painted the intake lips red. Now the kit sat for about seven weeks waiting on aftermarket decals.
Well, almost sat. I decided to only use one set of pylons as trainers apparently used only a few or none. I found no images of trainer TF-9s using the outer pylons. I ended up filling these holes with super glue 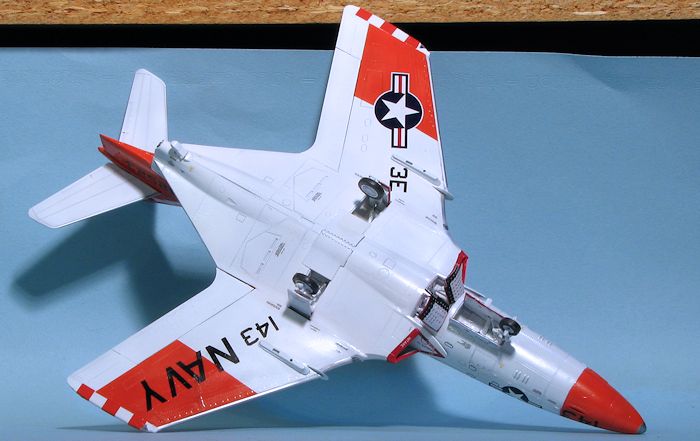 and only attaching the central pylons. The meant some additional sanding and repainting, but it was a pretty easy task.
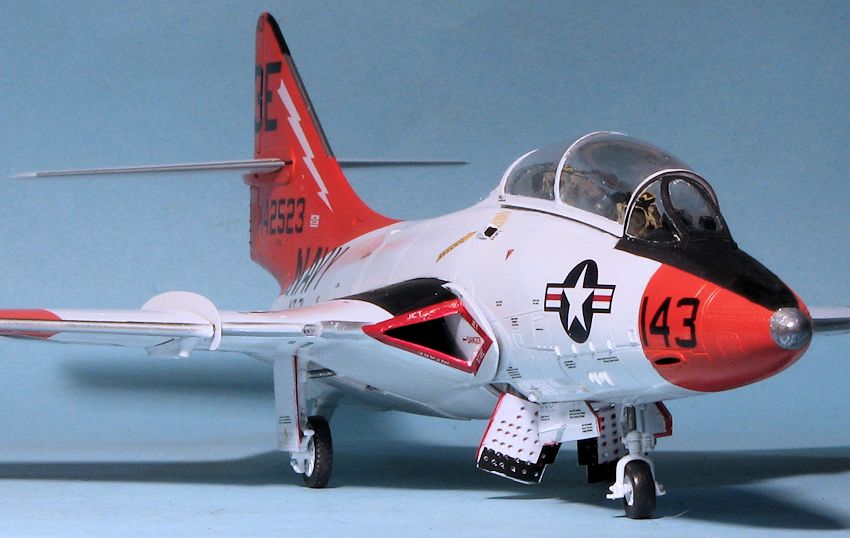
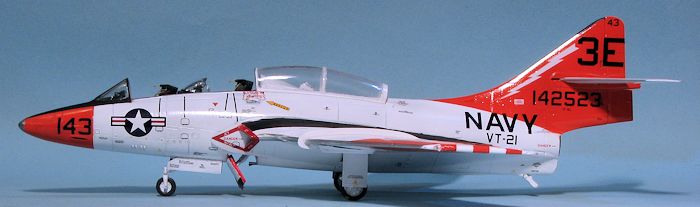
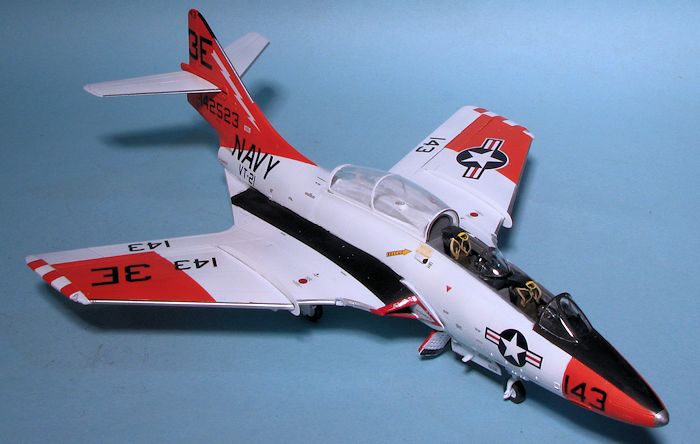
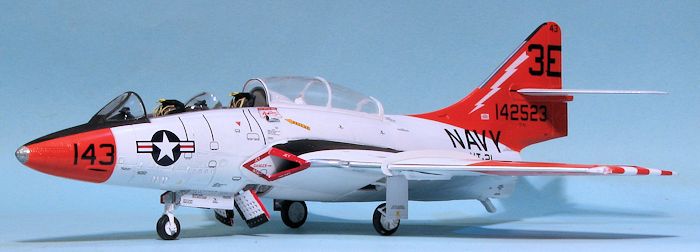
Finally the decals arrived from Furball Aero Design. I chose a set of markings from sheet FDS 48-002 that had a pretty standard line bird from VT-21. Unlike the kit decals, the Furball sheet included the red intake lip decal so that was a step I didn't need to do. This plane also had red/white wing tips so I had to mask the wing tips and repaint them white. I also had to deal with the nose as this option did not have the refuelling probe. I looked to see if the kit had a standard nose cap, but did not see one so inserted a piece of plastic rod the right diameter and after some sanding and more filling, had a fair representation.
Then I started applying the decals. These caused no issues at all. I was afraid that the insignia decals crossing areas that were both the white and insignia orange would not be opaque enough and I was right. Fortunately, I had a set of Fantasy Printshop's recent release of white insignia backing decals. Sheet FP 311 contained the size I needed for the wing decals. While not totally blocking the international orange, they made a huge difference. Perhaps another layer of white decal would have helped, but it would have also been pretty thick. There are a ton of stencil decals on this one and it took what seemed like forever to get them attached.
| FINAL CONSTRUCTION |
With all the markings finally on, I did the usual touchup painting and then attached the final bits. This included the gear doors and the wheels. The main wheels needed to have the openings enlarged to fit on the axles and I found the that nose gear fork was too shallow for the nose wheel to fit on all the way. The speed brakes in the front were a bit of a pain to get installed, but eventually fit as they should. I also installed the tail hook after painting the exhaust opening using Game Color's Tinny Tin.
The last bits included some clear pieces for landing lights and formation lights. I found that the landing lights fit much better if installed in the opposite wings. The tail hook piece has to be cut if displayed retracted. I then clear coated it, removed the masking from the canopy and windscreen, popped the canopy off and glued in the blast shield. After several months, much of it waiting for decals, the model was finished.
| CONCLUSIONS |
There have been folks who have commented on how difficult this kit is to build. To be honest, it is not a Tamiya but then again it is (obviously) not unbuildable. The key to success with this one is to test fit parts and make adjustments where needed. If you can build a short run kit, then you can build this one. It is not one that can simply be slapped together and so does take some skills on the part of the modeler. However, the end result is a very nice model of an important Navair type.
| REFERENCES |
http://en.wikipedia.org/wiki/Grumman_F-9_Cougar November 2014
Thanks to Glen and Kitty Hawk Models for the review kit. Thanks toFurball Aero Design for the decals and Scale Aircraft Conversions for the metal gear. This one should be at your local retailer. If not, have them order one for you. If you would like your product reviewed fairly and fairly quickly, please contact the editor or see other details in the