| KIT #: | JS-038 |
| PRICE: | 300 yen (about $1.00) when new |
| DECALS: | One option |
| REVIEWER: | Scott Van Aken |
| NOTES: |
| HISTORY |
 The Lockheed T-33 Shooting Star is an American-built jet
trainer aircraft. It was produced by Lockheed and made its first flight in 1948,
piloted by Tony LeVier. The T-33 was developed from the Lockheed P-80/F-80
starting as TP-80C/TF-80C in development, then designated T-33A. It was used by
the U.S. Navy initially as TO-2 then TV-2, and after 1962, T-33B. While there
are no more military T-33s still in active service (unless it is with someplace
like Bolivia), the type is very popular
with the jet warbird crowd. Many T-33s spent over 40 years on active service
before being retired.
The Lockheed T-33 Shooting Star is an American-built jet
trainer aircraft. It was produced by Lockheed and made its first flight in 1948,
piloted by Tony LeVier. The T-33 was developed from the Lockheed P-80/F-80
starting as TP-80C/TF-80C in development, then designated T-33A. It was used by
the U.S. Navy initially as TO-2 then TV-2, and after 1962, T-33B. While there
are no more military T-33s still in active service (unless it is with someplace
like Bolivia), the type is very popular
with the jet warbird crowd. Many T-33s spent over 40 years on active service
before being retired.
| THE KIT |
Hasegawa's offering of the T-33 was in their initial batch of model airplane kits. Hasegawa tended to concentrate most of their efforts on planes that were either flown by the JASDF, or were based in Japan, something that still seems to be part of their program. As with most Japanese model companies, the majority of their sales are in Japan so it is only logical that they play to the home market. The T-33 was one of those types that not only allowed Japan to enter the jet age when it was allowed to have an Air Force again in 1955, but also lasted well into the 1980s and even the 1990s before being retired.
Typical of their kits at this time, the
majority of detailing is the raised panel line variety. The main gear wells
are somewhat open as is the nose gear, providing basically a place to attach
the st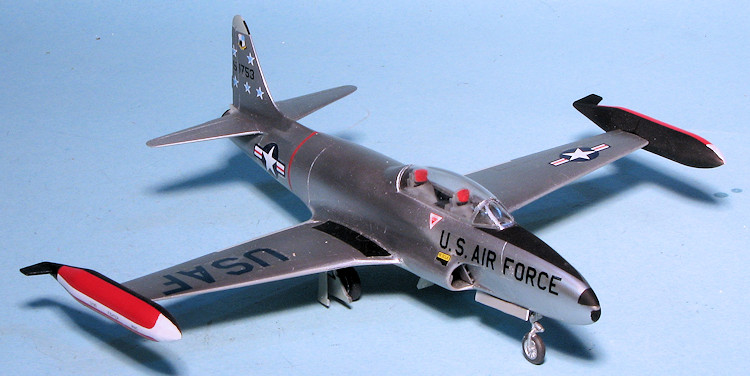 rut. For a cockpit there is a tub, a pair of seats and a rear
instrument panel. Two pilots are included to hide the lack of other detail.
rut. For a cockpit there is a tub, a pair of seats and a rear
instrument panel. Two pilots are included to hide the lack of other detail.
The cockpit is trapped between the fuselage halves and a tailpipe section is inserted near the end of the build. Intakes have separate splitters and are quite shallow. These are also the biggest fit issue areas on the kit. A separate nose piece is provided and while the instructions do not show it, one does need nose weight. Tip tanks are separate two piece assemblies and the tailplanes are a single piece on eich side. There is a rather thick one-piece canopy. The frame lines are very hard to discern, making masking a bit tricky.
The landing gear are fairly well done with the nose gear having an integral wheel. Both inner and outer gear doors as well as separate speed brakes are provided. There are no actuating rods for any of these items. The gear itself is a bit fragile when one is done as I have broken many over the years.
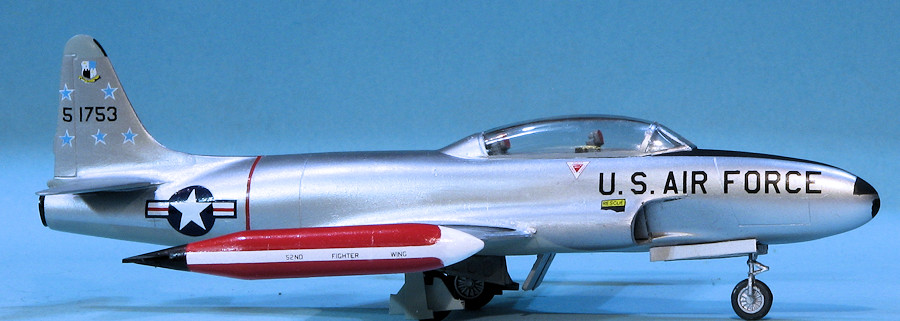
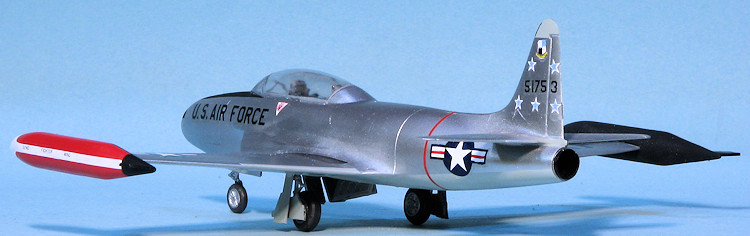
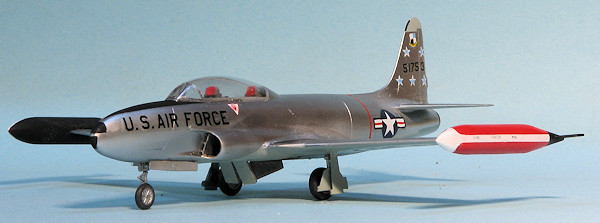
Instructions are nicely drawn and provide written steps for each diagram. Generic color information is given in the overall markings guide. Though a USAF plane is shown in the instructions, my kit had only the JASDF decals. These are generally unusable anyway due to age, but there are a lot of aftermarket sheets out there. The plane is shown in an overall unpainted metal finish with black anti-glare areas on the nose and the inside of the tanks.
| CONSTRUCTION |
This was a fire sale kit...literally. The kit came from a collection that was involved in a fire so in this case, there was no box. The sprues were quite short on the end that saw the heat, providing a trapezoid shape rather than rectangular one. I checked over the parts on this and another similar kit to see if any of the bits were damaged. There was on the other kit, but this one seemed to be in good shape aside from the runners so I plunked down my $2.00 and took it home.
Construction starts on this one with the assembly of the wings and the tip
tanks. I then cleaned up a lot of flash from the seats, painting them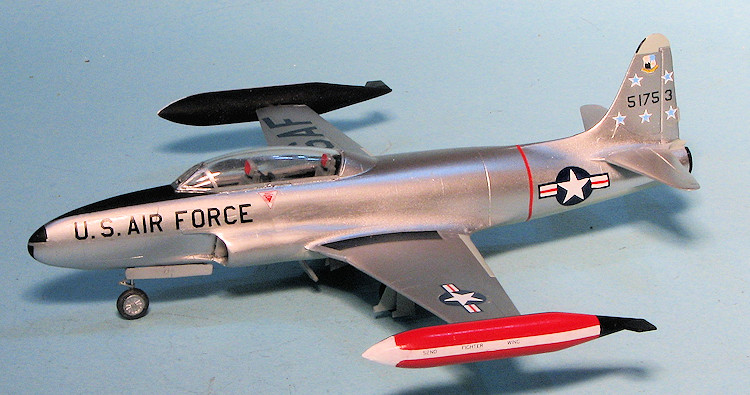 and
the interior in dark gull grey. The seats got red head rests. I did nothing
about the gigantic sink hole in one of the seats and glued those into the
interior. This was followed by the rear instrument panel. There is no detail
on the panel nor is there a decal for it. This was painted black.
and
the interior in dark gull grey. The seats got red head rests. I did nothing
about the gigantic sink hole in one of the seats and glued those into the
interior. This was followed by the rear instrument panel. There is no detail
on the panel nor is there a decal for it. This was painted black.
I then installed the cockpit into the right fuselage half and after adding some nose weight just to be safe, glued the halves together, again, after removing some flash. Then the intakes and splitter plates were installed. The fit of pretty much all the parts can best be described as 'eh'. In other words, treating the kit like a short run kit is the best approach. While good by 1971 standards, most of the detail has faded and the molds have definitely become worn, so all parts need to be test fit and all joins will need filler and then sanding.
When it came to attaching the wing, I discovered that the fuselage was too wide in this area. Thankfully, I had a set of Blap Productions super sanding blocks that I reviewed a short time back. This set made pretty quick work out of reducing the wing root width. I've used these blocks on a number of other projects and have found the very firm, flat, and rather broad surface to work just great for a number of situations. Eventually, I got the wing on and discovered that I had enough nose weight to keep it from tail sitting so attached the nose cone.
Then I spent some quality time smoothing things out and that included a sink area near the left horizontal stab. The stabs were attached and then the nose. The canopy was next and it really doesn't fit all that great, but it isn't terrible. Much of the fit issue is in the front and that is due to how thick the clear plastic is. I filled the gaps with clear paint. The landing gear struts were installed and the canopy masked (not an easy task as the frame lines are quite indistinct).
| COLORS &S MARKINGS |
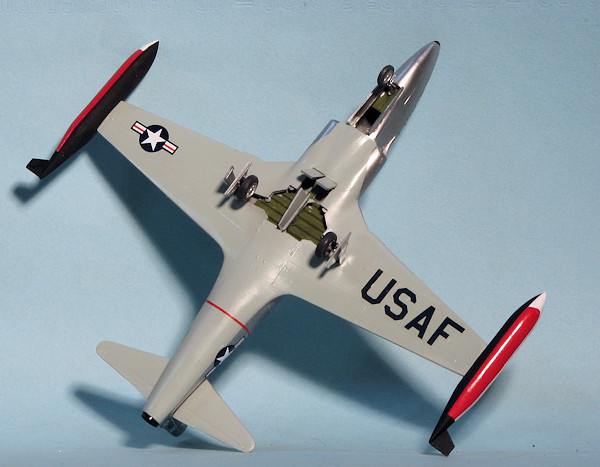 impossible, but I did find one that
showed at least some of this grey extending as far as the back of the nose
gear well. Since little could be seen on the underside of the intakes, I
made a big assumption that this only extended a short width on the
underside.
impossible, but I did find one that
showed at least some of this grey extending as far as the back of the nose
gear well. Since little could be seen on the underside of the intakes, I
made a big assumption that this only extended a short width on the
underside. | THE REST OF THE BUILD |
 I glued on the main wheels and started attaching gear doors. For the wheel
wells, I went with a green shade as that is what the reference aircraft
seems to have in the wells. The gear doors were left in bare
metal as that seemed to be more of the norm. Actually, the gear wells could
also be in silver/unpainted metal, so you can not really be
wrong. I believe most of the Canadair built planes had them painted silver. Speedbrakes were then glued on. Again, these could be a variety of colors on
the inside. The ones I have seen back when the T-33 was still on active duty
were unpainted on the inside.
I glued on the main wheels and started attaching gear doors. For the wheel
wells, I went with a green shade as that is what the reference aircraft
seems to have in the wells. The gear doors were left in bare
metal as that seemed to be more of the norm. Actually, the gear wells could
also be in silver/unpainted metal, so you can not really be
wrong. I believe most of the Canadair built planes had them painted silver. Speedbrakes were then glued on. Again, these could be a variety of colors on
the inside. The ones I have seen back when the T-33 was still on active duty
were unpainted on the inside. | CONCLUSIONS |
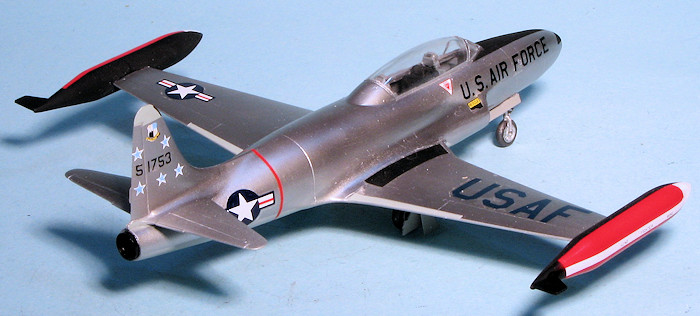 The end result
is a fairly nice shelf moldel. To be honest, the Hasegawa kit is well past its
prime and I'd suggest either the Heller or Platz kit for those wanting a better
T-33 in this scale. The Superscale decals were a real disappointment and it
seems the folks producing the sheet had not really looked at photos of the
plane. The insignia and unit badge are too small, the USAF for the wings is
missing, and the presentation of the serial on the sheet is wrong. The
instructions also fail to include the proper colors of the wing tanks and the
wing tank markings do not fit. I can understand their missing the underside grey
as it took a bit of sleuthing to get that part right. The sad truth is that
non-ANG markings options for US T-33s are sadly lacking and we really could do
with a sheet of training unit and unit hacks, but I doubt there is a demand for
it. If you have the Hasegawa kit, build it and be happy. If you do not, spend
your money elsewhere.
The end result
is a fairly nice shelf moldel. To be honest, the Hasegawa kit is well past its
prime and I'd suggest either the Heller or Platz kit for those wanting a better
T-33 in this scale. The Superscale decals were a real disappointment and it
seems the folks producing the sheet had not really looked at photos of the
plane. The insignia and unit badge are too small, the USAF for the wings is
missing, and the presentation of the serial on the sheet is wrong. The
instructions also fail to include the proper colors of the wing tanks and the
wing tank markings do not fit. I can understand their missing the underside grey
as it took a bit of sleuthing to get that part right. The sad truth is that
non-ANG markings options for US T-33s are sadly lacking and we really could do
with a sheet of training unit and unit hacks, but I doubt there is a demand for
it. If you have the Hasegawa kit, build it and be happy. If you do not, spend
your money elsewhere.
As a side note, this plane was later transferred to the Republic of China Air Force and survives as a display plane on Taiwan.
| REFERENCES |
http://en.wikipedia.org/wiki/T-33A_Shooting_Star
January 2016
Copyright ModelingMadness.com. All rights reserved. No reproduction in any form without express permission from the editor.
Thanks to me for picking this one up.
If you would like your product reviewed fairly and fairly quickly, please contact the editor or see other details in the Note to Contributors.