Tamiya 1/72 F-84G Thunderjet
| KIT #: | 60745 |
| PRICE: | $13.50 at the time |
| DECALS: | Two options |
| REVIEWER: | Scott Van Aken |
| NOTES: |
| HISTORY |
Though it was designed as an escort fighter, the F-84 was to eventually gain its fame in the mud moving area during the Korean war. Though the type did knock down a few Migs during the conflict, it was its ability to haul a respectable load and place it where it would do the most good that earned the Thunderjet its reputation.
 Replacing the F-80s (which replaced the F-51s), the first F-84s in theatre
were from a SAC escort fighter wing. In record time, the unit was able to
make the transition to dropping ordinance in place of dropping enemy
fighters. Eventually the F-84 nearly completely supplanted the older (but
not by much) F-80 Shooting Stars, and in the last year of the war, were
themselves starting to be replaced by fighter-bomber versions of the F-86F
Sabre.
Replacing the F-80s (which replaced the F-51s), the first F-84s in theatre
were from a SAC escort fighter wing. In record time, the unit was able to
make the transition to dropping ordinance in place of dropping enemy
fighters. Eventually the F-84 nearly completely supplanted the older (but
not by much) F-80 Shooting Stars, and in the last year of the war, were
themselves starting to be replaced by fighter-bomber versions of the F-86F
Sabre.
In addition to sterling work in Korea, the Thunderjet was exported and flown by a rather substantial number of foreign countries. Though many were in Europe, the Taiwanese were able to make good use of them against the communist Chinese, and some of those found their way into the Thai Air Force as well.
Back in the US, the now weary Thunderjets were pawned off on the Air National Guard for a short stint until those, too were replaced by the more capable and faster F-84F Thunderstreak or F-86 Sabres. Though there are a number in museums, sadly none have been restored to flying condition as warbirds.
| THE KIT |
As part of Tamiya's program of shrinking down 1/48 kits to 1/72, the F-84G was chosen in 1999. Part of the success in downsizing the kits has been the simplification of several parts of the kit. For instance, it may not have the droppable flaps of the larger kit or it may have fewer parts in the cockpit. Nonetheless, the kit retains all of the quality of its big brother.
 One thing that I did notice is quite different is that this kit does not have
the nose weight offered in the 1/48 variety. This means that you'll have to use
your ingenuity to find a place to fit weight as the 84 is a tail sitter. Options
are for an open or closed canopy and an open or closed gun compartment door. If
building the kit with this door closed, you don't install the guns! You also
have a pair of RATO units that were used quite often to get heavily loaded
Thunderjets into the air during Korean summers. Two bombs and two drop tanks
make up the rest of the stuff under the wings.
One thing that I did notice is quite different is that this kit does not have
the nose weight offered in the 1/48 variety. This means that you'll have to use
your ingenuity to find a place to fit weight as the 84 is a tail sitter. Options
are for an open or closed canopy and an open or closed gun compartment door. If
building the kit with this door closed, you don't install the guns! You also
have a pair of RATO units that were used quite often to get heavily loaded
Thunderjets into the air during Korean summers. Two bombs and two drop tanks
make up the rest of the stuff under the wings.
Instructions are superb, though all colors are referenced to Tamiya paints. Not a problem on this kit as no F-84Gs in US service were camouflaged. Decals are for two of the three options given in the 1/48 kit. The very flamboyant 'Four Queens' of the 58th FBS as shown on the box art or the more subdued, but still nice plane of the 508th SFW in the US in 1956. This SAC unit would probably not be carrying the RATO units nor the bombs as their mission was bomber escort.
| CONSTRUCTION |
 I started building this
kit at the same time that I began the Heller version previously reviewed. I
began in the cockpit as is the norm with kits and began assembling parts, which
included a four piece seat and attaching the rudder pedals to the instrument
panel piece. I then painted the cockpit bits using interior green for the most
part and semi-gloss black for the panels and area behind the seat. The seat
cushion and head rest were painted khaki.
I started building this
kit at the same time that I began the Heller version previously reviewed. I
began in the cockpit as is the norm with kits and began assembling parts, which
included a four piece seat and attaching the rudder pedals to the instrument
panel piece. I then painted the cockpit bits using interior green for the most
part and semi-gloss black for the panels and area behind the seat. The seat
cushion and head rest were painted khaki.
While all that was drying, I assembled the drop tanks and glued the wing halves together. I also put as much weight as I could in the intake/nose gear well halves and build up the exhaust which I'd already painted on the sprue. Then things sat for several weeks as I finished some other projects.
 Returning, I used the
decal seat harness and the one for the instrument panel. Then those items along
with the control stick were glue into the tub. The exhaust, cockpit, and the
nose well piece were glued into one fuselage side. I did not install the gun
section as I was not going to have the access hatch open and wanted to leave
room in case I needed more nose weight. The other half was installed and I dealt
with the seams. The intake piece is a single piece and is slightly larger than
the surrounding fuselage so that needed to be sanded down a bit.
Returning, I used the
decal seat harness and the one for the instrument panel. Then those items along
with the control stick were glue into the tub. The exhaust, cockpit, and the
nose well piece were glued into one fuselage side. I did not install the gun
section as I was not going to have the access hatch open and wanted to leave
room in case I needed more nose weight. The other half was installed and I dealt
with the seams. The intake piece is a single piece and is slightly larger than
the surrounding fuselage so that needed to be sanded down a bit.
I then attached the wings and the tailplanes. These fit fairly well, but the wings needed to have some pressure applied to them while the glue set to ensure there would be no gaps. I was not totally successful. I also installed the gun sight piece, followed by the upper nose section, after putting in a bit more weight. During all this, I managed to break and lose the nose pitot.
This seemed like a fairly good time to do some painting so the various wells were filled with Silly Putty as well as the cockpit. The transparencies were masked and I took everything to the paint shop.
| COLORS & MARKINGS |
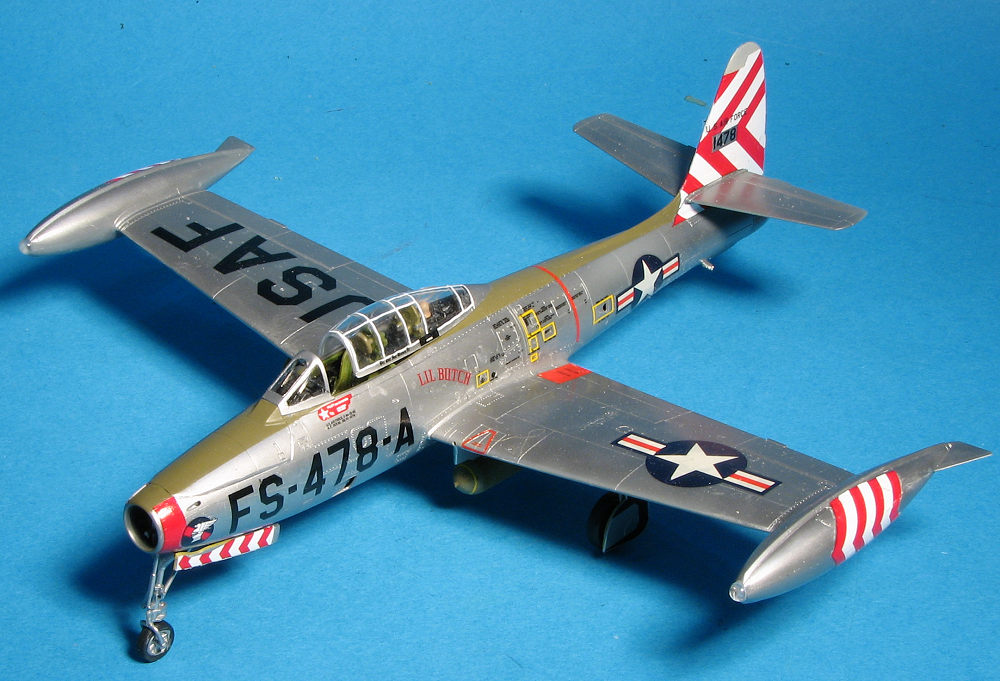
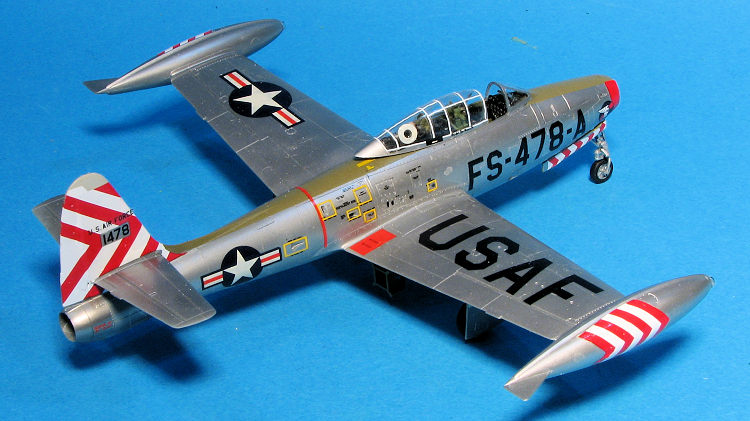
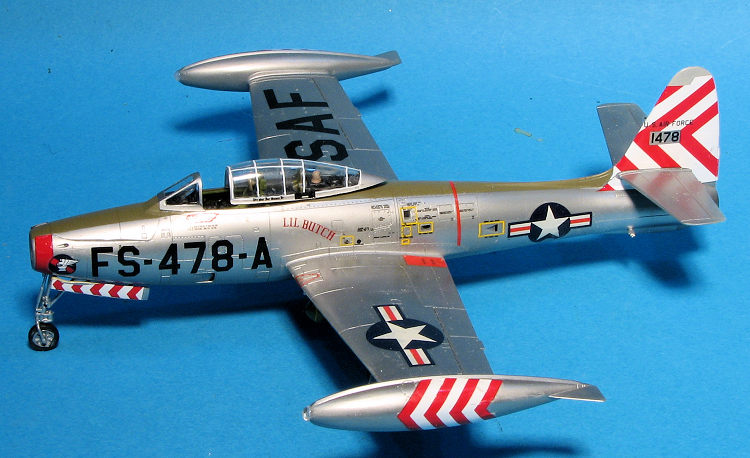
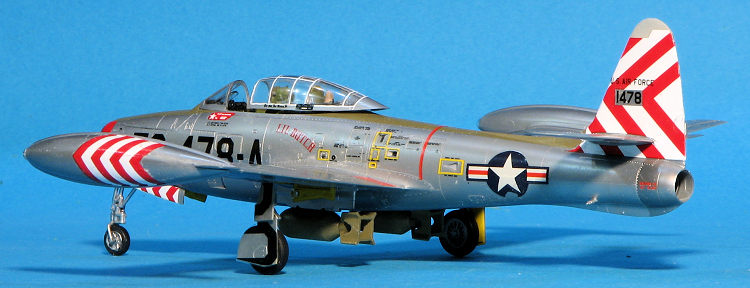
This was easy to paint. Overall Alclad II Aluminum with the fin tip in light gull grey and the area around the exhaust in dark aluminum. I then masked it and painted the upper fuselage with a lightened Tamiya olive drab. As usual, the Alclad II went on without any issue. I then installed the main landing gear and the nose landing gear in preparation for decals and was pleased to see that the included tail stand was not required.
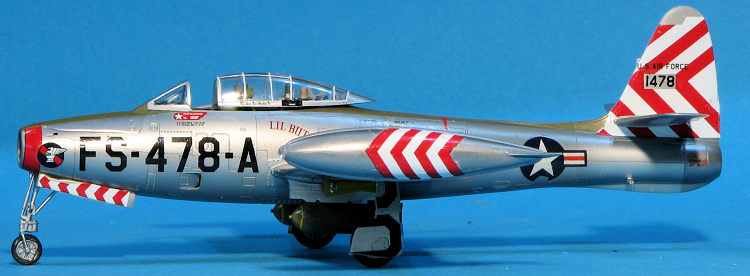
For this build, I used an
older Aeromaster sheet: 72-169 from which I'd already used a set of markings for
an Academy kit I built several years back. The sheet is designed for the Heller
kit, which shows how old it is, and while I didn't expect any fit issues, I got
a few. Specifically, the tip tanks, tail markings, and the nose gear doors. They
were a variety of too big as in the case of the fin markings, the wrong
size/shape in terms of the nos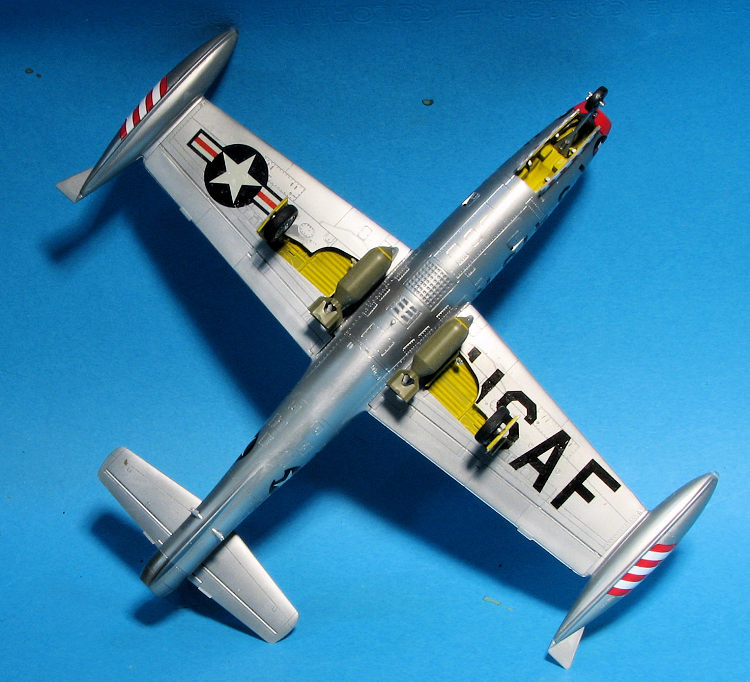 e gear markings, and a bit off shape for the tank
markings. This shows that there are some differences between the two kits.
e gear markings, and a bit off shape for the tank
markings. This shows that there are some differences between the two kits.
Eventually, I got them all on, building the rest of the kit along the way. I used the Tamiya kit decals for a number of the common markings, especially the underwing USAF as I feared there would be fit issues otherwise based on the unique markings. Also the Aeromaster sheet is lacking most of the stencils.
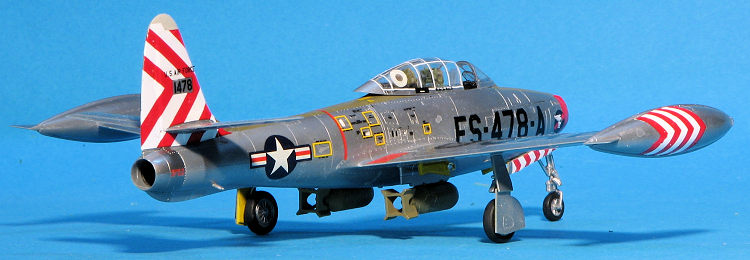
With those in place the only things left were to attach the small clear pieces in the inner gear doors and tip tanks, decide on bombs or drop tanks (bombs won out), and to deal with the canopy. You see, the F-84G had a white fiberglass brace installed inside the canopy as there had been issues with it imploding and breaking. Most kit makers engrave this into the plastic, but none of them include this as a decal. Painting is an option, but I chose to use fine white decals instead. Unfortunately, the ones I have are not totally straight, but rather squiggly. Still, they did the job and while time consuming to install, look a ton better than any painting I could have done. The masking was removed from the windscreen, the canopy pressed into place and that was it. Note that in the photos the canopy is not flush with the fuselage as it moved when I was moving around the model I'm too lazy to retake the photos.
| CONCLUSIONS |
 While the Academy Thunderjet is a nice model in its
own right, and offers rockets which this does not, it is pretty much second
place. The Tamiya kit far surpasses the Heller offering,
though it can be a bit fiddly at times. I have several of the Academy and Tamiya
kits still in the stash and will look forward to building either of them.
While the Academy Thunderjet is a nice model in its
own right, and offers rockets which this does not, it is pretty much second
place. The Tamiya kit far surpasses the Heller offering,
though it can be a bit fiddly at times. I have several of the Academy and Tamiya
kits still in the stash and will look forward to building either of them.
24 January 2019
Copyright ModelingMadness.com. All rights reserved.
If you would like your product reviewed fairly and fairly quickly, please contact the editor or see other details in the Note to Contributors.
Back to the Main Page Back to the Review Index Page Back to the Previews Index Page