M News 1/72 P-51H Mustang
| KIT #: | MN 72005 |
| PRICE: | $14.00 MSRP |
| DECALS: | One option |
| REVIEWER: | Scott Van Aken |
| NOTES: | Olde tyme short run with injected canopy |
| HISTORY |
The P-51H (NA-126) was the final production Mustang, embodying the experience gained in the development of the XP-51F and XP-51G aircraft. This aircraft, with minor differences as the NA-129, came too late to participate in World War II, but it brought the development of the Mustang to a peak as one of the fastest production piston engine fighters to see service.
 The P-51H used the new V-1650-9 engine, a version of
the Merlin that included Simmons automatic supercharger boost control with water
injection, allowing War Emergency Power as high as 2218 hp (1,500 kW).
Differences between the P-51D included lengthening the fuselage and increasing
the height of the tailfin, which greatly reduced the tendency to yaw. The canopy
resembled the P-51D style, over a somewhat raised pilot's position. Service
access to the guns and ammunition was also improved. With the new airframe
several hundred pounds lighter, the extra power and a more streamlined radiator,
the P-51H was among the fastest propeller fighters ever, able to reach 487 mph
(784 km/h or Mach 0.74) at 25,000 ft (7,600 m).
The P-51H used the new V-1650-9 engine, a version of
the Merlin that included Simmons automatic supercharger boost control with water
injection, allowing War Emergency Power as high as 2218 hp (1,500 kW).
Differences between the P-51D included lengthening the fuselage and increasing
the height of the tailfin, which greatly reduced the tendency to yaw. The canopy
resembled the P-51D style, over a somewhat raised pilot's position. Service
access to the guns and ammunition was also improved. With the new airframe
several hundred pounds lighter, the extra power and a more streamlined radiator,
the P-51H was among the fastest propeller fighters ever, able to reach 487 mph
(784 km/h or Mach 0.74) at 25,000 ft (7,600 m).
The P-51H was designed to complement the P-47N as the primary aircraft for the invasion of Japan with 2,000 ordered to be manufactured at Inglewood. Production was just ramping up with 555 delivered when the war ended. Production serial numbers:
Additional orders, already on the books, were cancelled. With the cutback in production, the variants of the P-51H with different versions of the Merlin engine were produced in either limited numbers or terminated. These included the P-51L, similar to the P-51H but utilizing the 2270 horsepower V-1650-11 Merlin engine, which was never built; and its Dallas-built version, the P-51M or NA-124 which utilized the V-1650-9A Merlin engine lacking water injection and therefore rated for lower maximum power, of which one was built out of the original 1629 ordered, serial number 45-11743.
 Although some P-51Hs were issued to operational units,
none saw combat in World War II, and in postwar service, most were issued to
reserve and ANG units. One aircraft was provided to the RAF for testing and evaluation.
Serial number 44-64192 was designated BuNo 09064 and used by the US Navy to test
transonic airfoil designs, then returned to the Air National Guard in 1952. The
P-51H was not used for combat in the Korean War despite its improved handling
characteristics, since the P-51D was available in much larger numbers and was a
proven commodity.
Although some P-51Hs were issued to operational units,
none saw combat in World War II, and in postwar service, most were issued to
reserve and ANG units. One aircraft was provided to the RAF for testing and evaluation.
Serial number 44-64192 was designated BuNo 09064 and used by the US Navy to test
transonic airfoil designs, then returned to the Air National Guard in 1952. The
P-51H was not used for combat in the Korean War despite its improved handling
characteristics, since the P-51D was available in much larger numbers and was a
proven commodity.
Many of the aerodynamic advances of the P-51 (including the laminar flow wing) were carried over to North American's next generation of jet-powered fighters, the Navy FJ Fury and Air Force F-86 Sabre. The wings, empennage and canopy of the first straight-winged variant of the Fury (the FJ-1) and the unbuilt preliminary prototypes of the P-86/F-86 strongly resembled those of the Mustang before the aircraft were modified with swept-wing designs.
| THE KIT |
I'm not exactly sure
just when this kit was originally produced as there is no date on the box or
instructions, however, it has to be at least ten years ago. This is pretty much
a standard "early era" type of Czech short run kit. It has all the hallmarks;
lightly engraved panel lines, soft detail and the usual molding glitches of
ejector pin towers, flash, and sink a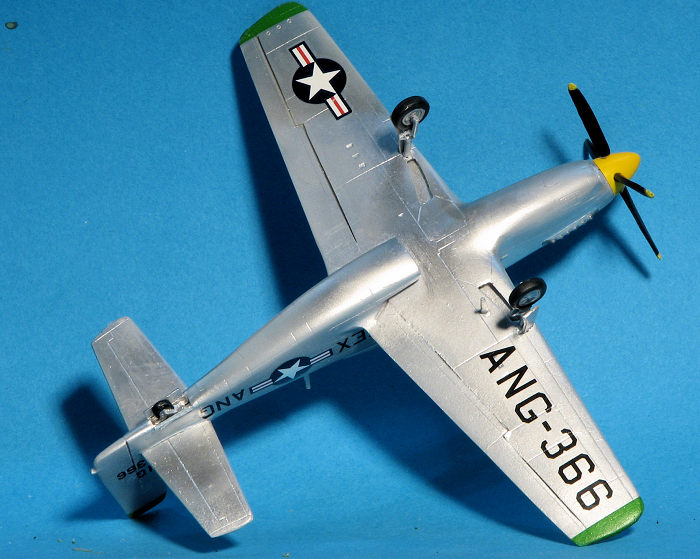 reas. While most of the towers will be
relatively easy to erase, some, such as the one in the seat, will not. I also
found sink areas on the prop blades and one of the main wheels looks like it was
molded with a flat spot, but it is just a poor molding. All the parts have flash
to some extent with the finer detailed parts being the ones
most difficult to clean up.
reas. While most of the towers will be
relatively easy to erase, some, such as the one in the seat, will not. I also
found sink areas on the prop blades and one of the main wheels looks like it was
molded with a flat spot, but it is just a poor molding. All the parts have flash
to some extent with the finer detailed parts being the ones
most difficult to clean up.
There are no enclosed main wheel wells with the large inner gear doors molded in the 'up' position. The cockpit consists of a floor, seat, stick and instrument panel. There is some inner fuselage detail, however. The lower scoop has no outer face to smooth things out so your modeling skills will be needed there. As mentioned, the prop blades (all separate) are not well molded and need work to get to looking good. I also think the spinner may be a bit too short and pointy. The tailplanes seem improperly molded as they have a straight leading edge and don't match the instructions or the decal placement three-view. Wing tips also seem too rounded in this regard and the fuselage does not seem deep enough when comparing it to the box art. I should also mention that the machine gun openings are just holes in the leading edge of the wing. Canopy is fair as these things go, but again, just doesn't seem to be quite right.
There are markings for one aircraft, the box art P-51H-10 from the 62nd FS/56 FG based in Alaska during 1946. The sheet looks to be well done and is quite matte. Those wishing different markings will have to rummage through the spares bin for them. Instructions are nicely drawn and I only wish the actual plastic was as well done as the drawings!
| CONSTRUCTION |
This is one of those kits where one gives it a start then loses interest due
to a number of possibilities and it gathers dust. This time for a dozen years.
Yes, I do have several kits that have, for what ever reason, have been
languishing for over a decade. After blowing the dust from the box and opening
it, I discovered that I'd already built the wing, painted the
 interior (Black),
installed the instrument panel, put the seat on the floor plate and broken the
control stick.
interior (Black),
installed the instrument panel, put the seat on the floor plate and broken the
control stick.
So I removed the prop blades from the sprues, along with the prop shaft, the spinner and the backing plate. The prop blades are horrible and difficult to tell which end fits closer to the spinner. I figured the fat part and spent quality time cleaning these along with the horizontal stabs. As mentioned in the kit description, I think these are shaped wrong as they are straight on the leading edge and I always thought that these were more tapered. Regardless, it was built as provided. I also sanded the seams on the wings and filled the gaps with super glue.
After replacing the broken/missing control column with a section of bent wire
and painting it, the interior was glued to a fuselage half. Then the other half
was attached. To say fit is poor would be about right. I had to clamp the
fuselage together in the front and the back to keep things aligned. This was
followed by massive filling and sanding to deal with the gaps and seams. Any
detail that may have been there was sent to oblivion, a fairly common fate for
engraved detailing as shallow as on kits like this. I also had to do some
opening of the radiator and oil cooler intakes. Half of the latter was
completely molded over and the former had a lip about a scale foot thick. A
motor tool helped quite a bit to
 grind on these areas to provide something
somewhat close to prototypical.
grind on these areas to provide something
somewhat close to prototypical.
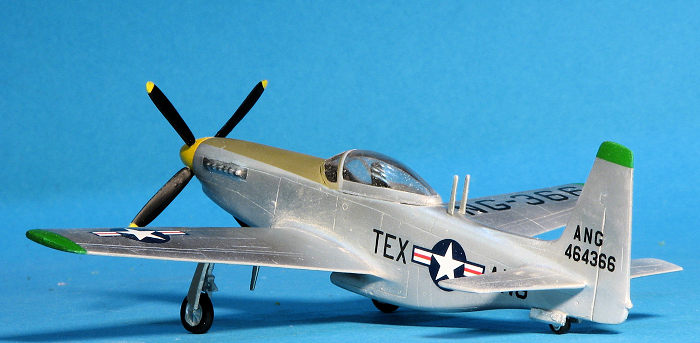
Then it was time to attach the wing. I expected it to not fit and I was not disappointed. Some heavy sanding on the roots helped, but it was multiple applications of filler that helped to smooth things out. I also attached the tail planes and they fit fairly well. The rudder was next and after a bit of adjustment with files, it fit on fairly well also. However, the tip of the tail was all wrong. It was slanted back like on the short fin Mustangs. I filed away at the top to flatten it a bit more, however, it doesn't seem to be as tall as it should. I decided to go ahead and extend it so filed the tip even flatter and added a piece of thick card. This was reinforced by superglue and had a layer of epoxy filler applied to fill in some of the gaps. Once dry, it was all sanded to something that looked more like the proper height and shape, though it may be a bit too tall. I then worked on trying to get the canopy to fit. This is not the right shape at all, though it is close. There is no other alternative. Once I got it close, I masked it and attached it, using my favorite clear cement to try to fill the gaps.
I was still struggling with the prop blades, but felt that perhaps it wouldn't hurt to start airframe painting.
| COLORS & MARKINGS |
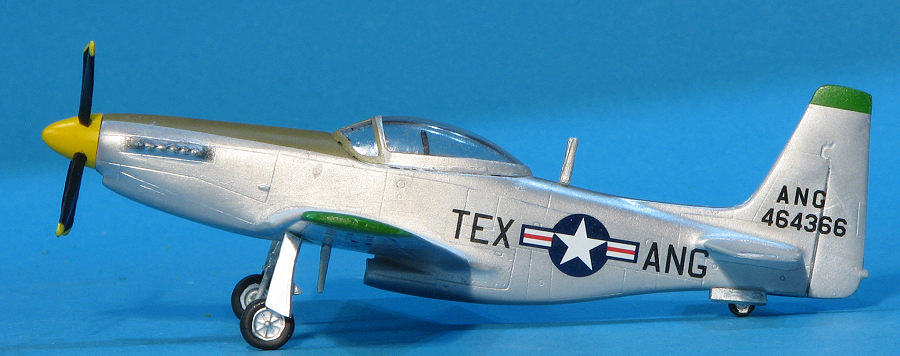
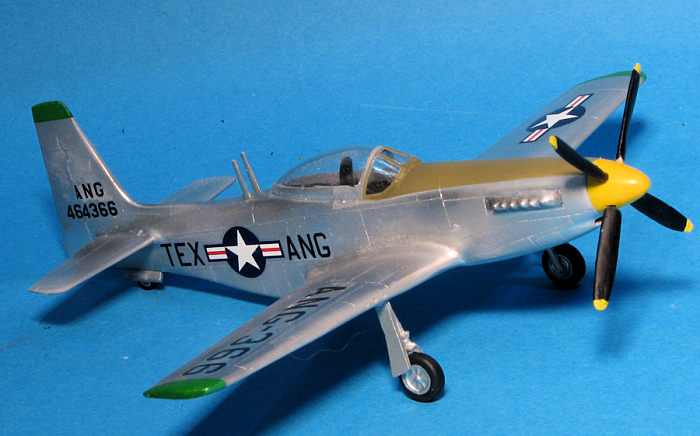
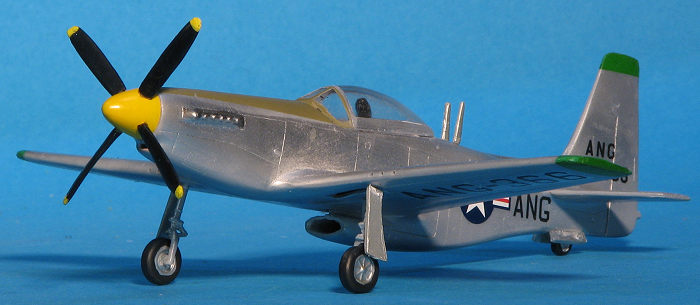
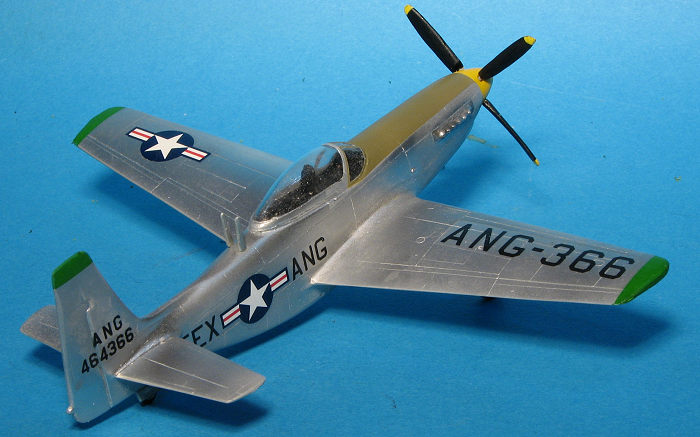
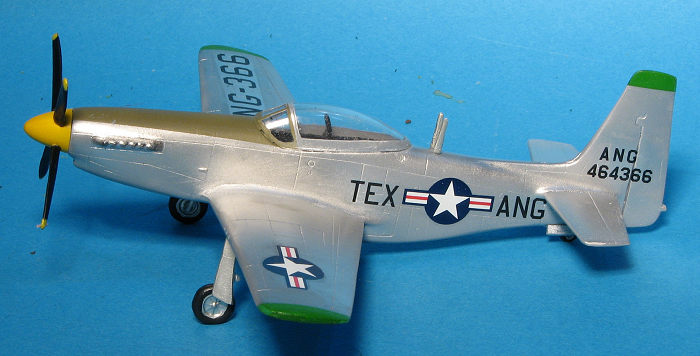
These aircraft were all unpainted metal with black or OD anti-glare panels on the upper cowling. I first sprayed on primer using Tamiya's grey from the rattle can. Then I sprayed on some polished aluminum to help look for glitches. I found quite a few so it was back to the bench to deal with them. Eventually I got the airframe painted. The antiglare panel was painted olive drab and the prop yellow.
I used a set of markings from a CMR kit of the H and chose the
181 FBS, Texas ANG. As mentioned, it had a yellow spinner and green for the fin
and wing tips. The sheet had decals for those and I used them though really,
should have gone ahead and painted them as it would be easy enough. The decals
are printed by Tally-ho and worked fairly well, though they needed setting
solution. The insignia included on that sheet looked like the blue surround was
too thin and the insignia
 themselves
too large. I used 30 and 35 inch insignia from the very nice Fantasy Printshop
sheet (FP710), and they looked just right.
themselves
too large. I used 30 and 35 inch insignia from the very nice Fantasy Printshop
sheet (FP710), and they looked just right.
I then installed the landing gear. The tail gear is far too short and the main gear plugs into holes in the lower wing rather than ones in the wheel well. These gear have no axles, just little stubs and after painting the poorly detailed wheels, those were stuck on. I then put on the landing gear doors, which were about six times too thick and would have better served by being replaced with card stock. However, this is a SOD kit and not worth the additional effort.
Assembling the prop wasn't exactly a cake-walk either. The spinner and back plate were not the same diameter at the join so had to have some sanding done. Then the blades had to have the small posts trimmed down to fit into the drilled out holes. Once installed, it was obvious that they were horrible. Add a proper propeller to the list of things this kit needs. The mounting plate for the prop fits into an opening in the front of the fuselage. This opening is far too small, but then the piece that fits into it is also too large. I had to reduce the size of the insert and open up the place where it inserts. Once that was done, I glued the prop to the shaft and once dry attached the assembly. The last things to do were to drill out the machine gun holes in the leading edge and attach the three far-too-fat antenna.
| CONCLUSIONS |
As expected, this kit has more accuracy issues than a current White House press briefing. It looks more like a P-51H than it does a Spitfire, which is not exactly what one would call high praise. You 'could' improve it with replacement landing gear and wheels as well as scrounging a decent prop and canopy from somewhere but the truth it, it would still be a fairly horrible kit. Were I you, I'd leave this one alone.
We build the pooches so you don't have to.
| REFERENCES |
http://en.wikipedia.org
14 June 2019
Copyright ModelingMadness.com. All rights reserved. If you would like your product reviewed fairly and quickly, please
contact
me or see other details in the
Note to
Contributors.