Airfix 1/72 F-86F Sabre
| KIT #: | A82011 |
| PRICE: | $20.00 SRP |
| DECALS: | Two Options |
| REVIEWER: | Scott Van Aken |
| NOTES: | Airfix club special with MiG-15 |
| HISTORY |
 over 15 years. It also was primary equipment for many air forces throughout
the world. Many still exist as warbirds and they are pretty much standard fare
in many of the world's museums.
over 15 years. It also was primary equipment for many air forces throughout
the world. Many still exist as warbirds and they are pretty much standard fare
in many of the world's museums. | THE KIT |
 Molded very much like all of its new kits, the
engraving may be a bit much for some, but most of us can deal with it OK. Four
standard grey sprues and one clear one for the canopy and windscreen come in the
now standard folded cardboard box. This one is made in India so Hornby is still
spreading the manufacturing.
Molded very much like all of its new kits, the
engraving may be a bit much for some, but most of us can deal with it OK. Four
standard grey sprues and one clear one for the canopy and windscreen come in the
now standard folded cardboard box. This one is made in India so Hornby is still
spreading the manufacturing.
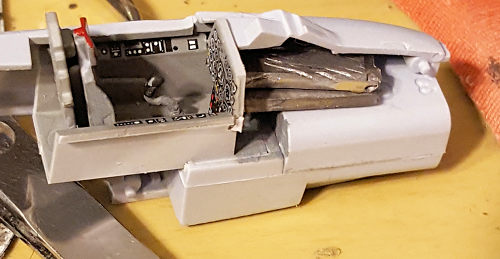
So let us get the the straight Sabre bits. This one has a 6-3 non-slatted wing with a fence. Sabre people realize that pretty much it is the wing that determines the accuracy of the markings to be used. Heaven forbid that some one put slatted wing Sabre markings on a fixed wing F-86. Heads will roll, I tell you!. The kit has a nice cockpit which includes a pilot figure. No harness on the bang seat which is pretty much like the real thing, only much simplified. Decals for instruments, which is OK in this scale. An intake section is included with the upper piece having '3 Grams' engraved on it. Now this means that 3 grams of weight is needed.
The wing can have pylons added to the inner section
for the use of bombs if one so wishes. Now I'm not sure if the USAF version is
the fighter bomber -35 or not, but in this scale, it probably doesn't matter and
those wanting to use the pylons and bombs will need to do a bit of research if
accuracy is important. The kit has well done landing gear with flattened tires
included and two
styles of nose wheel. There are separate 'gear up' gear doors
with additional reinforcement to allow them to be easily installed, a nice
touch. The same goes for the
 separate speed brakes; a closed option is given. It
will be interesting to see if the molding is such that these brakes are properly
drooped down when open. In addition to the bombs, the standard
early drop tanks are provided for the outer stations. This is topped by a two
piece canopy/windscreen that can be posed open if one wishes.
separate speed brakes; a closed option is given. It
will be interesting to see if the molding is such that these brakes are properly
drooped down when open. In addition to the bombs, the standard
early drop tanks are provided for the outer stations. This is topped by a two
piece canopy/windscreen that can be posed open if one wishes.
Kit instructions are well drawn with the usual Humbrol paint numbers in place of real paint names except for the camo and markings guide where the colors used on the outside are identified. Since this was part of a double kit boxing, there is only one markings option for the Sabre. That is for 'Little Rita', the aircraft of Dick Geiger of the 16 FIS in late 1952. Decals are well printed and include not only the Korean War bands but a mass of data markings. I should note that the sheet has the correct North American applied curved font.
| CONSTRUCTION |
 finest grade you have that will get the job done.
 After gluing all the bits into the cockpit, I installed it into a fuselage half. One needs to ensure it is not pushed too far to one side, so temporarily taping the other fuselage half will assist in this and in getting the tailpipe assembly properly aligned. When those have dried, I cut off a section of lead, folded it, weighed it to make sure it was at least 3 grams, and installed it above the intake. I then trimmed away the little step on the underside of the exhaust section as it isn't supposed to be there. With that done, the canopy base piece was slid in place and the halves closed. I also attached the nose section at this time.
 Make sure that you clamp the fuselage well, especially where it meets the
fin to eliminate gaps. Though the gaps were pretty well taken care of, there
were still some depressions to deal with where the halves meet. I used super
glue to fill these. I use this material as it doesn't shrink two weeks after
you paint the model as standard fillers will do. It also takes well to being
rescribed over without chunking. Downside is that you have to be very
careful when sanding it away and it takes multiple applications if the
gap/depression is fairly large.
Make sure that you clamp the fuselage well, especially where it meets the
fin to eliminate gaps. Though the gaps were pretty well taken care of, there
were still some depressions to deal with where the halves meet. I used super
glue to fill these. I use this material as it doesn't shrink two weeks after
you paint the model as standard fillers will do. It also takes well to being
rescribed over without chunking. Downside is that you have to be very
careful when sanding it away and it takes multiple applications if the
gap/depression is fairly large.
While dealing with the fuselage, I glued the wings together. None of the markings options I'm going to use will have bomb racks installed so I didn't open those. My go to glue, Tamiya extra thin, tends to dry fairly quickly so it was recommended I try a slower drying glue. In this case it is Mr.Cement Deluxe. It smells quite different from Tamiya and does take a bit longer to dry. It also does not have a precision applicator so its brush holds more cement, which is fine for large areas like wings.
Now it was time to attach the wings. The fit is very tight and to be honest, not all that great. You need to test fit multiple times, trimming away a bit to ensure a fairly flush fit. The right rear section of the wing/fuselage join is where I did the most scraping and even then there isn't a totally flush fit. This has been something I've noticed on all the Airfix F-86s I've done so it is not just an isolated case. You can also see that there are going to be gaps to fill. This sort of fit issue did not exist in kits where that little fillet was part of the wings.
With all that filled and cleaned, I attached the little ammo bay doors.
These do not fit all that snug. Note that the little triangle is not molded
on the door like that except for the Flight Systems International Sabres,
who did t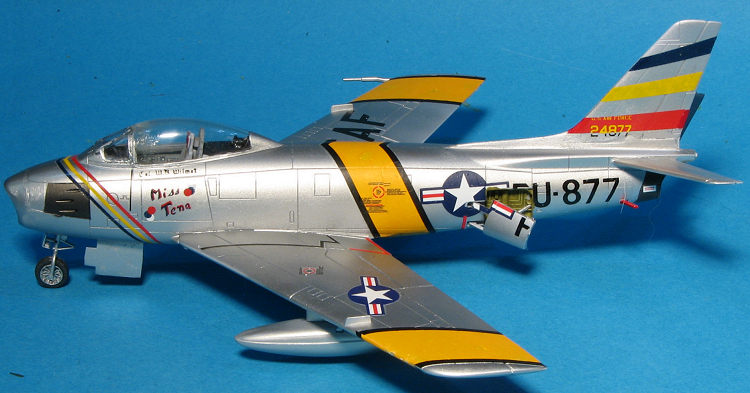 hat mod and were probably planes that were used when tooling this
kit. I'm not sure just what happens to that little triangle of metal, but I
am guessing that it folds back under the ammo doors when they are opened.
hat mod and were probably planes that were used when tooling this
kit. I'm not sure just what happens to that little triangle of metal, but I
am guessing that it folds back under the ammo doors when they are opened.
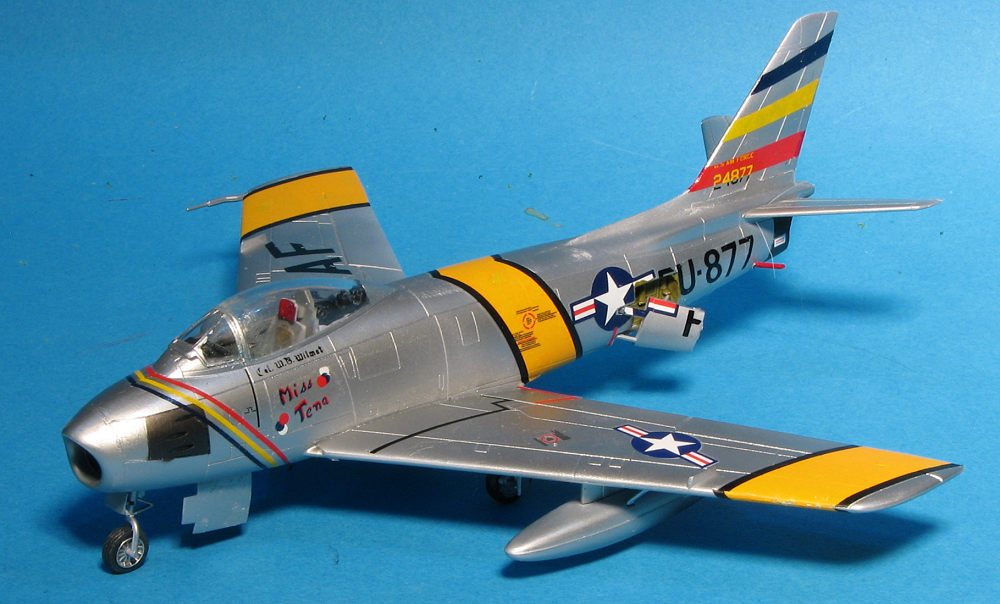
| COLORS & MARKINGS |
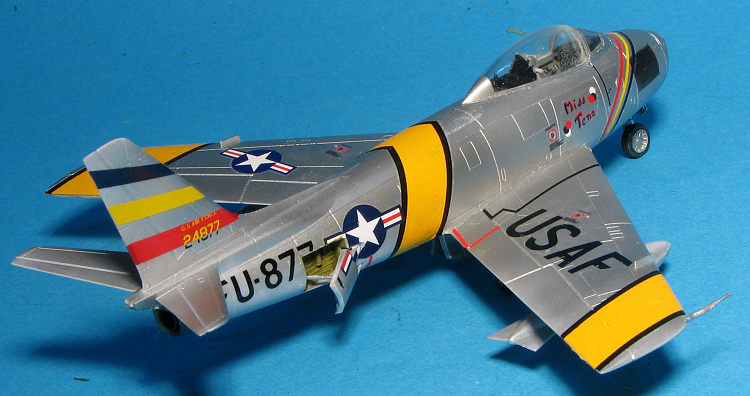
After letting the kit marinate for a few weeks, I
painted it overall Alclad II aluminum with steel used around the exhaust and
guns. I wanted to use another old set of markings from an ancient Microscale
sheet. However, the sheet, which depicted a Korean War plane, only had the
fuselage band and not the ones for the wings.
 Fortunately, I had several
Airfix Sabre sheets with those bands so I used the ones in the kit. Airfix
decals hate panel lines and refuse to conform over sharp curves (like wing
leading edges). Using strong setting solution was a two edged sword as the
decals did conform but also tended to be munched by the solution if too much
was applied. I also found the the lower fuselage decal was too narrow.
Fortunately, I had spares so cut bits from those to fix the errors. I'll
still need to paint the edges, but at least they are on. I also used the kit
sheet for insignia and some other markings. The rest came from the
Microscale sheet, which had been given a coat of Microscale Decal film to
prevent it the markings from falling apart.
Fortunately, I had several
Airfix Sabre sheets with those bands so I used the ones in the kit. Airfix
decals hate panel lines and refuse to conform over sharp curves (like wing
leading edges). Using strong setting solution was a two edged sword as the
decals did conform but also tended to be munched by the solution if too much
was applied. I also found the the lower fuselage decal was too narrow.
Fortunately, I had spares so cut bits from those to fix the errors. I'll
still need to paint the edges, but at least they are on. I also used the kit
sheet for insignia and some other markings. The rest came from the
Microscale sheet, which had been given a coat of Microscale Decal film to
prevent it the markings from falling apart.
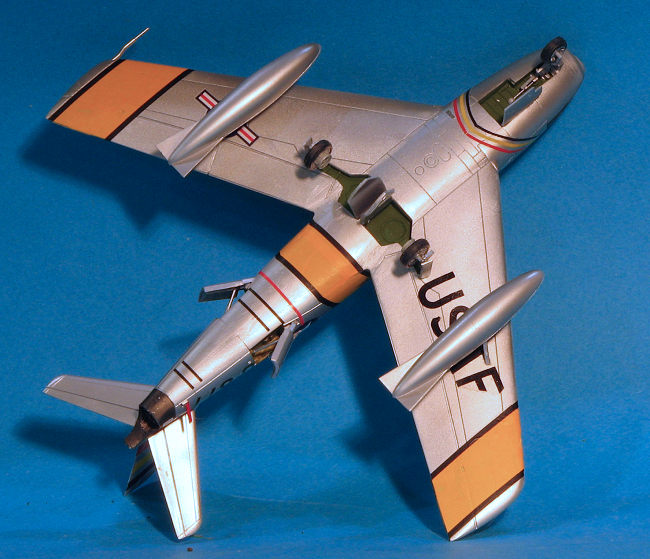
With the decals mostly in place (I had issues with some of the Airfix markings flaking off), I attached the landing gear. I had a set of resin wheels that I used, though frankly, it was wasted on this build as the build itself was full of glitches. The gear doors were attached and then the speed brakes and fuel dump. I removed the masking from the canopy and was unpleasantly surprised to notice that the glue had seeped under the masking. That area was sanded best I could, but it was ruined. A coat of clear gloss at least helped a bit, but I know of other modelers who would have chucked the whole thing in the trash.
The last parts of the build were attaching the fuel tanks and the pitot before doing the usual touch up and adding a few other decals.
| CONCLUSIONS |
If you would like your product reviewed fairly and quickly, please contact me or see other details in the Note to Contributors.