Fujimi 1/72 F-86F-40 Sabre
| KIT #: | F-18 |
| PRICE | 800 yen when new |
| DECALS: | Multiple options |
| REVIEWER: | Scott Van Aken |
| NOTES: |
1986 release |
| HISTORY |
 The F-86 is one of those planes that just seemed to have gotten most
everything right, all rolled up into one package. It was well armed, handled
fairly well and for the time, it was fast. It was also able to be upgraded and
served in the air arms of dozens of nations. One of those nations, and one of
the two who license built them, was Japan. Japan chose the F-86F-40 version that
had longer wings and reverted back to the slats for lower speed handling. The
longer wings added to the aircraft's lift which benefitted turning and provided,
along with the slats, a lower landing speed. While the 20mm cannon was becoming
the 'go to' armament, the .50 calibre Browning was still potent enough in most
cases.
The F-86 is one of those planes that just seemed to have gotten most
everything right, all rolled up into one package. It was well armed, handled
fairly well and for the time, it was fast. It was also able to be upgraded and
served in the air arms of dozens of nations. One of those nations, and one of
the two who license built them, was Japan. Japan chose the F-86F-40 version that
had longer wings and reverted back to the slats for lower speed handling. The
longer wings added to the aircraft's lift which benefitted turning and provided,
along with the slats, a lower landing speed. While the 20mm cannon was becoming
the 'go to' armament, the .50 calibre Browning was still potent enough in most
cases.
Japan's Mitsubishi-built -40s were also wired for Sidewinder missiles, though the early Sidewinders were not very reliable. Such was the popularity of the aircraft that they remained in service for many years in the trainer and hack roles. They also served with the Blue Impulse years after they were gone from regular service. The quickest way to tell a Mitsubishi built F-86F-40 from a North American built aircraft is that the Japanese version has a UHF antenna on the upper nose. Many of these planes were later recycled for drones and other auxiliary services, or ended up in civilian hands for those wealthy enough to afford a jet warbird.
| THE KIT |
The Fujimi Sabre series was probably the first modern F-86F series of kits. Engraved panel lines and nice molding made these the darling of Sabre modelers for decades. Even today, many modelers prefer these over the Hobbcraft or Airfix kits. The Hobbycraft kits are blatant knock-offs of this kit without the decent fit. Fujimi basically did three boxings depending on the wing and are the only ones to do a -40 if you discount the horrid Hasegawa offering of the early 1970s.
The cockpit tub is also part of the intake
trunking and the lower trunking piece has the nose gear well. Decals are
provided for instruments and side consoles though there is raised detailing on
both of those if you'd rather paint. A fair rep resentation of the seat and a
control stick completes this assembly. There is also an initial compressor stage
that fits behind the trunking.
resentation of the seat and a
control stick completes this assembly. There is also an initial compressor stage
that fits behind the trunking.
3 grams of nose weight is required prior to closing the fuselage haves and trapping the cockpit assembly and the exhaust. This latter item is fairly short compared to what Airfix provides but is fine for most of us. Fujimi molds the canopy glass and frame separately which I don't like, but there it is. A separate windscreen is provided and you could pose the canopy open if you wish. The nose intake piece is separate and you will need to carefully attach the UHF antenna to it. I'd wait until later in the build to attach this antenna.
You can also pose the speed brakes open or closed and so you can do the photo recon version, the gun trough pieces are separate. Gear and wheels are well done and you are provided with the later spoked nose wheel which is accurate for the Japanese F-40 version. When assembling the wings, you need to open holes for the drop tanks and missile pylons if you are using those. You can build this gear up if you wish though you'll need to provide your own stand. The result of this is that the forward nose gear door needs to be cut for gear down. The missiles are early AIM-9Bs and the tanks are Japanese style with no fins. I like that Fujimi provides intake and exhaust covers as that long intake trunk is a bear to remove the seams.
The decal sheet allows you to build a Sabre from any JASDF unit except for 501 squadron, which had RF-86s. The large decal sheet is very nicely done, though age may well have made the decals less than great. It also includes some stencils and wing walk markings.
| CONSTRUCTION |
As mentioned above, the only long
wing -40 Sabre kitted in this scale is this kit. However, the Mitsubishi built
aircraft differed from other long wing Sabres in that there was an intake
cooling scoop on the right side of the fuselage. If using this kit as a basis
for anything but a Japanese aircraft, this scoop needs to be sanded off. Another
thing to keep in mind is that this kit only comes with the finless
 drop tanks.
There were three styles used for the F-86. A set with small fins as used in
Korea, a later version that put end plates on those fins, and the version in
this kit with no fins at all. Many nations used these latter finless tanks
(along with the other types), but one should have some sort of photo reference
before using them. Otherwise get the latest release of this kit (F-58)
that has both tank types (along with a much higher price).
drop tanks.
There were three styles used for the F-86. A set with small fins as used in
Korea, a later version that put end plates on those fins, and the version in
this kit with no fins at all. Many nations used these latter finless tanks
(along with the other types), but one should have some sort of photo reference
before using them. Otherwise get the latest release of this kit (F-58)
that has both tank types (along with a much higher price).
Anyway, I started by brush painting all the interior bits and the cockpit sidewalls with FS 36231, dark gull grey, which is a fairly standard color for cold war US planes. I used Mr. Color lacquers and it dried very quickly. The seat was then built up. Keep in mind that there is no positive lower locator for the armor plating so ensure that it does not drop below the seat level. Decals are provided for instrument panel and side consoles. I used the decal for the instrument panel and dry brushed the side consoles after painting the upper surfaces black.
After painting the inside of the
intake area and the main gear well in aluminum, it was assembled and the engine
compressor stage attached. It is important that this assembly be in stalled
in one fuselage half to ensure that alignment is good. Note that the walls of
the nose gear well need to line up with the openings in the fuselage or their
will be alignment issues when installing the nose cap. After this had dried, the
interior save the seat was built up and this whole assembly glued in place along
with the exhaust piece. I then placed weight on the top of the intake and just
under the cockpit area just to make sure. Then the fuselage halves were joined
together. Once dry, the nose piece was attached then the seams were sanded,
filled and sanded again.
stalled
in one fuselage half to ensure that alignment is good. Note that the walls of
the nose gear well need to line up with the openings in the fuselage or their
will be alignment issues when installing the nose cap. After this had dried, the
interior save the seat was built up and this whole assembly glued in place along
with the exhaust piece. I then placed weight on the top of the intake and just
under the cockpit area just to make sure. Then the fuselage halves were joined
together. Once dry, the nose piece was attached then the seams were sanded,
filled and sanded again.
Next, the wings and the tailplanes were glued in place along with the fuel dump probe. These latter moves were a mistake as I broke both of these items several times during my fumble-fingered handling. Next kit I'll leave these off until the end. I then masked and attached the canopy in readiness to paint.
| COLORS & MARKINGS |
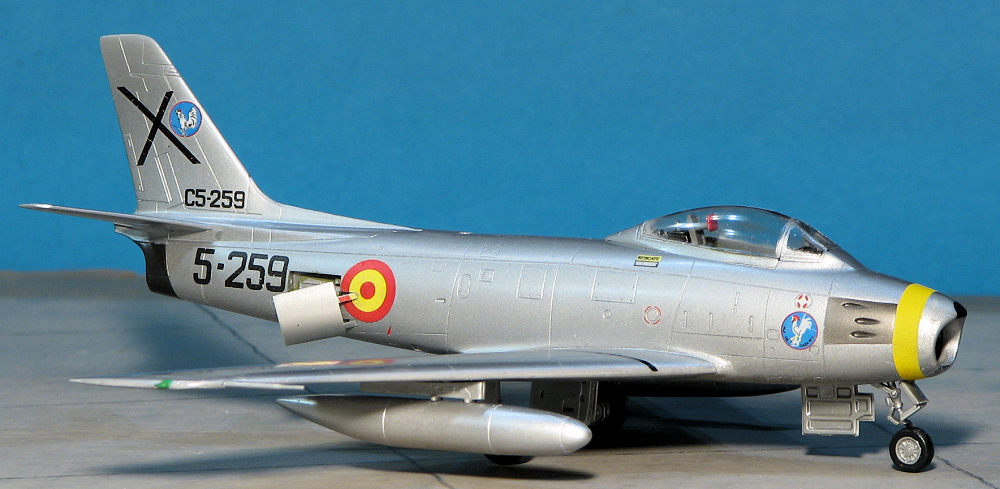
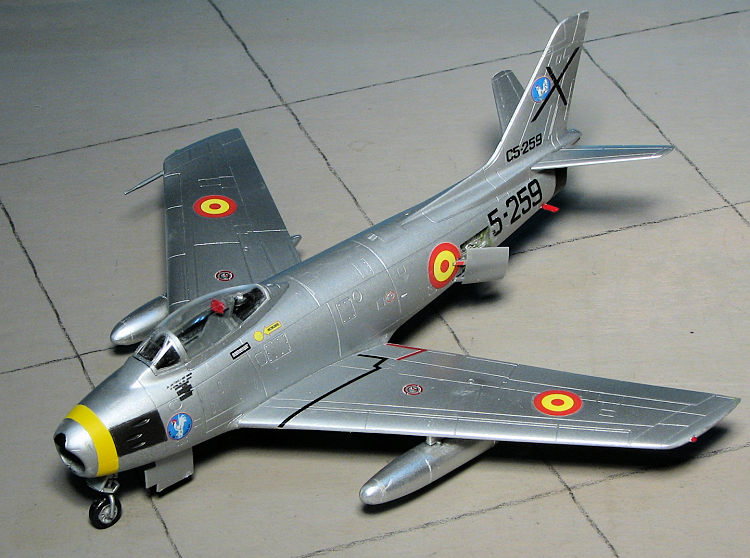
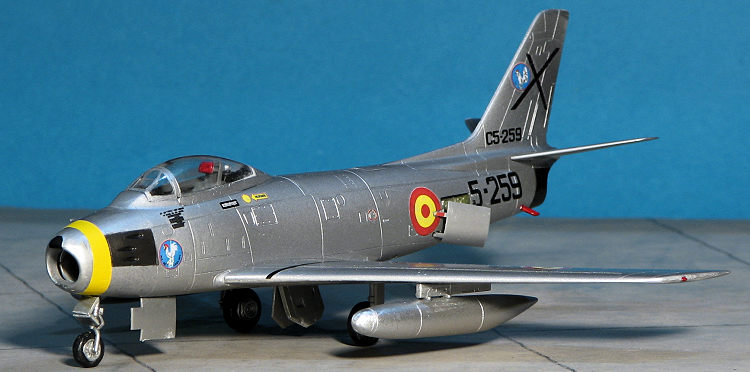
In the time frame of the decals I was using (LF sheet C7291), the aircraft were painted overall aluminum. To my eyes, the best paint for painted aluminum is Tamiya AS-12 in the rattle can. This paint covers well and is pretty much fool-proof so in several sessions (to give me somewhere to hold the airframe), it was painted. I then painted the gun blast panel and the exhaust with Alclad II steel.
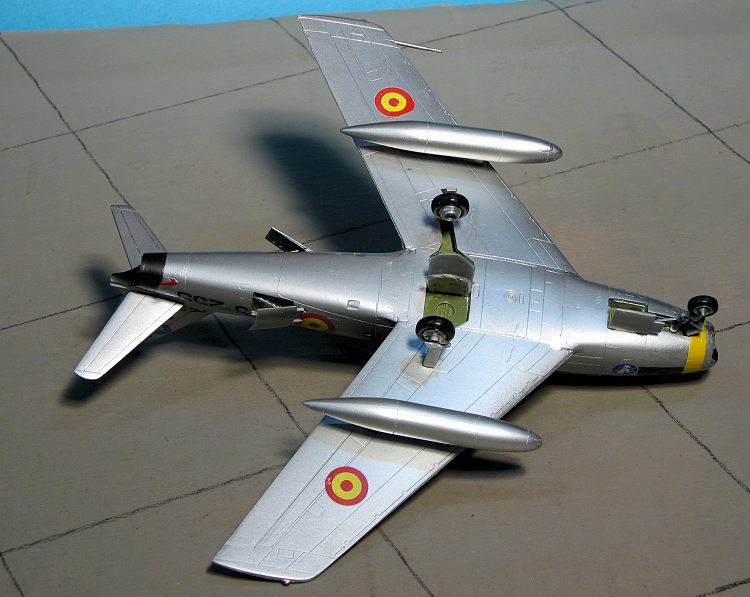
 Back at the bench, the upper
portions of the wheel wells were painted chromate green with Mission Models
paint. This shade also went onto the inside of the speedbrake well. Unless you
are modeling a warbird, the inside of the speed brake is left in unpainted
aluminum. Same for the inside of the gear doors. Once that was done, the landing
gear was glued in. I also broke those off several times in handling. Wheels were
painted and glued in place then I started on the decals.
Back at the bench, the upper
portions of the wheel wells were painted chromate green with Mission Models
paint. This shade also went onto the inside of the speedbrake well. Unless you
are modeling a warbird, the inside of the speed brake is left in unpainted
aluminum. Same for the inside of the gear doors. Once that was done, the landing
gear was glued in. I also broke those off several times in handling. Wheels were
painted and glued in place then I started on the decals.
The LF sheet provides two options. I picked the one with the yellow nose band and that was painted on. These decals have a single carrier over everything so each marking has to be cut out. They are quite thin. I used Micro Sol on them, but to get them to snuggle down into engravings, you need a stronger solution. Note that applying too much will damage the decal you have to almost dry brush it on. I taped the speed brakes in place so I could place the fuselage insignia and then cut the small section required once it had dried. After a fairly long time (I'm slow when it comes to decals), they were all in place. I did use some of the kit decals and they worked fine.
I then worked on attaching the gear doors, the pylons and the drop tanks.
| CONCLUSIONS |
 As mentioned this should
be your first choice for a long wing F-86F. The shorter wing -25/30 kits from
Fujimi are also a good replacement for the currently difficult to find Airfix
offering. It would have been nice if the kit were not molded in white and had
separate slats, but it isn't a deal breaker by any means. For those who are
going to use this kit for a North American built plane, there is a fairly
prominent scoop on the right fuselage half that was only on the Mitsubishi built
planes and that will need to be removed. I did not use the kit supplied intake
and exhaust covers. As you can see from the previous image, it is quite
difficult to not get a gap between the intake trunking and the nose section, so
it would be advisable to use the cover. Otherwise, this is a very nice kit and
is fairly available.
As mentioned this should
be your first choice for a long wing F-86F. The shorter wing -25/30 kits from
Fujimi are also a good replacement for the currently difficult to find Airfix
offering. It would have been nice if the kit were not molded in white and had
separate slats, but it isn't a deal breaker by any means. For those who are
going to use this kit for a North American built plane, there is a fairly
prominent scoop on the right fuselage half that was only on the Mitsubishi built
planes and that will need to be removed. I did not use the kit supplied intake
and exhaust covers. As you can see from the previous image, it is quite
difficult to not get a gap between the intake trunking and the nose section, so
it would be advisable to use the cover. Otherwise, this is a very nice kit and
is fairly available.
29 January 2021
If you would like your product reviewed fairly and fairly quickly, please contact the editor or see other details in the Note to Contributors.
Back to the Main Page Back to the Review Index Page Back to the Previews Index Page