Hasegawa 1/72 F-102A Delta Dagger
| KIT #: | JS-047 |
| PRICE: | $3.00 when new in the dark ages. |
| DECALS: | Two options |
| REVIEWER: | Scott Van Aken |
| NOTES: |
| HISTORY |
The Convair F-102 Delta Dagger was a US interceptor aircraft built as part of the backbone of the United States Air Force's air defenses in the late 1950s. Entering service in 1956, its main purpose was to intercept invading Soviet bomber fleets.
 The F-102 was the first operational supersonic interceptor and delta-wing fighter of the USAF. It used an internal weapons bay to carry both guided missiles and rockets. As originally designed, it could not achieve Mach 1 supersonic flight until redesigned with area ruling. The F-102 replaced subsonic types such as the F-89 Scorpion, and by the 1960s, it saw limited service in Vietnam in bomber escort and ground attack roles. It was supplemented by F-101 Voodoos and, later, by F-4 Phantom IIs. Many of the F-102s were transferred to United States Air National Guard duty by the mid-to-late 1960s, and the type was retired from operational service in 1976. The follow-on replacement was the Mach 2 class F-106 Delta Dart which was an extensive redesign of the F-102.
| THE KIT |
Hasegawa's 1/72 F-102A is a prime example of their first generation kits. Other subjects include the F-106, F-101, and F-100, all still in production, even after nearly 40 years. They are generally accurate in outline, are of the dreaded raised panel lines and finding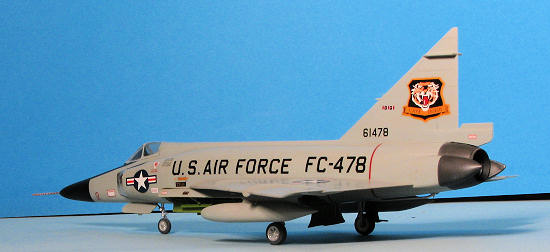 rivets on them is not unheard of. The plastic is generally thicker than what we have come to expect on modern kits and the fit is often not very good, again, compared to modern kits.
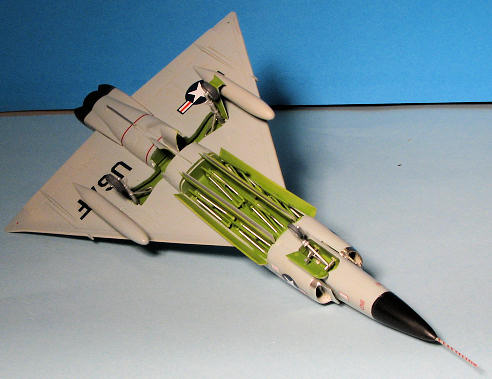
This particular one has a generic bang seat for the cockpit and along with a pilot figure, that is it. It comes with two under wing fuel tanks and a complete weapons bay with missiles. These are Falcons and are not very well formed. Best to toss them and use the better ones from the Hasegawa Weapons Set. The bay doors are separate bits and designed to be displayed open. Attempts at molding them closed will result in major frustration. Aeroclub used to make a metal 'closed' door upgrade so those wanting to do that option will need to check on availability. The landing gear are fairly well done and the main gear wells are not fully enclosed. A one piece canopy is provided.
To be honest, I don't recall the markings provided as I used aftermarket on the build. I do know that Minicraft (the Hasegawa importer) included instructions translated into English.
| CONSTRUCTION |
This aircraft kit is really quite simple. This was the day before there were a multitude of inserts and to be honest, the only ones there could be would be for the wing tips as all F-102As were pretty much the same. I sta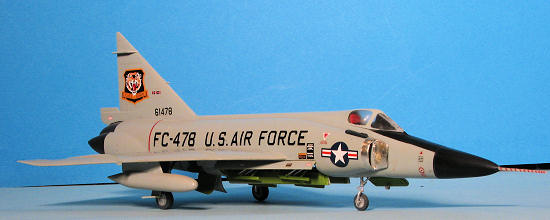 rted this one by painting and installing the seat then adding weight to the nose (probably not needed), and closing up the fuselage. Fit is fairly good, though I did have to sand the one fin half as the plastic there is far too thick on one side of the fusealge.
Attaching the tail cone and intakes showed the need for filler and much sanding. I never said these kits fit well, but for the time they were adequate. I then glued the wing sections and again, needed filler and sanding to get a decent fit. During all this the drop tanks were assembled as was the missile bay. I used Chromate Green for all the wheel bays and the missile bay. Getting the missile rails installed was probably the most complex part of the build. I left off the really poorly molded Falcon missiles and over the years, have not bothered installing new ones.
I then glued on the canopy, masked it and headed for the paint shop.
| COLORS & MARKINGS |
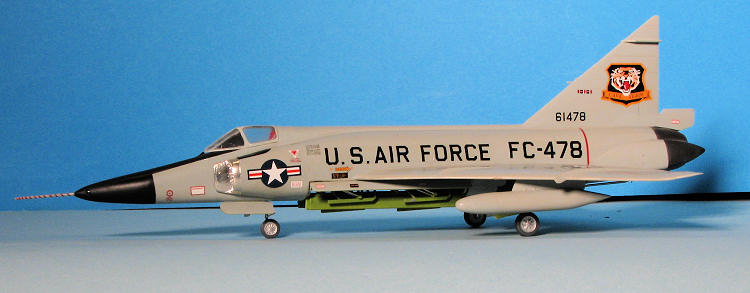
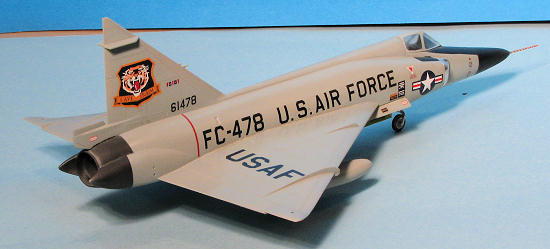
Painting most F-102s is a piece of cake. They are overall FS 16473 Gloss ADC Grey. I painted the outer gear doors and missile bay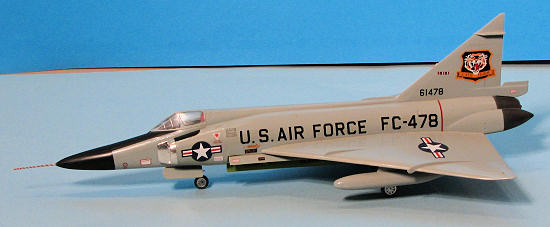 doors at this time. Once dry, the exhaust area was masked off and painted with Metallizer Burnt Iron. The nose was also masked off with the radome and anti-glare panel being painted black. I also painted the landing gear silver along with the missile bay retraction struts. I then cemented the landing gear in place before applying decals. Since the paint was gloss, no clear gloss was applied prior.
As the kit decals had yellowed and were thick, I decided to use one of the markings from an old Modeldecal sheet. Set #11 from 1971 has markings for a 460 FIS aircraft as based at Portland, OR in 1965. It is a fairly simple scheme with no fence or wing tip markings. First, I used Bare Metal Foil to cover the intake sections. The rest of the markings went on without any trauma. I did have to use some of the kit data markings, but again, no real problems with them. I then went to complete the rest of the kit.
| FINAL CONSTRUCTION |
 Getting the bay installed in the fuselage, I then worked on getting the doors glued on. These were not the best fit in the world, but eventually they were properly fit. Wheels and tires were painted and installed along with the gear doors. The drop tanks were glued in place followed by the nose probe and that was pretty much it.
| CONCLUSIONS |
Though it has been a couple of decades since I built this one, I can still remember how it went together. It is, sadly, the only 1/72 F-102 option for mainstream modelers. One would hope that a replacement would be available from someone like Academy or Hobby Boss, but I fear that the lack of variants is holding this back. Still, for a 40 year old mold, it isn't half bad and certainly no worse than many of the short run kits out there. It gets reissued with fresh decals from time to time so you may well want to be on the watch for it.
| REFERENCES |
June 2010 If you would like your product reviewed fairly and fairly quickly, please contact the editor or see other details in the Note to Contributors.