Anigrand 1/144 Short SA.4 Sperrin
| KIT #: | AA-4043 |
| PRICE: | $90.00 |
| DECALS: | One Option |
| REVIEWER: | Scott Van Aken |
| NOTES: | Resin kit with clear resin canopy |
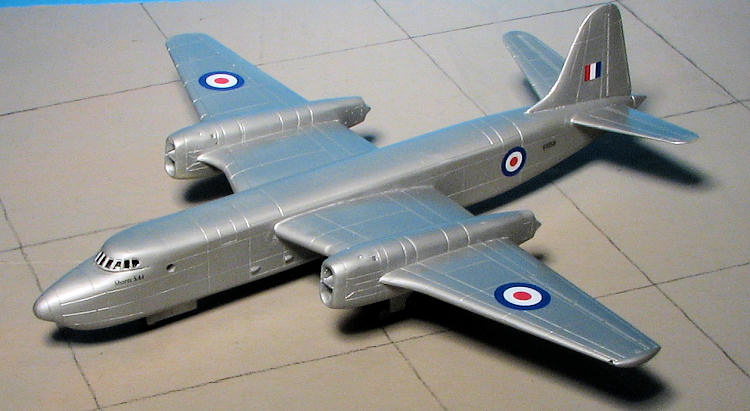
The Short SA.4 Sperrin (named after the Sperrin Mountains, a range of hills in Northern Ireland) was a British jet bomber design of the early 1950s built by Short Brothers and Harland of Belfast, popularly abbreviated "Shorts". It first flew in 1951. The design had always been a fall-back option in case the more advanced jet designs of the V-bombers were delayed, and it was not put into production because these swept-wing designs (such as the Vickers Valiant) were by then available. The Sperrin prototypes were however valuable for research data on large jet aircraft. They were also used to test various new engines.
This is another of Anigrand's superb deals in 1/144 kits as it not only has the Sperrin, but three other British jets included. One is the Gloster Javelin, an aircraft that reached full production status and two other prot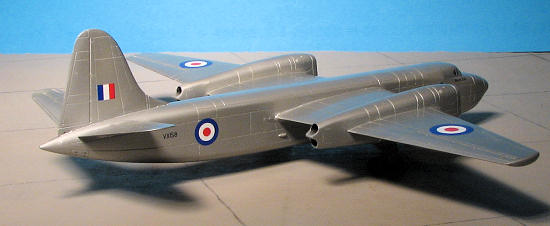 otypes. One is the Hawker P.1127, the prototype Harrier and the other is the Shorts SB.5 that was used to test the wing used on the EE Lightning.
The kit comes packaged in a multi-section polybag with each of the smaller kits in their own section and the rest used for the Sperrin and the clear resin canopies. The kit has nicely engraved panel lines, which are a bit large for the scale, but perfect for a model. As is usual, there will be clean up required as is the norm with all resin kits. None of these will be difficult to build once cleaned up. The only issue for the smaller ones will be finding a place for nose weight as there isn't a lot of room. As you can see from the parts layout that I swiped from the Anigrand web site, the kits really are rather simple, though they do have some rather small parts.
Instructions are CAD drawings of two positions of the model, allowing the placement of all the parts to be noted. On the other side is a brief history of the Sperrin and a painting markings guide. The Sperrin is in unpainted metal, the P.1127 in aluminum paint, the SB.5 in Silver over Black and the Javelin in standard RAF camouflage of green/grey over light grey. There are two decal sheets, each with half the markings. Anigrand decals work well, though have difficulty with any setting solutions I've ever tried on them.
 I'll start out the construction description by saying that this is one very nicely engineered kit. Even test fitting parts showed that Anigrand has come a long way and this has to be about the best they've done in terms of general parts fit.
On this one, I started the gluing by first filling the nose with ballast. I'm not sure how much it took, but I determined what was right by taping the wings and tail surfaces in place and then taping weight on the nose. Then I glued the weight in the nose and added a bit more before closing the fuselage halves.
I used superglue for not only the cement, but to fill most of the gaps. Standard Tamiya grey putty was then used to smooth things out. This was true when I attached the tail planes as well. The wings first had the engine compressor sections painted aluminum, then glued onto one wing half. The outer wings are one piece, but the section with the gear bays and lower engine cowling is separate. These were then glued together once the compressor sections were dry. The fit of both parts is really superb.
The vertical tail and the stabs were next. Again, fit was pretty good, though as I do on seeming all my kits, filler was needed along the joins. Same for the wings when those were cemented in place. In fact, as the wings were a ssembled, they'd give a definite anheadral, which was not the way the plane was built as the wings are supposed to be straight. For this I cemented the top of the wing then applied accelerator when it was straight. Then the rest of the wing that stood proud of the fuselage was filled with super glue and left to dry. Usual filler followed, but at least it was all straight.
The interior has little but two seats in it so the two seats were glued in place and later it was all painted black. Interestingly, the two seats are quite different from each other. No indication is provided in the instructions as to which goes where so you have a 50% chance of getting it right.
While the seats were drying, I decided to install the landing gear. After all the entire aircraft will be pretty much the same color. The nose gear fit quite well. The main gear also fit after one side had a bit of trimming done to it as the hole wasn't exactly the same size. I noticed when test fitting that if the main strut bottomed out, it would provide the aircraft with a nose down stance that was not correct. As such, I only glued the rear brace, leaving the main strut un-cemented until it would be on its wheels. There is 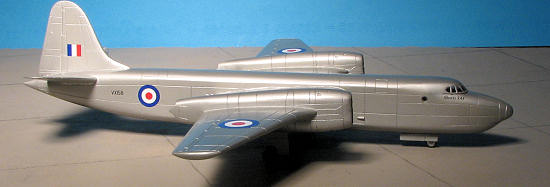 another strut to help support the main gear. This has a little cup on it to attach to a small pin on the gear. A nice idea except that Anigrand molded them both the same. This means you have two for one side and none for the other. Out came the pin vice and one was drilled through so it would fit. Then it was time for the moment of truth. Did I have enough nose weight. NO?? Well, out came the lead sheet and a section was added to the interior as the back bulkhead You can see this in the image above. Figured no one would notice it, especially if it was painted black with the rest of the cockpit. It did cure the tendency to tail sit.
With the cockpit painted and dry brushed, it was time to attach the cockpit transparency. Fit here was only fair as there was a rather good gap at the rear. I
 As one who is terminally lazy and would rather do a painted rather than bare metal aircraft, I looked through the web until I found a photo of the Sperrin in overall aluminum lacquer: the RAF's High Speed Silver. I've included that photo here to show I'm not faking it. As you can see, there is not even a hint of the difference in hue on various panels that would be typical of an unpainted metal aircraft.
After digging around for something suitable, I finally came across a tinlet of Xtracolor enamel that worked like a charm. When it was dry, I applied the decals. To my delight, these actually conformed to the engraved lines after an application of Solvaset. Be advised that the color box art shows the fin flash in reverse. The red should be forward.
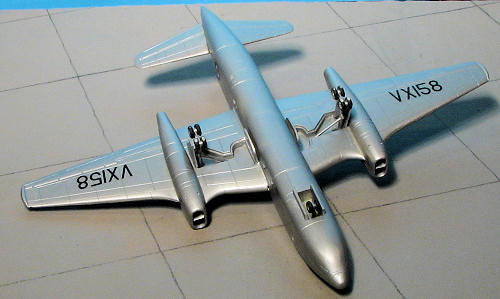 With the airframe done and decaled, it was time to add the wheels and gear doors. The doors were cut and along with the wheels, were painted in preparation for attachment. I found that one of the nose wheels was missing. Whether it was not included or went astray during the build is unknown, but it did have me scrambling to find a replacement of some sort. What I found was the wheel backing on a 1/72 landing gear strut. I'm not sure what it was for, but it was the proper diameter. I rounded the edges, drilled a hole in it and painted it. Not as nice as the resin one in the kit, but adequate. The wheels were glued in place as was the main strut. It still ended up balancing on the bogies with the nose wheel slightly in the air, but a bit of sanding at an angle on the bottom of the main wheels got things to sitting properly. The gear doors were glued in place and the masking was removed from the cockpit area. The last thing was a bit of clear paint to fill in the side windows.
Despite my ever-glacial construction pace, this one was a lot of fun to build. It was a very low stress kit and had fit that I thought was among the best of any resin kits I have done. If you like bombers and like those that were a bit unusual, then this one is for you.
 http://en.wikipedia.org
 April 2010
Copyright ModelingMadness.com. All rights reserved. No reproduction in
any form without express permission from the editor.
If you would like your product reviewed fairly and fairly quickly, please contact the editor or see other details in the Note to Contributors.Back to the Main Page
Back to the Review Index Page
2025