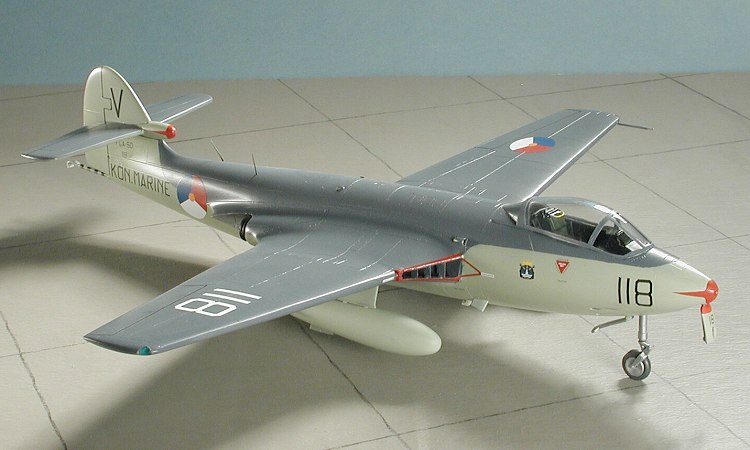
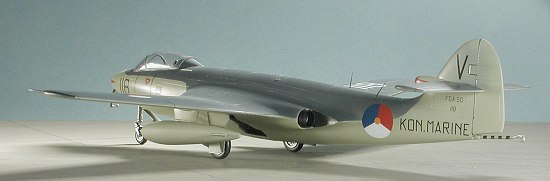
Classic Airframes 1/48 Seahawk FGA.50
| KIT # | 465 |
| PRICE: | $55.00 MSRP |
| DECALS: | Several options |
| REVIEWER: | Scott Van Aken |
| NOTES: | Includes resin and etched metal parts |
| BACKGROUND |
| CONSTRUCTION |
 As with all kit that have a lot of resin, much time was spent sawing off resin blocks and generally cleaning things up. Though not exactly the primary part of the instructions, I wanted to make sure that all the resin bits fit. For the cockpit, this meant installing the partial nose well. The instructions tell you that you'll have to trim a lot from the cockpit tub and they are not kidding as this took a considerable amount of time to get properly cleaned up to where it fit well.
Once that was done, I cemented in the intakes and while they were drying, painted the main gear well in aluminum. The tail halves were glued together as were the tail planes. When dry, the inevitable seams were filled and things were sanded smooth. I then set them aside until later in the build. The wings were a bit of a poser. Literally. The kit only supplies the wing root detail and not any actual folding mechanism for the wings. While not exactly a lot of stuff is in there, having some sort of piping and hinge stuff would have been helpful. Being the lazy sod I am, I decided that this one would be wings down. Now for the next question. Does one glue the wings to the fuselage halves and reinforce the join with strip styrene, or glue the wings together and butt them up against the fuselage roots?
 Leaving that burning question for a while, I glued the engine intakes into their proper locations in the lower fuselage. I then test fit the main wheel well to be sure that it fit properly. I was so glad that I didn't have to take off all the resin plug as it took an age as it was! Then I glue in all the small resin boxes to the inside of the upper cockpit section as shown in the instructions. The control stick was also glue into the cockpit.
This made for a good time to do a bit of preliminary painting. Using Duralumin Alclad II, I painted the main wheel wells and the inside of the gear doors and landing gear. I was going to paint the interior bits with British Interior Green, but the instructions stated that a dark black/grey would be more appropriate so that is what I used, mixing a bit of black with 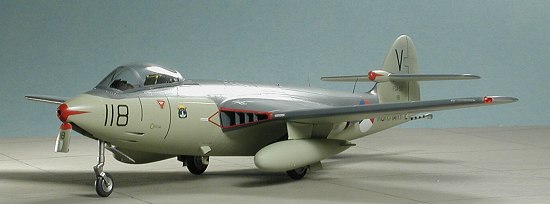 a lot of Neutral Grey. Still came out near black. The etched instrument panels were painted flat black and I painted the back of the instruments with ivory. Then the plastic instrument panel was glued in place. While that dried, the three acetate instruments were glued to the back of the etched panels using clear paint. This works great as long as there is no stress on the parts. Best of all, you don't have to sweat the mess that is sometimes made when one uses superglue for this. When all that was dry, again using clear paint, the instrument panels were cemented in place and left to dry.
Then the interior was dry-brushed with aluminum to bring out some of the details. With that done, the time had come to get serious about some gluing. With the intakes already in, I tackled the main wheel wells. I then glued in the cockpit section to the upper fuselage half. Fit here was quite good, but I found that I'd not sanded away enough on the bottom to get it to properly fit. Breaking out the coarse sanding sticks, I wailed away at it until the bottom of the cockpit was paper thin. I then 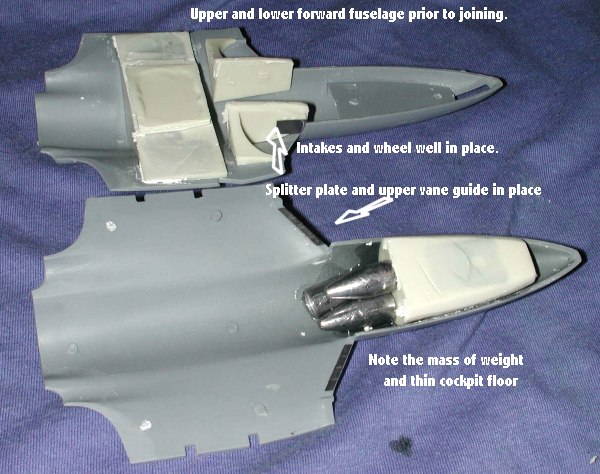 lined things up and while there is a thin gap along the forward fuselage, using thick super glue should provide the proper stick and fill the gap as well. Before that happened, I'd need weight. Gluing in a bunch of my largest fishing weights behind the cockpit, I figured I had enough.
At this time I also glued in the small metal splitter plates to the intakes. I also glued in the guide parts for the intake vanes on the upper intakes. These are numbered backwards in the instructions so be aware of this. With those in place, I painted the 'back' of the intakes with flat black and the rest of the intake with Extra Dark Sea Grey. In truth, you could paint the whole intake with EDSG as the intake is not very large to begin with. After all these bits were glued in and solid, I glued the front of the fuselage with super glue. I used some accelerator on it and then applied a second layer to the outside to fill in holes. The area around the intakes and exhaust were glued with regular styrene cement.
Now for the exhaust. Again, the kit numbers for the exhaust housings are reversed, but the proper sides are printed on the back of the part. The instructions would have you do some sanding (I guess), but I found that I could fit them in place without any real fuss. I glued the exhaust nozzles onto the housings and then glued the housings in place. While that was drying, I drilled out the nose (as it seems there is a fresh air inlet there). The nose was not circular but oval on the very front so I had 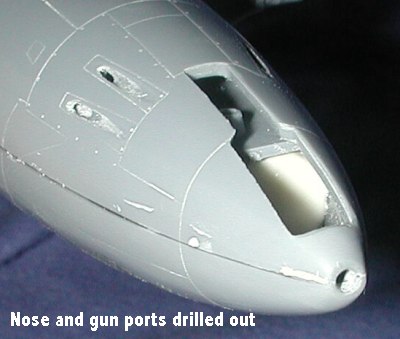 to do some judicious sanding to get a more rounded appearance. I also chamfered the intake as shown in photos. Turning to the underside, I drilled out the gun ports and deepened the very shallow troughs. Later lengths of tubing will be inserted to represent gun barrels.
Moving to the rear. It was time to attach the rear fuselage. This wasn't going to be an easy fit as it is basically just a butt fit with only the small tabs on the exhaust housings to help. It was apparent that the cross section of the aft fuselage and the forward fuselage join were not exactly th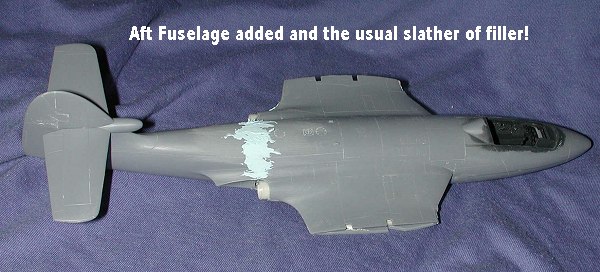 e same. Fortunately it was close so, using superglue, I squeezed the parts until they lined up and then hit the fuselage join with accelerator. It is important to use a semi-slow drying super glue for this. The oozed super glue was sanded down as was some of the surrounding fuselage that just didn't match up perfectly. The area was then slathered with filler and sanded smooth.
As I often do with kits, I decided to add red and green wing tip formation lights using clear colored plastic. These are made from swizzle sticks, but you could use old tooth brush handles or just about anything else that is made of clear red or green plastic. In most cases, this only takes a few minutes to do, and that includes the sanding. Some I know use superglue to 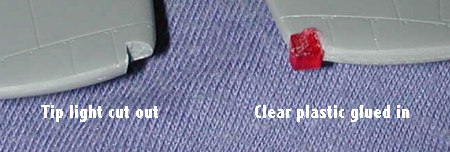 attach the bits, but I just use regular styrene cement and let it dry before attacking it with sandpaper. The steps are easy. First, you cut out the old wing tip formation light. I use a razor saw. Then you lightly sand the inside until it is smooth. Taking your colored plastic, cut a cube that will be a bit larger than the opening. Glue it in place, pushing it into the crevice to make sure all is covered. When it is dry, simply sand to shape using sanding sticks. Once it is close, then use finer and finer grits to get it down to the exact size and then polish it with your usual method or with super fine sanding papers. Actual work takes about 5 minutes per wing.
With that done, I used the little rectangular blocks supplied to make sure the wings are not too thin as tabs for the outer wing section. Then, after much test fitting and gentle sanding, I glued the wings in place. The fit was surprisingly good. On both 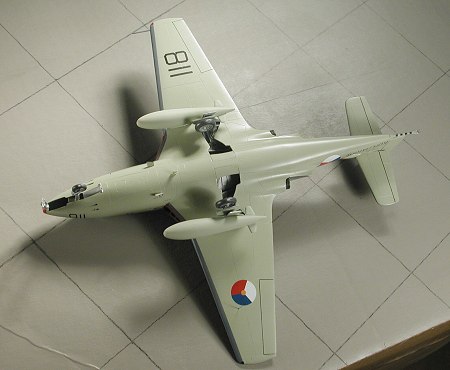 wings the rear of the outer section seemed to want to ride a bit high, but that was taken out when I did the usual sanding on the seam. There were several gaps on the hinge line as well as at the leading edge so the use of filler is inevitable, no matter how much you'd rather not use it.
Once the filler had dried, I took out my killer 240 grit sandpaper and sanded down the really bad spots. Then, going over the areas again with finer and finer paper, I managed to get things nice and smooth. Next, I spent some quality time rescribing the panel lines that had been lost. Really wasn't as bad as I had originally thought so things were quickly back to normal. I then glued in the tail plane, which was a really simple job. I used super glue and accelerator to make sure that things were properly square. Then I added some smaller bits to the fuselage, which included the hold-back hook, two shell ejector chutes (I thought it odd that there were but two, but the references said that was correct), and a small intake on the right side. The small engine inlet 'grilles' were next. While they did fit in well, I think I used too much glue. I also glue on the two inner pylons as I was going to use the drop tanks. The holes in the wing and the tanks need to be drilled out and made larger than they show on the plastic. The last item in this list was the gun sight. Since part of the canopy overlapped the aft section of the rear cockpit 'bump', I masked the cockpit, the wheel wells, formation lights, and went to do some painting.
| COLORS & MARKINGS |
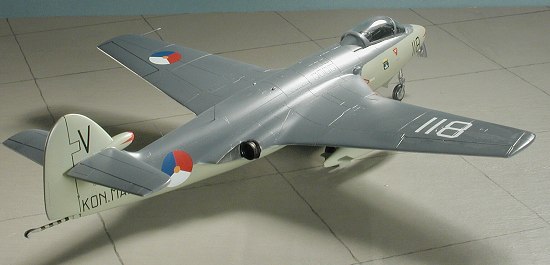
I chose an Extra Dark Sea Grey over Sky aircraft and since I had some Aeromaster Acrylics in those colors, I decided to use them. I generally don't like acrylics, but since this was a masking scheme with no free-hand work needed, acrylics would be just fine. You can spray these right from the bottle, but due to their age, I decided to thin them a bit with rubbing alcohol. First was the lower side with the Sky. When dry, I started spraying the EDSG. This overlaps the forward leading edge, but masking would be much easier by masking the EDSG so I wasn't too concerned about overspray at this time.
 While all that was drying, I painted the seat black with a yellow seat cushion and dark green cushion black. I also glued in the seat harness, which was painted medium blue and the pull handle, which was painted yellow. Thanks to Tom Cleaver for the color info. I also cleaned up the landing gear and painted them and the wheels with Aluminum using Alclad II. The inside of the gear doors also got this treatment. They could have just as easily been painted Sky of you are so inclined.
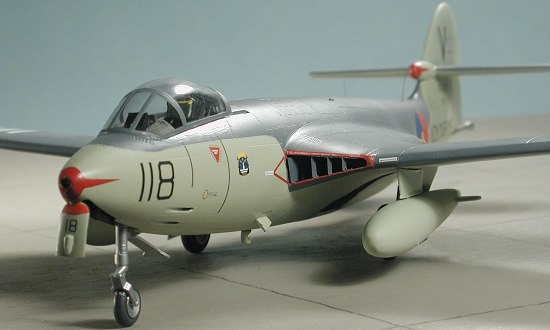
I then masked off the EDSG portion of the airframe and painted the rest of it with Sky. After removing the masking, I noted that I needed to paint the intake 'lips' in red for the version I was doing. Some more masking and a bit of red paint took care of that. Of course, it meant that I'd have to repaint the intake grilles because of the overspray.... No matter and once that all dried the kit was returned to the work bench to have the landing gear installed.
 Installing the gear was an easy enough job. The mounting holes for the main gear were perfect and both gear legs were a nice tight fit. No problems with the various retraction struts either as they fit well. The nose gear needed to have its tab filed down about half as the hole was too shallow. Again, no problems with that, either. The nose wheel is trapped between two halves so some additional clean-up is needed once the wheel is installed. The front axle is also too skinny and I had to glue the wheel solid. With it on its wheels, I gave the kit several coats of clear acrylic gloss in preparation for the decals.
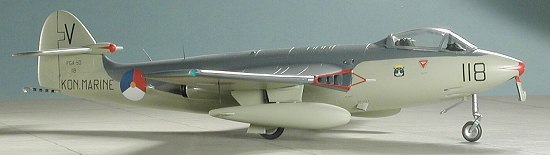
I chose the Dutch FGA.50 version as I figures most everyone else would do one of the RN schemes. The decals are by Microscale and beautifully done, as always. I had no trouble at all with the decals. You are given small decals for the nose and tip of the fin 'bullet'. I had no delusions about these fitting perfectly, but they did do a very credible job. Fortunately, the color is easy to match and I just used a bit of paint to take care of the gaps. Couple of things I noticed with the decals. First of all, the stripes for the tail hook are too short and only cover about 1/3 of the circumference of the hook shaft. I put mine on the bottom and then 'colored in' the rest. The red part of the upper nose gear door is too small, and there are no decals for the drop tanks. Most photos I've seen of these tanks has them festooned with warning and service markings.
| FINAL CONSTRUCTION |
 With the decals in place and the usual touch-up painting done, the next job was to attach the gear doors. The inner main gear doors are normally up unless the gear is cycling or the aircraft undergoing maintenance. Fit of these doors is quite good. Same with the lower main gear doors. I should mention that all will need some clean-up as the sprue attachment points intrude onto the door edge detail. The larger main gear doors don't quite match the slots they are to fit into. The situation is that there is a notch in the aft part of the door that is not in the kit doors. A simple cut with a hobby knife will put that into place and make the fitting of the door just fine.
Now that the main gear doors were in place, it is time to move to the front. Well, the forward door not only doesn't have a solid connection point, it isn't exactly the same shape as the forward well. The door is curved at the top, while the well is more rectangular. You can fix it if you want (the wheel well, that is), but I left it alone. The aft forward door mounts nearly horizontal with the underside of the fuselage so take care in this regard.
 I then mounted the canopy using white glue. The fit is fair and the white glue helps to blend things a bit. The aft section should be much thinner to mold to the shape of the rear fuselage hump that is there. You can probably grind down on the canopy, but I left well enough alone. A vac canopy might not be a bad idea for this as it would be thin enough. Then I drilled holes for the pitot tube and three small antennas. The pitot tube was attached with normal glue while the antennas were attached with clear paint. I also bent the heck out of them and will probably replace them with short lengths of stretched sprue later on (as I either lose them or mangle them beyond use). Final addition was the tail hook.
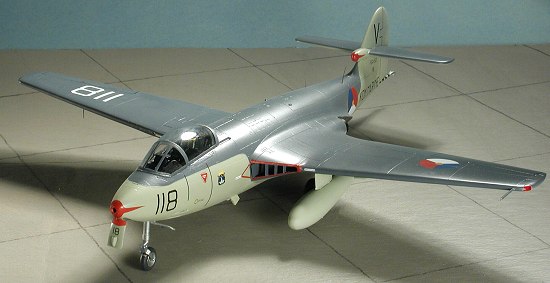
The model then had a coat of semi-gloss clear sprayed on it to seal things in, while I went about and did more touch-up painting. I then pushed the drop tanks onto the pylons. These interfere a bit with the gear doors so it might be a good idea to mount the inner pylons a touch farther outboard. I pulled the masking from the canopy and the formation lights and the kit was done!
| CONCLUSIONS |
Well, this one went rather well. I started on a Saturday and finished Thursday, surely a record for me and short run kits. Yes, it has some issues that will need to be dealt with during the build, but nothing really major that anyone who can handle sandpaper and filler won't be able to fix. Probably the fussiest part of the build were the little metal guide vanes on the intake. 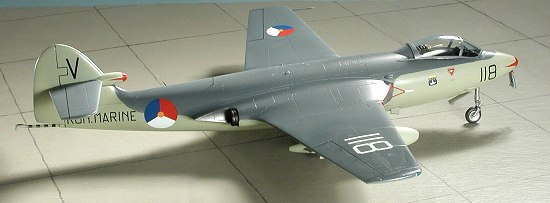 I'd like to see that whole thing as a resin cast. Of course, one could do an earlier version of the Sea Hawk that doesn't have them, or take the easy way out and make intake covers!
Two other things. One is that I decided against installing tubing for guns. They are not that readily apparent anyway and I was hit with overwhelming laziness when it was time to get to that part. The other is that this model has no pre/post-shading or grunge on it. My choice, so you can warm up those keyboards and start sending me those "How could you not...." e-mails!
Anyway, this is a very nice kit that really isn't that difficult a build. It is one that I like and can recommend for those who don't like vacuforms and are ready to tackle something a bit more of a challenge than a Tamiya kit.
| REFERENCES |
Hawker Aircraft since 1920, by Francis K Mason, 3rd Edition, 1991, ISBN 1-55750-351-6
August 2004
# 1325 in a series
Copyright ModelingMadness.com. All rights reserved. No reproduction in any form without express permission from the editor.
If you would like your product reviewed fairly and fairly quickly please
contact the editor or see other details in the