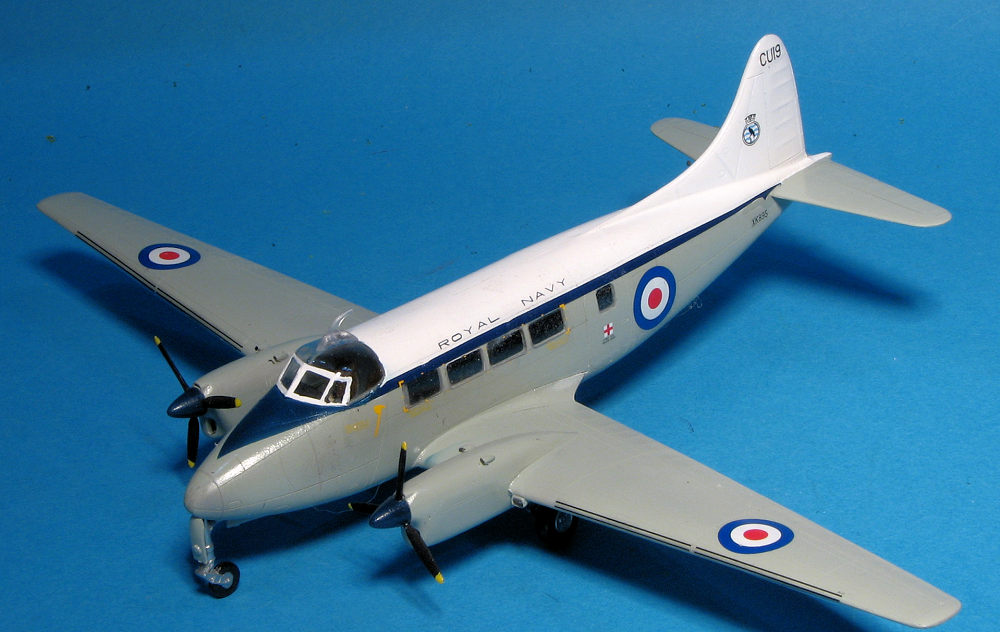
Amodel 1/72 DH-104 Sea Devon
| KIT #: | 72294 |
| PRICE: | @$40.00 by the time it gets to your door. |
| DECALS: | Four options |
| REVIEWER: | Scott Van Aken |
| NOTES: | Short run with photo etch fret. 2018 tooling |

| HISTORY |
The de Havilland DH.104 Dove was a British short-haul airliner developed and manufactured by de Havilland. It was a monoplane successor to the prewar de Havilland Dragon Rapide biplane. The design came about from the Brabazon Committee report which, amongst other aircraft types, called for a British-designed short-haul feeder for airlines.
 The Dove was a popular aircraft and is considered to be one of Britain's
most successful postwar civil designs, in excess of 500 aircraft being
manufactured between 1946 and 1967. The type saw considerable success in the
role for which it was envisioned, operating with small feeder airlines from
small or unprepared landing strips.
A longer four-engined development of the Dove, intended for use in the less developed areas of the world, was the de Havilland Heron. A considerably re-designed three-engined variant of the Dove was built in Australia as the de Havilland Australia DHA-3 Drover.
In excess of 50 Doves were sold to various operators in the United States by Jack Riley, an overseas distributor for the type. De Havilland later assumed direct control of U.S. sales, however did not manage to match this early commercial success for the type.
| THE KIT |
This is one of those kit buys that was inspired by a decal sheet. Though Airfix does a nice Heron in 1/72 scale, no one did a Dove/Devon. Amodel has now come to the rescue and this is their Devon boxing.
The instructions start in the cockpit and the amount of detail is adequate for this scale. Somewhat generic seats and no belts, but one does wonder how much will be seen through the transparency. The nose gear well has to be built up from four parts and the engine nacelles are also four pieces. There is no allowance made for the props to spin so you'll have to devise something from tubing or the such for that.
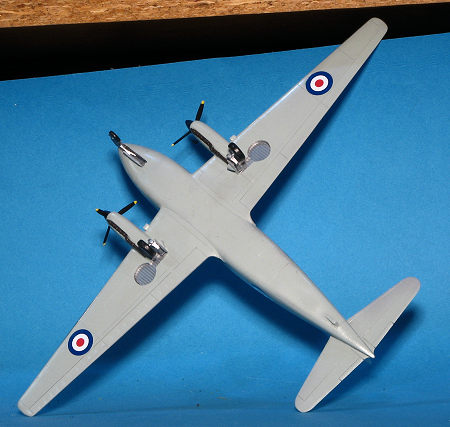 Before installing anything into the fuselage halves,
the cabin windows are installed. The instructions show these being attached from
the outside. I'd do a test fit to see if these could be left off until after
painting. Conversely, you can prepaint the areas around the windows. With that
done, the nose gear is attached to the nose well and that along with the cockpit
is installed. There is no indication of any weight, but I'd put in as much as
you can fit as bet it needs some.
With that done, the tailplanes are attached followed by the wing. There is a single lower piece and two upper halves. The wing will need filler. You see, in order to cast such a large piece, the sprue attachment stub had to be large and is in the middle of the wing. Removing this stub leaves a large hole in the lower wing so break out the card/filler and prepare yourself for some dedicated filling. I'd use a two part filler or super glue as that much one-part filler will shrink with time. With that on, the cockpit transparency is glued on. You are provided with two. For these markings options you use the one with the side windows.
The next couple of steps have you install the engine nacelles along with the various landing gear legs, wheels and doors. You'll notice rather quickly that the wheel wells are too shallow to actually hold the wheels, but, if you want to model this gear up, simply use one half of the wheels and perhaps sand down the gear leg. Then you attach the props and determine if your option has the radio feed in the upper cockpit transparency.
 But wait, this kit comes with photo etch. What about
that. Well, there is another sheet included that replaces the final construction
step. This includes external stuff like windscreen wipers, static dischargers, a
variety of antennas and a mounting plate for the roof antenna. The construction
step tells you which bits to use for which marking option.
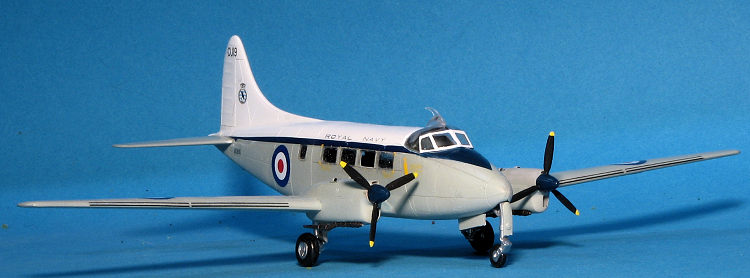
Speaking of which, you get four in this kit. Well, there are only two liveries with Martin's Air Charter (which became Martinair) having options for three planes. Two of those three are the same registration but with different names above the windows. The fourth option is with Transportes Aereos de Timor. All four options are in bare metal with white upper fuselage/tail. The TAM plane has the large red cheat line. Decals are quite matte and in perfect register. There are aftermarket sheets available for this kit if you don't like the kit options.
| CONSTRUCTION |
As you might expect, I started this build by removing the
major pieces (upper wing halves and fuselage halves) from their sprue and
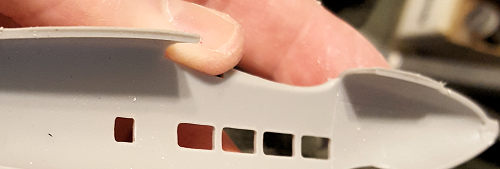 cleaned those up. The fuselage in particular had the sprue gates attach on the
mating surfaces. This generally causes me to oversand when removing them. One
plus is that, without alignment pins/sockets, I could sand both sides pretty
much the same. The lower part of the fuselage halves had a fairly large and
thick lip that had to be sanded down as well. The lower wing piece got several
applications of super glue to fill the hole.
Then standard construction could begin and this was the cockpit. One thing I noticed is that quite a few of the thicker parts had sink areas on them. This is not unusual in these sorts of kits and one can choose to fill them all or leave them be, depending on where they are located. While slowly building up the cockpit, I decided to test fit one of the transparencies. The instructions show them fitting from the outside. So I removed one and cleaned up the sprue attachment point. It did not fit. It does fit backwards, but each piece is curved slightly to conform to the fuselage exterior. I sanded the edges at a bit of an angle and that was enough to get the piece to fit properly. Now I know how to deal with this when the time comes.
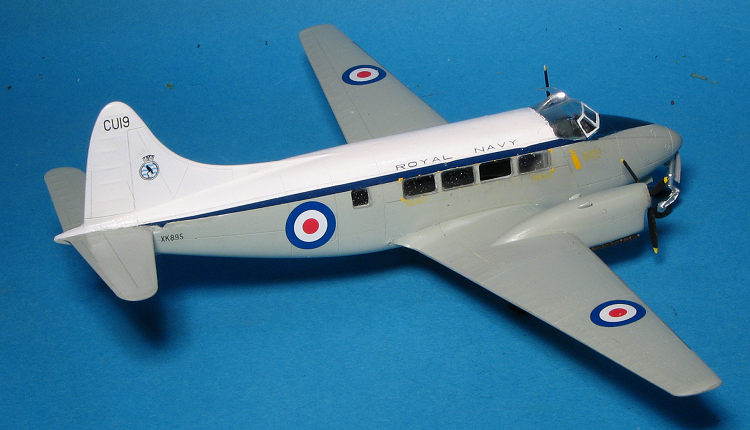 I also decided to build up the engine nacelles. The cowlings
are three pieces plus a front. These bits are all butt joins like most
everything else in the kit. Look carefully at the pieces when cementing as the
upper portion of the cowling has engraved areas for the attachment of a couple
of cooling scoops. Quite a bid of adjusting around while the cement is still wet
is required. Note that the front is narrower than the rear and the bottom more
square than the top at the back of the cowling. Once the seams were dealt with,
they were put in the box until after the wings were assembled.
Back at the cockpit, the control wheels and columns were installed. These were a bit tricky as they are close to the seats so perhaps installing these before the seats would be a good idea. The wheels themselves were very flashy and difficult to clean up. These were attached as was the rear bulkhead and the assembly was left to dry. I then decided to paint the interior bits. The little icon for a paint color did not have a matching color anywhere in the instructions. A look on the 'net showed a grey of some sort so I used Ocean Grey to paint the cockpit and the cabin interior. With no seats in the cabin, a fairly dark shade like that seemed appropriate. I also painted the outside of the fuselage around the windows with Light Aircraft Grey (actually FS 16473 ADC Grey). That way I wouldn't have to deal with masking the individual windows when the time came.
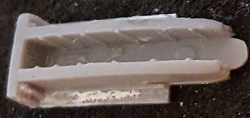 Sanding and installing the windows was a bit on the tedious
side, but eventually I got them all in place and covered the with tape. When I went to glue in the nose
gear well, I realized that the instructions had led me astray. I had glued the
side walls on the outside of the guides as shown, but they needed to go on the
inside. I pulled the assembly apart and reglued the parts, thus allowing the
well to fit into the fuselage as it should. At the same time, I installed the
nose gear retraction strut, but left off the nose gear when I glued it in place.
It meant cutting off the mounting tabs on the gear leg, but it also prevented me
from breaking it during handling. It worked out just fine in the end.
During this time, I finished building up the interior by adding tape belts and attaching the sidewalls and the instrument panel. To get the sidewalls properly aligned, the bottom was cemented to the floor, the interior placed into a fuselage half and the sidewall clamped to the interior of the fuselage.
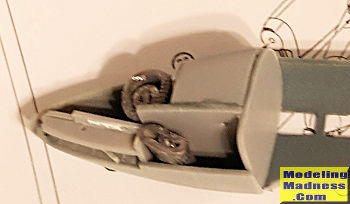 Then the
fuselage halves were joined together after putting what I thought was enough
weight into the nose. It turned out that it was not so I'd recommend filling all
the empty space you see under the cockpit and in the nose as well. With all that
in place, I joined the fuselage halves. This was a job that required some
clamping and I used superglue followed by some accelerator just to keep some of
the areas closed. It turned out that the cockpit is a bit too wide so there was
little to do other than fill in the seams and hope for the best. It turns out
that even with
 the
additional width, the canopy part was not too narrow for the opening. With
that done, I attached the upper wings first as the area to the rear of them is
rather complex and I'd not have gotten a good fit otherwise. Then the lower wing
was glued on and this was followed by the tailplanes. I initially put them on
upside down, giving the tailplanes a V like on the Heron, but these are flat and
were quickly switched before the glue set.
Next was the engine installation. These are not the best fit, but some sanding and file work got things fairly close and the usual filler got a smooth join. I left off the engine fronts to check on the balance. Sure enough, I needed more nose weight, especially as the main gear lean forward a bit. Lead sheet was rolled up as in the nose and installed in the front of the nacelles. These need to be set back a bit so that the engine intake bit can properly mate with the cutout inside the nacelle. Once the fronts were attached and smoothed out, the small intakes were added atop each nacelle and the carb intake on the wing leading edge were cleaned up and glued on. Time for paint.
| COLORS & MARKINGS |
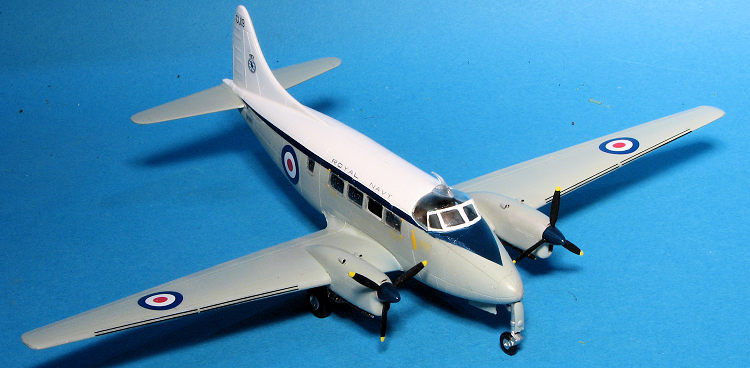 ky
to the touch. I masked the canopy with liquid mask, an evolution that did
not go as well as I'd have liked. If anyone does a masking set for this
plane, buy it. The canopy section was attached using clear glue from Japan
that holds very well. Then the upper section and fin were painted white.
 | CONCLUSIONS |
As short run kits go, this one is quite good. There are the usual issues of fit and flash with a sink area or two, but overall, it turned out rather well. I've always liked the Dove and it flew with a lot of different nations and small airlines. Amodel's offering is one that, barring the sort of screw ups I made, turns into quite a nice model.
| REFERENCES |
https://en.wikipedia.org/wiki/De_Havilland_Dove
31 May 2019
Copyright ModelingMadness.com.
All rights reserved.
If you would like your product reviewed fairly and
fairly quickly, please
contact
the editor
or see other details in the
Note to
Contributors.
Back to the Main Page
Back to the Review
Index Page
Back to the Previews Index Page