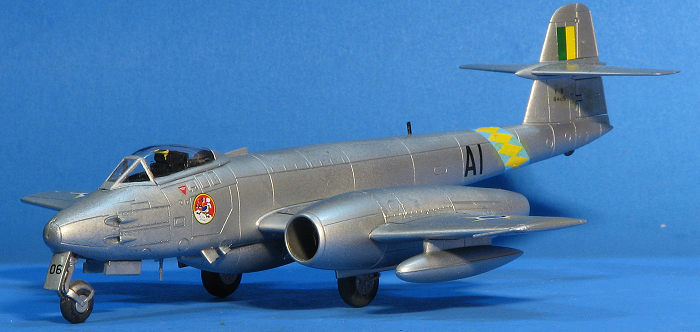
Airfix 1/72 Meteor F.8
| KIT #: | A04064 |
| PRICE: | $21.00 |
| DECALS: | Three options |
| REVIEWER: | Scott Van Aken |
| NOTES: |
2022 tooling |
| HISTORY |
 The first viable Allied jet fighter was the Meteor. Such was the ability
of the airframe to accept newer and newer engines that Meteors were flying in
the skies of the world for many years and in cases decades after the initial
aircraft first flew. Much of the success of the Meteor was that it was a basic
aircraft and other than its power plants, did not break any new ground.
The first viable Allied jet fighter was the Meteor. Such was the ability
of the airframe to accept newer and newer engines that Meteors were flying in
the skies of the world for many years and in cases decades after the initial
aircraft first flew. Much of the success of the Meteor was that it was a basic
aircraft and other than its power plants, did not break any new ground.
Not only that, but the type was easy to fly and easy to maintain, a trait that put it in good staid with the export market, where it sold well. It was also developed into a viable night fighter and even decades after it was out of front line service, there were Meteors flying in specialty roles such as drones and ejection seat testing. I'm not sure if any are in the hands of war bird enthusiasts, but I would be surprised if there was not at least one.
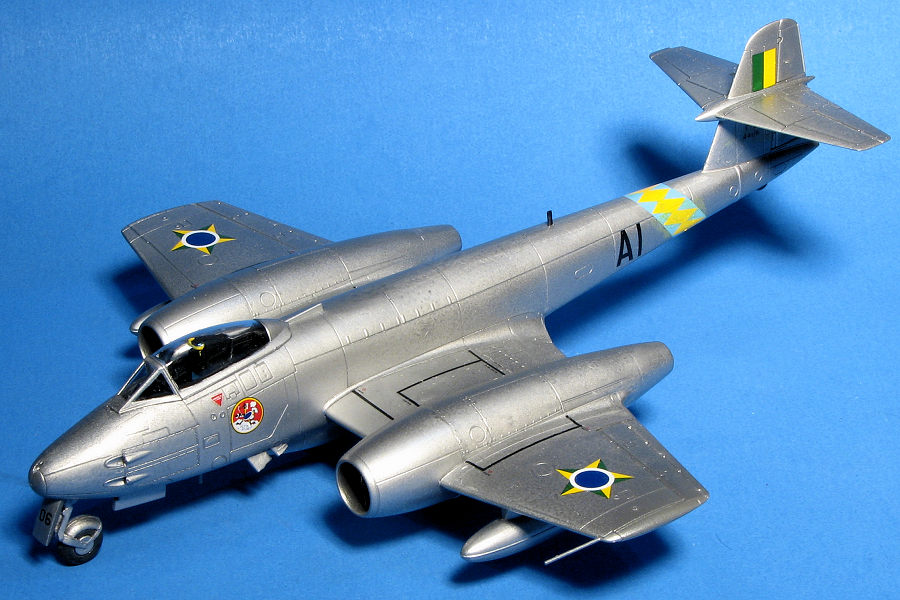
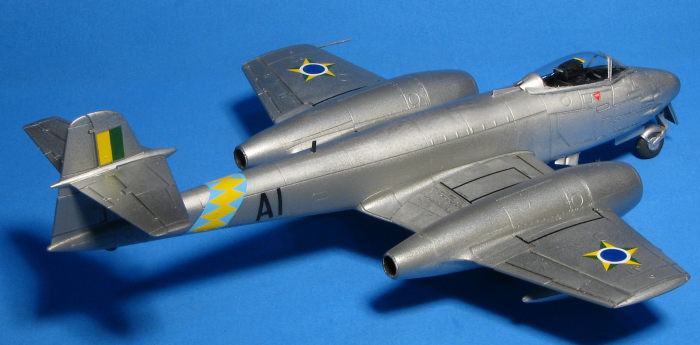
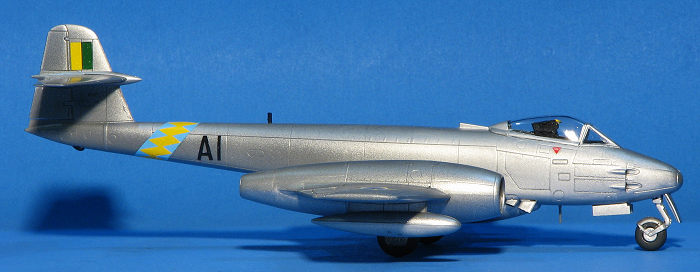
The ultimate fighter version was the F.8. This was the third major production type following the F.3 and F.4. It can be easily identified from the previous variants by the more square tail and longer length, which allowed great fuel capacity.
| THE KIT |
 It was nice to see Airfix release this kit as previously, what was
available in this scale was only in short run from Special Hobby as well as the
ancient Frog offering or the very difficult Merlin kit. There were also some
conversion sets and vacuform kits.
Probably missed some, but I'm old and I can do that.
It was nice to see Airfix release this kit as previously, what was
available in this scale was only in short run from Special Hobby as well as the
ancient Frog offering or the very difficult Merlin kit. There were also some
conversion sets and vacuform kits.
Probably missed some, but I'm old and I can do that.
B
 That brings us to step 38, which starts us assembling and
installing the tailplanes. Then we move to the nose and build up the rest of the
nose gear attachment points before assembling our choice of nose halves and
attaching those. When it comes to landing gear, the wheels are in right and left
halves and keyed to fit into slots on each gear half. Gear doors have hinges so
no butt joins on this one.
That brings us to step 38, which starts us assembling and
installing the tailplanes. Then we move to the nose and build up the rest of the
nose gear attachment points before assembling our choice of nose halves and
attaching those. When it comes to landing gear, the wheels are in right and left
halves and keyed to fit into slots on each gear half. Gear doors have hinges so
no butt joins on this one.
| CONSTRUCTION |
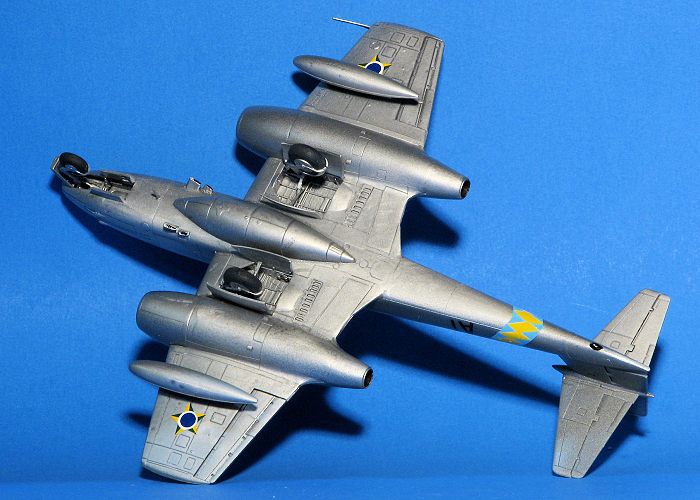
 When
building the landing gear, I ran into issues closing up the area around the
wheels. Getting the wheels glued together wasn't the issue. What was the
issue was getting the fenders properly closed. All three of these features
have a fairly large gap. I recommend some aftermarket landing gear for this
one. I had little issue building the wings, but again, it is wise to test
fit everything as many steps in advance as you can. I then attached the
wings and after making sure I had enough nose weight, I went to install the
nose cap. Fit on this was not good and required filler and sanding to get a
fair fit. Finally, when attaching the windscreen and canopy I ran into
issues. The instructions are not all that clear on fitting the windscreen,
but basically it fits inside the fuselage halves. For the canopy, I had to
leave off the section that fits in the back in order to get it to fit on the
fuselage.
When
building the landing gear, I ran into issues closing up the area around the
wheels. Getting the wheels glued together wasn't the issue. What was the
issue was getting the fenders properly closed. All three of these features
have a fairly large gap. I recommend some aftermarket landing gear for this
one. I had little issue building the wings, but again, it is wise to test
fit everything as many steps in advance as you can. I then attached the
wings and after making sure I had enough nose weight, I went to install the
nose cap. Fit on this was not good and required filler and sanding to get a
fair fit. Finally, when attaching the windscreen and canopy I ran into
issues. The instructions are not all that clear on fitting the windscreen,
but basically it fits inside the fuselage halves. For the canopy, I had to
leave off the section that fits in the back in order to get it to fit on the
fuselage. | CONCLUSIONS |
Despite the issues I ran into, I know what to look for next time and so will do better on whatever additional kits I build. This one is considerably easier to build than the Special Hobby version and the one to get.
30 January 2026
Copyright ModelingMadness.com. All rights reserved. No reproduction in part or in whole without express permission.
If you would like your product reviewed fairly and fairly quickly, please contact the editor or see other details in the Note to Contributors.