Frog/Novo 1/72 Sea Venom FAW.21
| KIT # | |
| PRICE: | $ |
| DECALS: | none |
| REVIEW : | |
| NOTES: | This was a Russian repop from the early 80's |
| HISTORY |
The rather dumpy looking Sea Venom was the R.N.'s first allweather jet fighter and replaced the lovely Sea Hornet in the mid 1950s. As weremany early naval jets, it was an adaptation of the RAF Venom, in this case theNF.2 night fighter. Like most navalized aircraft, this one was principallydifferent from its land based brethren in having an arresting hook, foldingwings and a stronger structure for carrier landings.
The first 50 aircraft were designated FAW.20 and soon replacedby the more potent FAW.21. This version had boosted controls, an uprated Ghostengine, U.S. radar, frameless canopy and Martin Baker ejection seats. Anothervisual difference was a lack of tailplanes outside the fins.\
The Sea Venom had a relatively long service life with the RN,serving from 1954 until late 1960, being replaced by the Sea Vixen. Test SeaVenoms were fitted with Firestreak missiles as a test in 1958 and were anexcellent platform, however, the now elderly airframe was not chosen to carrythem in fleet service. The type was also exported to Australia and a Frenchversion, the Albion, was produced. Several Sea Venoms are extant inmuseums.
| THE KIT |
 I'm not surehow many of my reading audience has built a Frog kit, but Frog was well knownfor producing a variety of very interesting subjects. They are one of the firstcompanies to offer multiple markings variations on their decal sheets. I do knowthat this is what attracted me to the kits. I was also attracted to them by theease of construction. To say that Frog kits were highly detailed would be a realstretch. However they provided all that one really needed at the time. They hadno recessed panel lines, no detailed cockpits, no positionable canopies, nomultiple variants. In fact, they were just simple, easy to build kits. Many ofus cut our teeth on these kits and I learned how to use filler thanks to Frog!
This particular kit was a Russian repop of the Frog kit. WhenFrog went out of business, all their molds (except the German WWII aircraft),were bought by a Russian firm. Most were reboxed under the Novo label. However,there were other packagings, with many of them, like mine, in a bag with poorinstructions and no decals. The kits were very flashy and required a lot ofclean up to build. They were also very inexpensive compared to the original Frogkits, as the originals were nearing collector status.
| CONSTRUCTION |
Then the fuselage halves were glued together. While it wasdrying, the wings and tail boom halves were glued together. The tip tanks arepart of the wing halves. Then the various seams were filled. This is anear requirement for most Frog kits. Now for the fun part. Getting the wings,tailplane, and tail booms to all line up. This was a real fun job. By the timeall was lined up, or close, anyway, I was a nervous wreck. There were also somepretty large gaps where the booms met the wings. This needed lots of filing,sanding and filling, but it can be made to look fairly good. Now I had basically a complete airframe. Test fitting the canopyshowed the fit to be rather pathetic. The only thing to do for this was to usefiller to fair it in place. The canopy was masked and several filler sessionswere done to get this part right. Then it was off to the paint shop.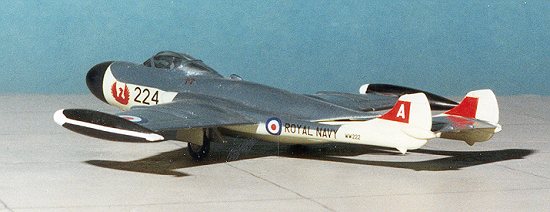 Building this beast was obscenely simple. There is very littlecockpit so that was painted black. You get two seats and a cockpit floor. Noneed to mess things up with instrument panels and control sticks, you know! Thenose was then filled with as much weight as I could put in it. These boom typeaircraft tend to be tail-sitters.
| PAINT & DECALS |
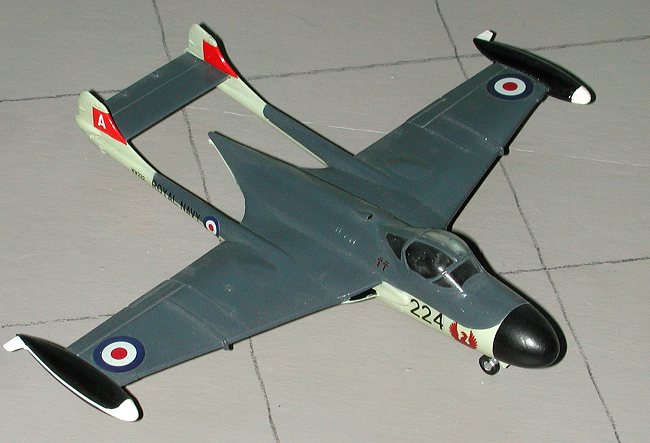
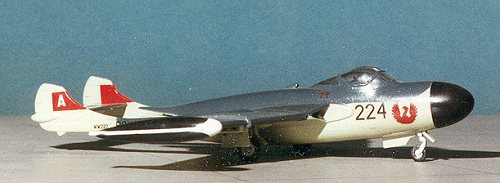
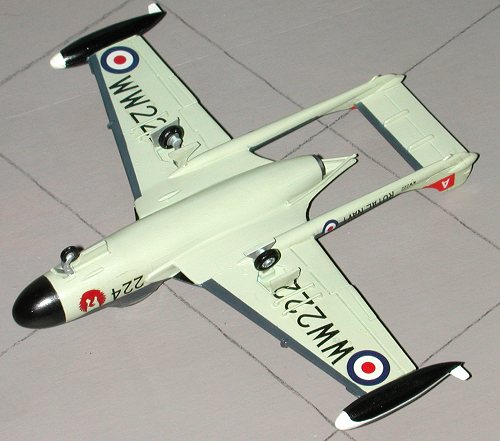 Royal Navyaircraft of this age were pretty well uniformly painted in Extra Dark Sea Greyand Sky. Actually, a pretty nice combination of colors. I used Gunze Acrylicsfor all the colors on this one. First step was to paint the nose black. Then itwas masked off and the rest of the airframe was painted sky. This was thenmasked off as needed and the rest painted EDSG. This masking bit was quitecomplex, especially the tail and nose section. A lot of back and forth paintingwas done. When dry, the wings masked and the tip tanks painted black.
All the gear doors, rocket rails and tail hook were painted skyand the struts aluminum. I had decided not to use the rockets as they were justvery badly molded. More like blobs than real rockets.
Now for thedecals. There were none with the kit, however, Modeldecal had done several SeaVenoms in their various sheets and so I chose a nice one from 809 Squadron withthe red firebird on the nose and red tail markings from the HMS Albion.
Asexpected, the Modeldecal decals were superb and fit quite well. I made sure themain gear doors were in the wells when applying the underwing serials. Thesewere later cut and the doors removed so I could continue construction. Once allthe decals were on, the tip tank markings were hand painted with white paint.Actually, several coats were needed.
| CONSTRUCTION CONTINUES |
 Finalconstruction basically consisted of applying the tail hook, rocket rails,undercarriage and doors. The doors are grossly thick and the wheels stick outfrom the struts too much. In fact, the wheels snap onto the axles and are prettytoy-like. But, that is quite typical for kits of this age. Once all had beenglued in place, the kit was given a semi-matte clear coat to seal things in.Thanks to the nose weight, the aircraft is not a tail sitter. The canopy wasunmasked and that was it.
Those wishing to add detail tothe kit have lots of room to do improvements as the Frog kit is generally prettybasic.
| CONCLUSIONS |
This is a '60s kit. When I built it in the mid 1980s, I waslooking for a basic shape that I could make look pretty. The Frog kit wasperfect. It was also the only one in this scale. In fact, the Sea Venom has darnfew mainstream kits made of it. In 1/32 there is a Matchbox kit; in 1/48 the newAeroclub multi-media kit; and in 1/72, there is this one. Though the fit isn'tthe best, I wouldn't hesitate to recommend it to almost anyone. The anal canhave a field day listing all the things wrong with it. The beginner can have akit done in no time. The rest of us can have a 1/72 Sea Venom on our shelveswithout having to sweat resin or PE parts. The only aftermarket that I know ofare seats and decals.
An additional note. Reader David Edwards informs me thatthere was an upgrade set by Tasman that added a lot to this. He also mentionsthat Aeroclub did or does a replacement canopy and bang seats for it.
| REFERENCES |
British Naval Aircraft since 1912, by Owen Thetford
November 2000
Review kit courtesy of me and my wallet!
If you would like your product reviewed fairly and quickly, please
contact the editor or see other details in the
Back to Reviews Page 2025