A&A Models 1/48 Yak-11
| KIT #: | 4801 |
| PRICE: | $59.95 SRP in the US |
| DECALS: | Four options |
| REVIEWER: | Scott Van Aken |
| NOTES: | Short run with p.e. and masks |
| HISTORY |
The Yak-11 entered service in 1947, serving as a standard advanced trainer with the Soviet Air Forces and DOSAAF. Both the Yak-11 and C-11 were used in all Warsaw Pact countries and were exported to eighteen countries, including many African, Middle Eastern and Asian countries.
North Korean Yak-11s were used in combat in the Korean War, with one Yak-11 being the first North Korean aircraft shot down by US forces when it was destroyed by a North American F-82 Twin Mustang over Kimpo Airfield on 27 June 1950. East Germany used the Yak-11 to intercept American reconnaissance balloons. The aircraft are popular with the warbird crowd and over 100 still remain airworthy.
| THE KIT |
A photo etch fret is provided for the seat harness, rudder pedals, engine fan assembly (more on this later) and a grille on the engine cowling to name a few. None of the p.e. is required if you don't want to use it. Each of the seats is two pieces while the four side consoles, that also include some of the framework, are three pieces each. A decal is provided for the instrument panels and you'll need them as the panels are otherwise devoid of detail.
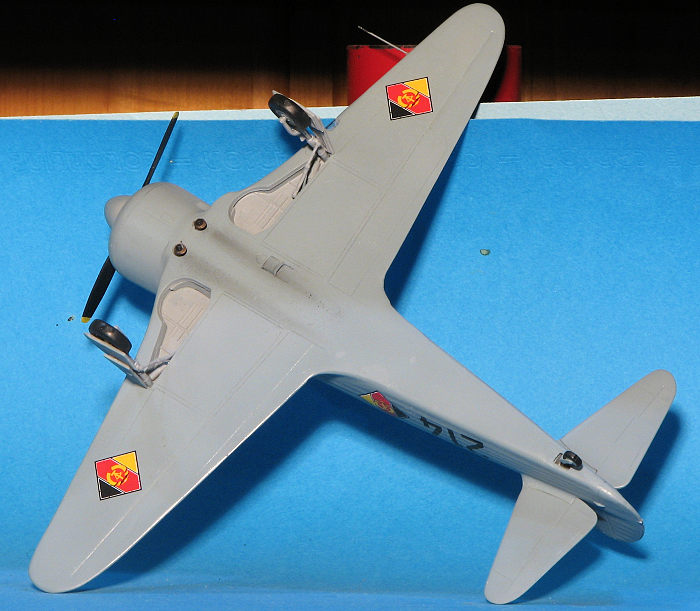
The interior bits fit on on a flat floor and there is a bit of additional interior sidewall detail that fits atop the side console framework. This is then installed into a fuselage half along with the rear self and bulkhead along with a tail gear well piece. Wings have three piece gear wells on each side and the tailplanes are upper and lower halves.
Now to the engine. Building up the engine assembly takes six full construction steps. It includes the engine mounts, a bunch of separate intake and exhaust tubes with the latter going into the final header. In the front, a p.e. circular item is used to fit over the cylinders and to this is attached the brass engine fan assembly. Now, if you don't want to do all that, you can simply use the alternative forward cowling piece that blocks any view of the engine and stick the shortened exhaust through the holes in the cowling. Will probably save a ton of time, but won't look as nice.
Each main gear leg consists of many parts and you have the option of plastic or p.e. oleo scissors. The kit also includes two piece plastic wheels or you can use the rubber donuts provided that will have plastic inserts. The canopy is a single piece and you are provided canopy masks. Also included are two styles of forward canopy mirrors that allow the instructor in the back to see what's going on from the back seat. The canopy is a bit thick and distorted, so no need to go nuts on the interior.
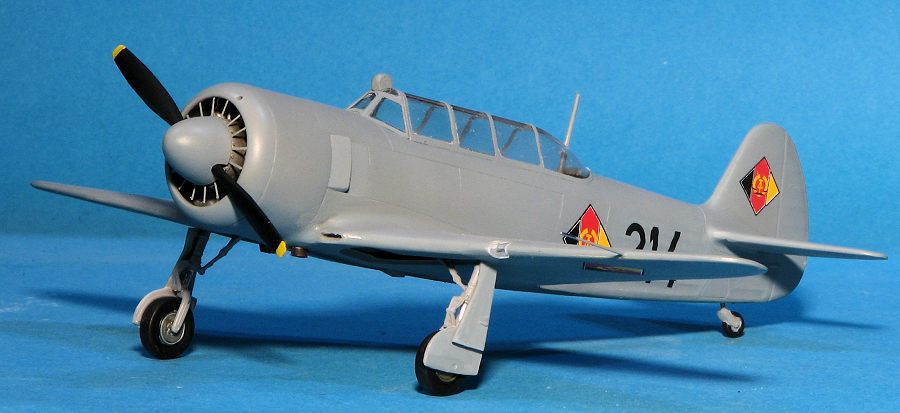
Instructions are nicely done and provide Humbrol paint references. There are four options. Three are in overall light grey and are for a Soviet, East German, and Hungarian aircraft. The fourth is in an overall light olive with yellow wing and fuselage bands from the Egyptian Air Force. The light olive will need to be mixed. Decals look to be very nice and based on other Ukrainian decals I've used, should be quite thin.
| CONSTRUCTION |
 I started this one by following the instructions. All of the first page
deals with the interior. Each of the four side console assemblies has part of
the inner framework attached to it. The fit on this and pretty much all the rest
of the parts is only OK. During this sequence, you build up the wheels of your
choice and I went with the all plastic ones insted of the version with the
o-ring tire. When it came to the rudder pedals, you will soon find that some
work has to be done. You see, on the pedals piece, there is a pin. On the
cockpit floor, to mount the pedal piece there is also a pin. One has to do. I
removed the one on the cockpit floor and drilled a hole.
I started this one by following the instructions. All of the first page
deals with the interior. Each of the four side console assemblies has part of
the inner framework attached to it. The fit on this and pretty much all the rest
of the parts is only OK. During this sequence, you build up the wheels of your
choice and I went with the all plastic ones insted of the version with the
o-ring tire. When it came to the rudder pedals, you will soon find that some
work has to be done. You see, on the pedals piece, there is a pin. On the
cockpit floor, to mount the pedal piece there is also a pin. One has to do. I
removed the one on the cockpit floor and drilled a hole.
When it comes time to attach the side console pieces, I found that the subassembly numbers for each location were wrong. It isn't difficult to decipher what goes where, but for a bit, it is a head-scratcher. The thin inner sidewall pieces are a pain to mount. I ended up sanding the top of the exposed framework pieces to provide a bit of additional mounting space.
At this time, I deviated a bit and started building up subassemblies.
One is the engine. Fit on this is really not that good. All the parts will
eventually fit, but not without using some of those building skills. I also
built 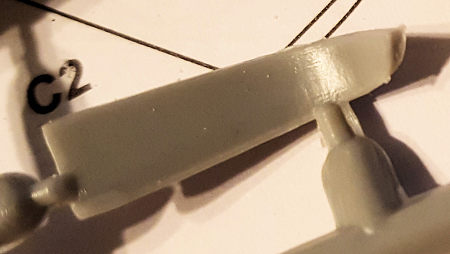
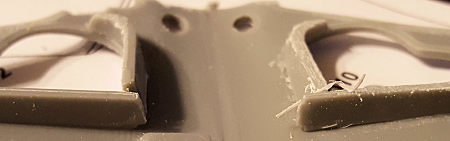
At the wings, the three piece gear well has no distinct alignment areas
so you are left going back and forth between the instructions and the parts to
ensure that you have them at least close to where they are supposed to be.
Fitting the upper wing proved to be an issue. Some of the gear well pieces were
too tall and wouldn't let the wing sit properly. Nothing that an 80 grit sanding
stick couldn't fix. In the image, the well to the left is untreated.
With the wings done, that along with the horizontal stabilizers were attached. There followed a lot of filler work on these items, the wing fit being especially poor. Then for the engine and cowling. I did not build up any of the back of the engine as none would be seen. The exhaust piece openings were hollowed out and this was installed. For the engine, I added the two large p.e. sections and glued the engine into the cowling after a bit of head trimming to get it to fit. Once I was sure it was well attached, the cowling was glued on. This is also a fairly poor fit.
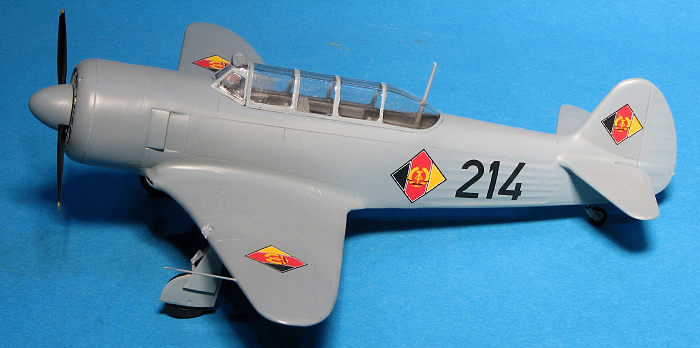
| COLORS & MARKINGS |
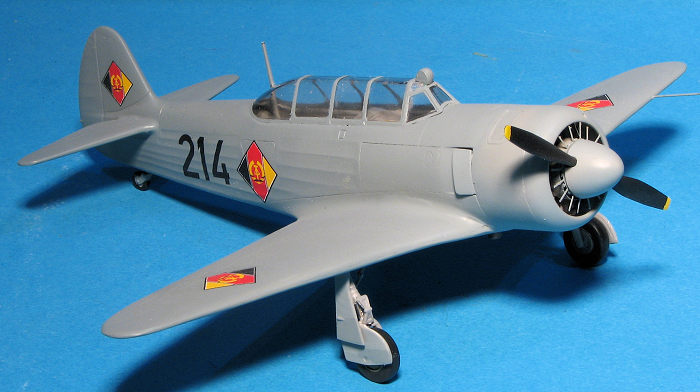
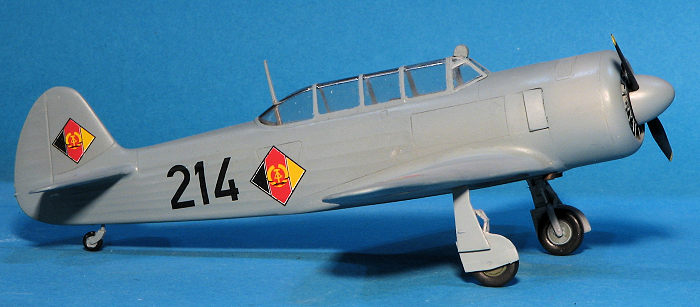
Initially, I was going to do an Egyptian plane with the yellow wing bands. However, when looking on the net for photos of the real deal, it seemed that every one who had built this kit had used that same scheme. Despite already painting the yellow bits, I decided to do one of the other options. These are generally overall blue-grey and a fairly good representation of that is FS 35237. For this I used Testors ModelMaster enamel. This also works well as a primer and showed several areas that needed more work.
There was still a bit to go, that included attaching the prop and installing the landing gear doors. There are no positive attachment points for the doors so one just has to wing it and hope for the best. There is also no pitot tube provided so I used a bit of .020 phosphor bronze wire. The masking stuck really well, except for the very upper canopy section and was a bit tricky to remove. It left no residue and was good at preventing paint from leaking under it. Lastly, the landing light housing was sanded down to fit the housing and pressed in place. A bit of pastel for exhaust and that was it.
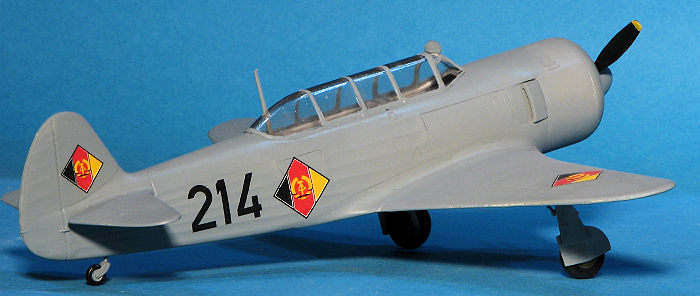
| CONCLUSIONS |
Overall, this was not an easy build. None of the parts fit well and all of them had the sprue gates intrude on the part. I spent a lot of time filling and sanding with this one, which definitely puts it in the short run/experience needed category. However, with perseverance, an acceptable model can be made. Since I have a fondness for trainers, this one fills the bill nicely. No one really makes a nice Yak-11 in any scale so until someone takes the plunge, short run kits are all we have.
| REFERENCES |
https://en.wikipedia.org/wiki/Yakovlev_Yak-11
7 October 2022
Copyright ModelingMadness.com. All rights reserved. No reproduction in part or in whole without express permission from the editor.
If you would like your product reviewed fairly and fairly quickly, please contact the editor or see other details in the Note to Contributors.