| KIT #: | 81760 |
| PRICE: | $42.00 delivered |
| DECALS: | Four options |
| REVIEWER: | Scott Van Aken |
| NOTES: | 2021 tooling |
| HISTORY |
 One of the recommendations from the government testing of Lavochkin
La-130 (Lavochkin La-9 prototype) was to further develop it into a
long-range escort fighter. The resultant La-134 prototype (also sometimes
referred to as La-9M) featured increased fuel and oil capacity. Armament was
reduced to three cannons. The prototype flew in May 1947. The second
prototype, La-134D had fuel capacity increased by an additional 275 l (73 US
gal) with wing and external fuel tanks. The aircraft was fitted with larger
tires to accommodate the increased weight and amenities for long flights such as
increased padding in the seat, armrests, and a urinal. In addition, a full radio
navigation suite was installed. Not surprisingly, combat performance with a full
fuel load suffered. However, as the fuel load approached that of La-9, so did
the performance. The aircraft was found to be poorly suited for combat above
7,000 m (23,000 ft). The new fighter, designated La-11 (OKB designation La-140)
entered production in 1947. By the end of production in 1951, a total of 1,182
aircraft were built.
One of the recommendations from the government testing of Lavochkin
La-130 (Lavochkin La-9 prototype) was to further develop it into a
long-range escort fighter. The resultant La-134 prototype (also sometimes
referred to as La-9M) featured increased fuel and oil capacity. Armament was
reduced to three cannons. The prototype flew in May 1947. The second
prototype, La-134D had fuel capacity increased by an additional 275 l (73 US
gal) with wing and external fuel tanks. The aircraft was fitted with larger
tires to accommodate the increased weight and amenities for long flights such as
increased padding in the seat, armrests, and a urinal. In addition, a full radio
navigation suite was installed. Not surprisingly, combat performance with a full
fuel load suffered. However, as the fuel load approached that of La-9, so did
the performance. The aircraft was found to be poorly suited for combat above
7,000 m (23,000 ft). The new fighter, designated La-11 (OKB designation La-140)
entered production in 1947. By the end of production in 1951, a total of 1,182
aircraft were built.
The La-11 was used extensively by the North Korean Air Force during the Korean War. Once they had been cleared from Korean skies, they still operated nocturnal raids from bases in China and were quite difficult to shoot down.
| THE KIT |
 Hobby Boss kits have generally been a pleasure to build as they are fairly
well engineered so I ordered this one from Hong Kong. The kit is pretty
standard stuff with a nicely done cockpit that has inserts for the lumpy
bits on the side consoles. A decal is provided for the instrument panel and
there is harness detail molded into the seat.
Hobby Boss kits have generally been a pleasure to build as they are fairly
well engineered so I ordered this one from Hong Kong. The kit is pretty
standard stuff with a nicely done cockpit that has inserts for the lumpy
bits on the side consoles. A decal is provided for the instrument panel and
there is harness detail molded into the seat. | CONSTRUCTION |
 Throwing
caution to the wind, I started by building up the cockpit. This was painted
in a fairly light grey with decals taking care of the instrument panel. As
usual, the fit was good and while it would have been nice to have p.e. seat
belts, there are some molded in on the seat surface which will do in a
pinch. The kit provides a nice engine, but it will be invisible on the
completed kit due to the nearly full face fan that was used to keep it cool.
It does need to be installed as that is what you use to attach the prop.
Throwing
caution to the wind, I started by building up the cockpit. This was painted
in a fairly light grey with decals taking care of the instrument panel. As
usual, the fit was good and while it would have been nice to have p.e. seat
belts, there are some molded in on the seat surface which will do in a
pinch. The kit provides a nice engine, but it will be invisible on the
completed kit due to the nearly full face fan that was used to keep it cool.
It does need to be installed as that is what you use to attach the prop. | COLORS & MARKINGS |
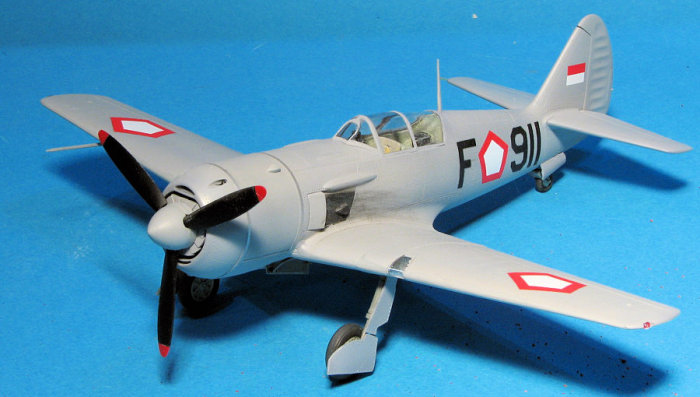
 When
I built the MikroMir kit, I used Colourcoats AMT-11 and it turned out to be
the right shade. Unfortunately, that tinlet had dried out so I used Hataka's
equivalent. This turned out to be too dark, so I mixed up some light
aircraft grey with a little bit of Hataka's AMT-11 and that did the trick.
This went on beautifully and is one reason that I like their paint. The
exhaust area was painted using Tamiya X-18 black. With the airframe painted,
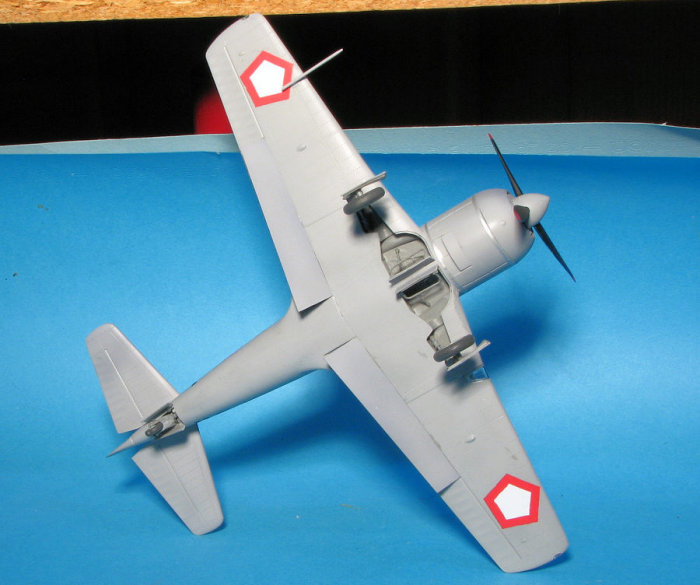
I returned to the bench. Gear wells, inner gear doors and landing gear were
painted a dark grey.
When
I built the MikroMir kit, I used Colourcoats AMT-11 and it turned out to be
the right shade. Unfortunately, that tinlet had dried out so I used Hataka's
equivalent. This turned out to be too dark, so I mixed up some light
aircraft grey with a little bit of Hataka's AMT-11 and that did the trick.
This went on beautifully and is one reason that I like their paint. The
exhaust area was painted using Tamiya X-18 black. With the airframe painted,
I returned to the bench. Gear wells, inner gear doors and landing gear were
painted a dark grey. 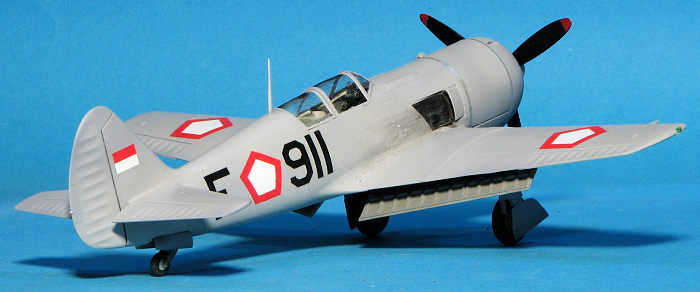 The next
step was to clear coat the airframe in preparation for the decals. For this
one, I decided to use another option from a very large Begemot sheet that I
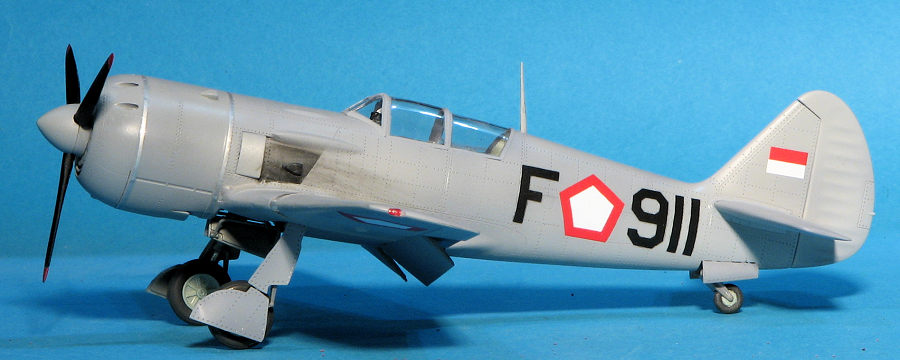
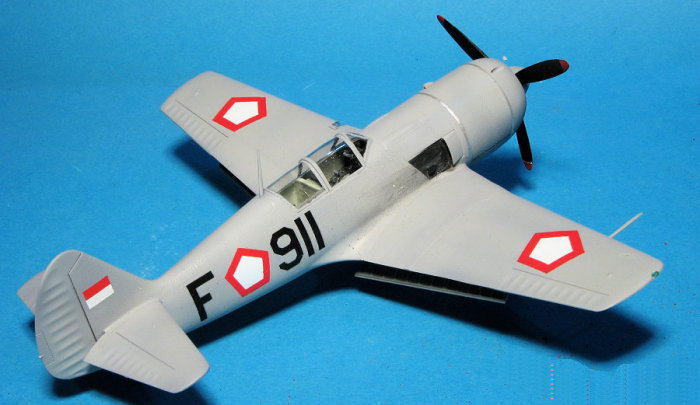
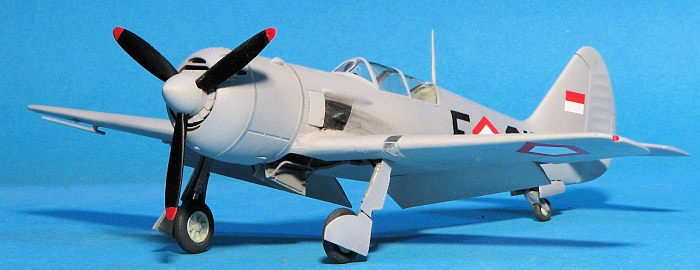
bought for the MicroMir kit. In this case, I chose the Indonesian Air Force
option. A dozen of these aircraft were donated to Indonesia from China.
Apparently they were not in the best of shape so only lasted a short time in
service. The Begemot decals worked just great. They are fairly thin so even
somewhat weak setting solutions like Microsol were sufficient. For the metal
bands around the cowling, I used Fantasy Printshop's silver stripes sheet.
The next
step was to clear coat the airframe in preparation for the decals. For this
one, I decided to use another option from a very large Begemot sheet that I
bought for the MicroMir kit. In this case, I chose the Indonesian Air Force
option. A dozen of these aircraft were donated to Indonesia from China.
Apparently they were not in the best of shape so only lasted a short time in
service. The Begemot decals worked just great. They are fairly thin so even
somewhat weak setting solutions like Microsol were sufficient. For the metal
bands around the cowling, I used Fantasy Printshop's silver stripes sheet.
| CONCLUSIONS |
I have to say that overall, I'm pretty happy with this one. The build time was a fraction of what it took with the Ark Model kit. Yes, it does have a few items that should have been in with the kit including a clear armor section behind the pilot and a landing light. I'd also have liked the outer main gear doors to have some sort of positive locator instead of just a butt join. However, the result looks pretty nice and while I don't have another to build at the moment, I'd not cross out the possibility that another is in my future.
| REFERENCE |
https://en.wikipedia.org/wiki/Lavochkin_La-11
19 April 2024
Copyright ModelingMadness.com. All rights reserved. No reproduction in part or in whole without express permission from the editor.
If you would like your product reviewed fairly and fairly quickly, please contact the editor or see other details in the Note to Contributors.