Steelwork 1/72 Lavochkin La-9
| KIT #: | SK7214 |
| PRICE: | 39 Euros from www.steelwork-models.de |
| DECALS: | Two options |
| REVIEWER: | Scott Van Aken |
| NOTES: | Resin with metal, photo etch and vacuformed parts. |
| HISTORY |
 La-9 represents further
development of the Lavochkin
La-126 prototype. The first
prototype, designated La-130
was finished in 1946. Similarity to the famous Lavochkin La-7 was only
superficial – the new fighter had all-metal construction and a laminar flow
wing. Weight savings due to elimination of wood from the airframe allowed
for greatly improved fuel capacity and four-cannon armament. Mock combat
demonstrated that La-130 was evenly matched with La-7 but was inferior to
Yakovlev Yak-3 in both horizontal and vertical planes. The new fighter,
officially designated La-9, entered production in August 1946. A total of
1,559 aircraft were built by the end of production in 1948.
La-9 represents further
development of the Lavochkin
La-126 prototype. The first
prototype, designated La-130
was finished in 1946. Similarity to the famous Lavochkin La-7 was only
superficial – the new fighter had all-metal construction and a laminar flow
wing. Weight savings due to elimination of wood from the airframe allowed
for greatly improved fuel capacity and four-cannon armament. Mock combat
demonstrated that La-130 was evenly matched with La-7 but was inferior to
Yakovlev Yak-3 in both horizontal and vertical planes. The new fighter,
officially designated La-9, entered production in August 1946. A total of
1,559 aircraft were built by the end of production in 1948.
Only one La-9 remains in airworthy condition today, owned by Jerry Yagen of Virginia Beach, Va, restored by Pioneer Aero Restorations between 2001 and 2003. A handful of others remain in museums in China, Korea and one in Romania.
| THE KIT |
Arriving in Steelwork's usual hard cardboard box, the contents are several zip bags with various bits. The fuselage was wrapped in bubble wrap while the wings and tailplanes were in one bag, the metal gear in another, and the smaller pieces in yet another. The photo etch is quite thin and was packaged with the decals and a warning slip about the decals. The kit resin is actually tan instead of the grey shown in the image from the kit instructions.
 Acetate sheets are provided for the instruments that
are sandwiched between the three levels of instrument panel. The cockpit
provides a seat, rudder pedals, stick and side consoles along with a harness for
the pilot. Since the fuselage is a single casting, one simply installs these
pieces into the opening.
There are various bulges that fit onto the fuselage as well as some photo etch
pieces.
Acetate sheets are provided for the instruments that
are sandwiched between the three levels of instrument panel. The cockpit
provides a seat, rudder pedals, stick and side consoles along with a harness for
the pilot. Since the fuselage is a single casting, one simply installs these
pieces into the opening.
There are various bulges that fit onto the fuselage as well as some photo etch
pieces.
The engine fan/grille is a section of photo etch. This material is also used to enhance the inner gear door detail. I like that the landing gear legs are cast metal and they appear to be bronze. This will eliminate any issues with long time sagging due to the weight of the resin. Most of the resin parts have the sprue stubs already removed so only minor clean up is required. This extends to the clear bits as well. They are pre-trimmed leaving on the final trim to the builder. Two sets of vac pieces are included. In addition to the canopies, there are two smaller square sections. These are for the landing light lens. The prop is a hub with separate blades that slot into holes in the spinner.
 Instructions are quite well done and in full color.
They includes photos of the kit while under construction with images showing
colors used as well as where the parts go. Decals are for the two North Korean
planes shown on the box art. One is engine grey over light blue-grey while the
other is overall blue-grey. The two tone option is a plane currently in a museum
in North Korea. The decals are very nicely printed and have a continuous clear
coat. I suspect these are ALPS printed as there is a warning sheet about being
too rough with them. I would suggest a light clear coat before cutting them as
it just seems prudent.
Instructions are quite well done and in full color.
They includes photos of the kit while under construction with images showing
colors used as well as where the parts go. Decals are for the two North Korean
planes shown on the box art. One is engine grey over light blue-grey while the
other is overall blue-grey. The two tone option is a plane currently in a museum
in North Korea. The decals are very nicely printed and have a continuous clear
coat. I suspect these are ALPS printed as there is a warning sheet about being
too rough with them. I would suggest a light clear coat before cutting them as
it just seems prudent.
| CONSTRUCTION |
First step in this case was building up the cockpit. I have to say that this took me an age thanks to all the teensy photo etch bits. In fact, I got so frustrated with the tiny levers that I set things aside for a couple of weeks and worked on easier stuff! Eventually all the pieces got attached and I then painted the cockpit and inside of the fuselage with Soviet Interior Grey from the White Ensign range of enamels. At least the delay gave me time to clean up some of the other parts. I just have to face that I'm not good with photo etch; well, at least teeny tiny bits.
 The cockpit was then detail painted to bring some
color to things. The clear acetate instruments were painted white on the back
and when dry, attached to the various instrument panel bits. These were then
glued atop each other using clear gloss paint as an adhesive. This took quite a
while as the kit was on a slow track while other subjects were attended to.
The cockpit was then detail painted to bring some
color to things. The clear acetate instruments were painted white on the back
and when dry, attached to the various instrument panel bits. These were then
glued atop each other using clear gloss paint as an adhesive. This took quite a
while as the kit was on a slow track while other subjects were attended to.
There are four small resin vents that fit atop the forward fuselage section. I also folded the exhaust vent pieces and attached them. The forward fan section was also glued in place. This has a specific way it fits in as one of the fan sections is shorter than the other and fits on the top.
Meanwhile, I attached the main gear well photo etch piece and did much sanding on the wings to get the best fit I could. The small inner gear doors are a single piece that is a bit of a challenge to bend. You really need to have a bending took for this part. It has an additional layer that is attached to it as well.
 After a bit of trimming to get the instrument panel in
place, the interior was glued in place and the lower wing attached. I opened up
the holes in the fin for the stabs and also had to reduce the size of the stab
tabs to get them installed. These are keyed as one side has an elevator trim tab
and the other does not. With those in place, the seams were filled and sanded
down.
After a bit of trimming to get the instrument panel in
place, the interior was glued in place and the lower wing attached. I opened up
the holes in the fin for the stabs and also had to reduce the size of the stab
tabs to get them installed. These are keyed as one side has an elevator trim tab
and the other does not. With those in place, the seams were filled and sanded
down.
Next major bit was the lower radiator. This requires a pretty flat surface so be sure you have one for it.
This led me to finishing up the main gear well and assembling the gear doors. The gear doors are two pieces of photo-etch with the large piece containing the framework for the lower door. The part of the lower door with the detailing is that which fits against the framework section. on my fret, these two lower pieces were quite curved and needed to be straightened to get to fit well. I actually used super glue on these instead of my usual clear paint.
The well itself had the base floor already installed.
There is a section of piping that fits into the forward well. There is also a
section, part 19 on the fret, that I had no idea where it went. The kit
instructions are rather
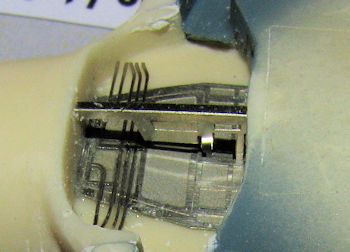 lacking in
any information at all regarding the wheel well with just arrows pointing into a
dark area where no detail can be seen. I did know that I had to bend this part
like the inner gear doors as there were bend lines on it. Once bent, I could see
that two prongs would fit into the small slots in the first piece of gear well.
These are a super tight fit and did not need cement. Atop this piece will fit
the inner gear doors. Hopefully the photo will assist others building this kit.
lacking in
any information at all regarding the wheel well with just arrows pointing into a
dark area where no detail can be seen. I did know that I had to bend this part
like the inner gear doors as there were bend lines on it. Once bent, I could see
that two prongs would fit into the small slots in the first piece of gear well.
These are a super tight fit and did not need cement. Atop this piece will fit
the inner gear doors. Hopefully the photo will assist others building this kit.
With that done, the inner gear door was trimmed and fit atop the brace. I did not attach the inner gear door retraction struts at this time. I also opened up the hole for the tail gear and attached the resin gear doors for this piece. The main landing gear was also cleaned up and glued in place. You will need to trim the length of the main gear legs to get a proper fit. There are oleo scissors for both the main gear and tail gear. The one for the tail disappeared when I cut it from the sprue. Thought I had a good hold on it, but guess not. The main ones are very fragile and easily broken when bending.
Time to move on to the one part of the build that I was dreading; the vacuformed canopy. You are provided with two of them, but the frame lines are so indistinct as to not be there at all. One just has to take a guess when masking. The canopy also did not fit very well when it was cut to what I thought was the proper shape. However, it is good enough until something better comes along and was attached using Vallejo Gloss Clear paint. This same substance was used to fill any gaps.
| COLORS AND MARKINGS |
 Good time to do some painting. I like to see what the
Internet provides in terms of verification of color schemes, but the truth is
that in this case, there was darn little. 99.9% of the images I found were of
the warbird or drawings of the same airplane. A couple of b&w images and a
single Chinese museum image were all I found. That latter image was in overall
light blue, one of the options on the sheet.
Good time to do some painting. I like to see what the
Internet provides in terms of verification of color schemes, but the truth is
that in this case, there was darn little. 99.9% of the images I found were of
the warbird or drawings of the same airplane. A couple of b&w images and a
single Chinese museum image were all I found. That latter image was in overall
light blue, one of the options on the sheet.
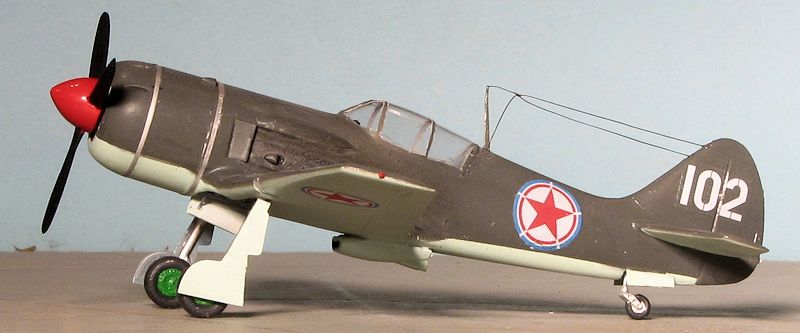
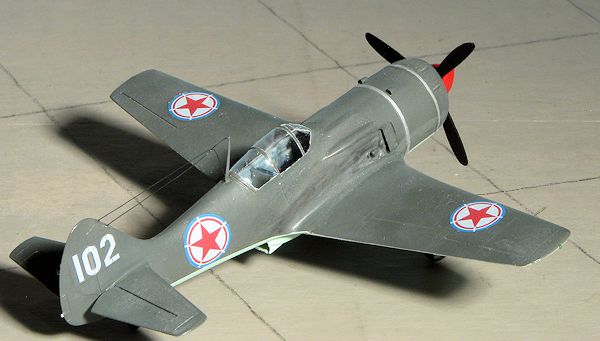
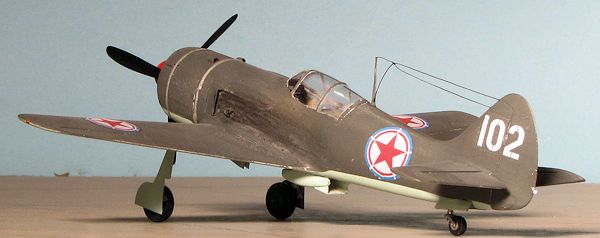
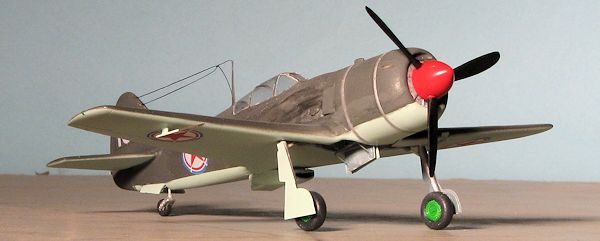
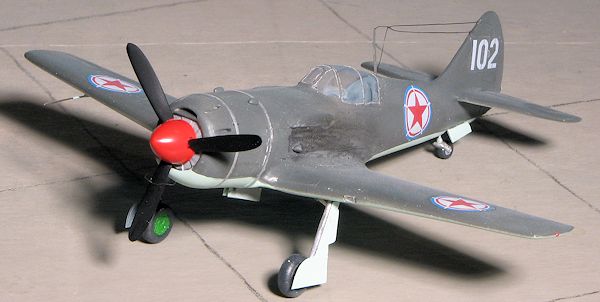
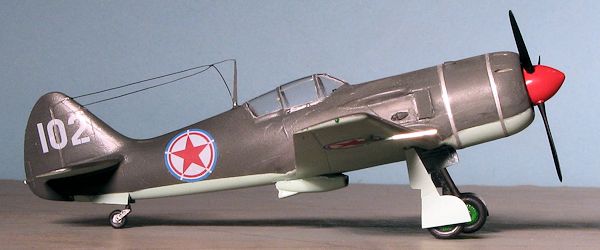
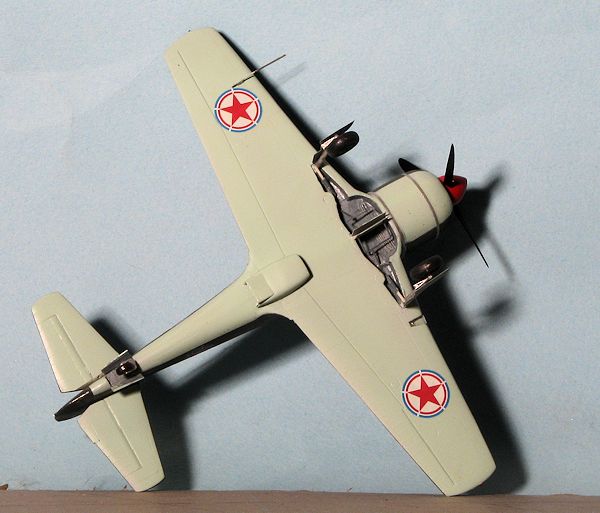
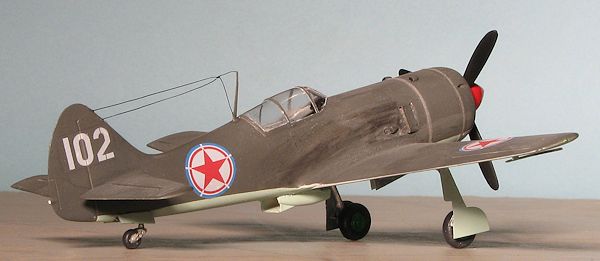
I went with the Dark Grey over Light Blue option as it had a red prop spinner. For the Dark Grey, it was recommended that FS 36081, which is Engine Grey, be used for the upper color. I used a Soviet Light Blue from the Colourcoats range for the underside. When those colors were sprayed on, I brush painted the gear wells and inner gear doors with a Soviet Interior Grey, also from the Colourcoats range. Main wheel centers were painted Green from the small Testors bottles.
| FINAL BITS |
With the painting done, I started attaching other fiddly bits. First one was the resin gear retraction struts, followed by the wheels, which needed to be drilled out using a #58 bit. I then trimmed back the axles which were too long. Then the radio mast was folded in half after much fussing (who the heck does radio masts in photo etch. It would have been much nicer to have this in resin) and then stuck in a hold drilled in the fuselage behind the cockpit.
Other fiddly bits were the inner gear door retraction
struts. I then noticed that the main gear was too straight down for my tastes so
bent them a bit forward. Nice thing about metal gear is that you can do this.
The main 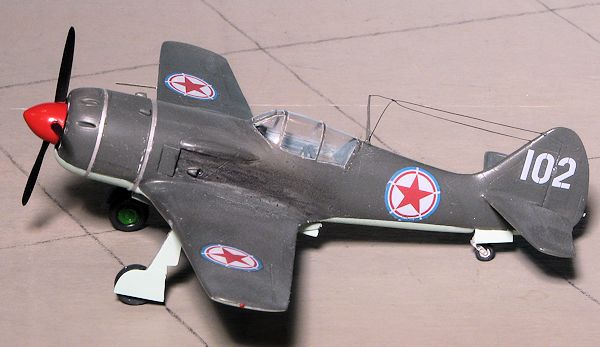 gear doors were then attached. Cutting and placing the landing light
lens was a real hassle as the lens is poorly outlined on the vac section.
Doesn't help that it is small and I lost one in the process. I finally got one
that was somewhat acceptable and attached it using Vallejo clear gloss paint.
The under wing pitot tube is two pieces of photo etch that are supposed to be
sandwiched together before attaching. Right. Well, despite my
misgivings, it worked out fairly well, though a resin bit would have been
preferable. The recently installed bits were appropriately painted and it was
finally time for markings.
gear doors were then attached. Cutting and placing the landing light
lens was a real hassle as the lens is poorly outlined on the vac section.
Doesn't help that it is small and I lost one in the process. I finally got one
that was somewhat acceptable and attached it using Vallejo clear gloss paint.
The under wing pitot tube is two pieces of photo etch that are supposed to be
sandwiched together before attaching. Right. Well, despite my
misgivings, it worked out fairly well, though a resin bit would have been
preferable. The recently installed bits were appropriately painted and it was
finally time for markings.
These decaks appear to be ALPS printed as the entire sheet is on one carrier. I started by applying the chrome bands around the cowling. They provide spares so I figured I would attach one and see how it reacted to Microsol setting solution, the weakest I have. It did not do much so I trued some Mr. Mark Softer and that did the trick. Though the whites of the decal looks very opaque, this is due to the reflected light and in actuality, they are somewhat transparent. I also found that, according to the markings placement guide, the insignia are a bit large.
The last things to do were to string the radio antenna. I used EZ line for this, but honestly, should have used something else as EZ line tightens up when you use super glue on it. It is great for single strands, but when you have to add wires to it, whatever cement you use will distort the first run. I then cemented the prop in place and added a bunch of pastel exhaust. The canopy was unmasked, any paint creep removed and I was finished.
| CONCLUSIONS |
 This is not the only 1/72 La-9 kit around. Siga also
produced one that is very short run, but does, apparently, have an injected
canopy. There is also the MPM kit, which was one of their very early releases,
but as I have not built it, I cannot comment. I am sure there are others. I will say that this one from
Steelworks is very nicely molded and seems to have enough detail to please most.
It is probably the more accurate of the group mentioned. If one can handle the vac canopy and the somewhat iffy instructions,
as well as all the p.e., a very nice model will result.
This is not the only 1/72 La-9 kit around. Siga also
produced one that is very short run, but does, apparently, have an injected
canopy. There is also the MPM kit, which was one of their very early releases,
but as I have not built it, I cannot comment. I am sure there are others. I will say that this one from
Steelworks is very nicely molded and seems to have enough detail to please most.
It is probably the more accurate of the group mentioned. If one can handle the vac canopy and the somewhat iffy instructions,
as well as all the p.e., a very nice model will result.
| REFERENCES |
http://en.wikipedia.org/wiki/Lavochkin_La-9
May 2013
Copyright ModelingMadness.com. All rights reserved. No reproduction in
part or in whole without express permission from the editor.
Thanks to www.steelwork-models.de
for the preview kit. You can get this kit at the link. If you would like your product reviewed fairly and fairly quickly, please
contact
the editor or see other details in the
Note to
Contributors.