Ammo 1/48 MiG-17F
| KIT #: | 8510 |
| PRICE: | $50.00 |
| DECALS: | Five options |
| REVIEWER: | Scott Van Aken |
| NOTES: | 2023 release |
| HISTORY |
 The Mikoyan-Gurevich MiG-17 (Russian: Микоян
и Гуревич МиГ-17; NATO reporting name: Fresco) is a
high-subsonic fighter aircraft produced in the USSR from 1952 and operated by
numerous air forces in many variants. It is an advanced development of the very
similar looking MiG-15 of the Korean War. The MiG-17 was license-built in China
as the Shenyang J-5and Poland as the PZL-Mielec Lim-6.
The Mikoyan-Gurevich MiG-17 (Russian: Микоян
и Гуревич МиГ-17; NATO reporting name: Fresco) is a
high-subsonic fighter aircraft produced in the USSR from 1952 and operated by
numerous air forces in many variants. It is an advanced development of the very
similar looking MiG-15 of the Korean War. The MiG-17 was license-built in China
as the Shenyang J-5and Poland as the PZL-Mielec Lim-6.
MiG-17s first saw combat in 1958 in the Second Taiwan Strait Crisis and later proved to be an effective threat against more modern supersonic fighters of the United States in the Vietnam War. It was also briefly known as the Type 38 by U.S. Air Force designation prior to the development of NATO codes.
When the Iron Curtain fell the MiG-17 was still in use by Warsaw Pact countries and by the Chinese. As such, the type became available to whomever could afford on. This resulted in a rather large number of Chinese and Polish-built types being registered on the war bird market. Their simplicity and ease of maintenance has made them quite popular.
| THE KIT |
The MiG-17 has been fairly well served for the 1/48 modeler. Nothing super detailed, but kits from SMER, Hobbycraft and HobbyBoss that provided nice shelf models. This release by Ammo increases the detail level, though at a considerable price.
This is a base kit with just a photo etch fret aside from the usual plastic bits. This fret is for the six wing fences, two harness straps for the back of the seat, and a section under the back of the canopy. The cockpit is quite nicely done and makes into a tub that also includes part of the engine intake. There is nice sidewall detail as it will be quite visible.
 The exhaust is built up then it, the rudder, and the
cockpit are trapped between the fuselage halves. There is room in the front of
the cockpit piece for weight and 15 grams (which is quite a bit) is indicated.
Then a lower and upper forward fuselage section along with the intake are
attached. Note that there are two upper fuselage pieces if one of your models is
a Lim-5. Next, various holes are opened in the lower wing halves of you want
drop tanks or the rocket pylons that are only provided in the upgraded kit. Next
the lower wing halves are joined to the upper along with the ailerons. The kit
provides for the option of lowered flaps, but looking at period photos never
shows these as deployed.
The exhaust is built up then it, the rudder, and the
cockpit are trapped between the fuselage halves. There is room in the front of
the cockpit piece for weight and 15 grams (which is quite a bit) is indicated.
Then a lower and upper forward fuselage section along with the intake are
attached. Note that there are two upper fuselage pieces if one of your models is
a Lim-5. Next, various holes are opened in the lower wing halves of you want
drop tanks or the rocket pylons that are only provided in the upgraded kit. Next
the lower wing halves are joined to the upper along with the ailerons. The kit
provides for the option of lowered flaps, but looking at period photos never
shows these as deployed.
Construction then moves to attaching the wings, tailplanes, and elevators along with the windscreen. The kit is flipped over and underside items like the cannon and rad alt antennas are attached. Landing gear and doors are next. The speed brakes can be posed open, but again, this is not seen in period photos. Next to last construction is the canopy and wing fences. There are slots in the upper wing for the p.e. fences. The slots look to be oversize, but we'll just have to wait to see if that is true. The last step is the assembly and installation of the wing tanks if those holes have been opened.
Instructions are well done and provide MiG/Ammo paint references. Half of the instruction booklet covers actual construction with all sorts of notes on aftermarket replacement parts. The other half is history, tips, and advertisements. Separate markings sheets are provided and there are some nice camouflage options. Two are North Vietnamese, two are Chinese, and one is North Korean. The decals are quite nicely done and glossy. Ammo does three other boxings that provide other markings options. The kit also includes three booklets in case you don't know how to sand, use glue, or do pin washes. Basically, they are advertisements for MiG/Ammo products.
| CONSTRUCTION |
 Though this appears to be a fairly simple kit, I decided to
take a brave step and follow the instructions. This had me first putting all my
effort into building the interior. For the most part, things went fairly
smoothly. The parts placement is easy to do, but I have to admit I had issues
with the ejection seat. The positive locators are not really there and one has
to deduce, by a lot of test fitting, just how some of the parts fit. This is not
helped by the placement of the sprue gates, which if not totally eliminated,
will lead to fit issues. I also found the upper portion of the seat to be a bit
of a mess with those parts being particularly difficult to get into place.
Eventually, I had to sand down the top and sides of the seat to get the canopy
to fit over it.
Though this appears to be a fairly simple kit, I decided to
take a brave step and follow the instructions. This had me first putting all my
effort into building the interior. For the most part, things went fairly
smoothly. The parts placement is easy to do, but I have to admit I had issues
with the ejection seat. The positive locators are not really there and one has
to deduce, by a lot of test fitting, just how some of the parts fit. This is not
helped by the placement of the sprue gates, which if not totally eliminated,
will lead to fit issues. I also found the upper portion of the seat to be a bit
of a mess with those parts being particularly difficult to get into place.
Eventually, I had to sand down the top and sides of the seat to get the canopy
to fit over it.
The interior is a fairly major part of the build. There are side panels and a front section that fit around it. These are the nose and side intakes. The side portions took some fiddling to get properly in place. There is room in the front piece (which also contains the nose gear well) for some weight. The instructions state that 15 grams is required and I had to put weight under the interior as there wasn't any way to fit it all where the instructions wanted.
Eventually the interior was completed and set aside for a bit while I painted and assembled the exhaust. I left the afterburner piece off until near the end of the build. The exhaust assembly was then installed in the back and the interior in the front. The attachment area for the interior is a shallow channel on either side and difficult to get the interior properly aligned. Note that there is a small section behind the interior that has to have detail sanded off if you want to have the canopy closed, which I did. The rudder also needs to be trapped between the fuselage halves when they are closed.
 Once that
was done and the seams given attention, the upper and lower fuselage sections
were added, followed by the forward intake piece. I added the additional weight
under the cockpit before attaching the lower fuselage piece. Naturally, the
forward fuselage was a bit wider than the intake piece, but I have sandpaper and
know how to use it.
Once that
was done and the seams given attention, the upper and lower fuselage sections
were added, followed by the forward intake piece. I added the additional weight
under the cockpit before attaching the lower fuselage piece. Naturally, the
forward fuselage was a bit wider than the intake piece, but I have sandpaper and
know how to use it.
Wings were next and are pretty straightforward. Ailerons are separate and added once the halves were joined. I left off the landing light until the very end of the build. Don't forget to open the holes in the lower wing halves if you want to add the drop tanks. The next steps involved adding the tailplanes, elevators, wings and windscreen. On the underside the guns were attached along with a fuselage insert. I left off the rad alt antennas otherwise I would have broken them off during handling.
As the base color of the kit was to be aluminum, I took the time to install the landing gear struts as well as the short gear doors. I also left off the flaps and speedbrakes. Note that the speedbrakes are supposed to fit flush with the fuselage when closed and they do not. This means that unless you want to do a lot of trimming and fitting, they have to be modeled open. The wing fences are etched metal and the slots in the wings actually had to be slightly opened before they would fit. I also built up the drop tanks.
At this time I masked and attached the clear parts. This was where I discovered the seat was too high and had to sand the upper portion for it to fit a closed canopy. I also had to leave off the small insert in the back of the canopy as it wouldn't let the canopy close far enough. All the clear bits are held in place with Cementine clear glue. I then put Silly Putty in the flap area and speed brake wells to hold the parts in place while I headed for the paint shop.
| COLORS & MARKINGS |
 I actually
wanted to do a non-kit scheme, but could not find my 1/48 MiG-17 aftermarket
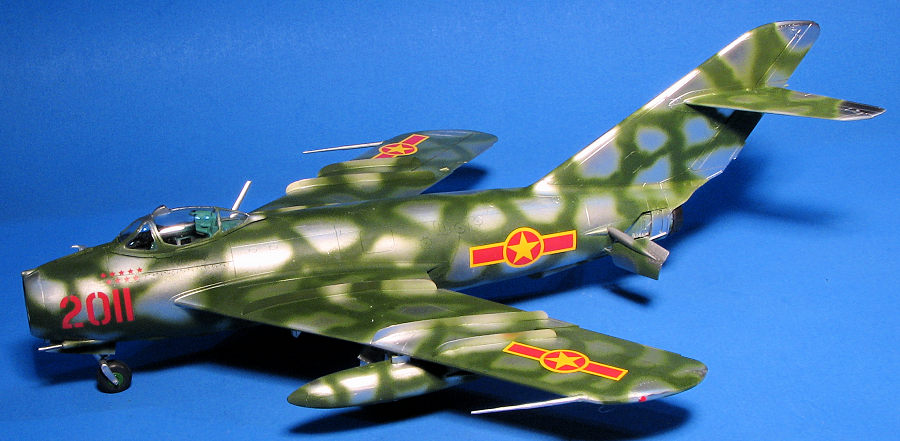
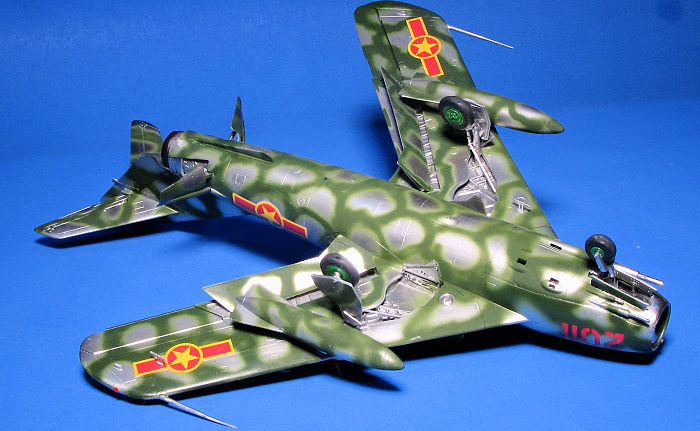
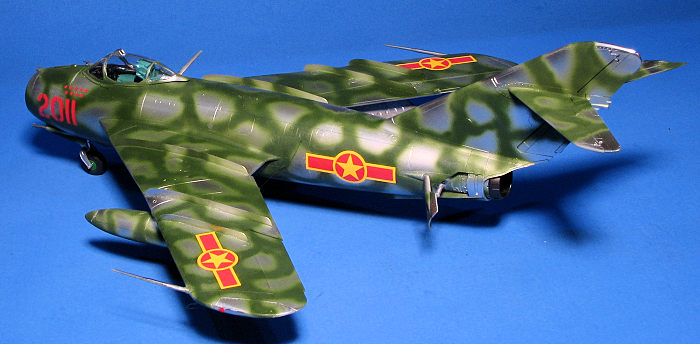
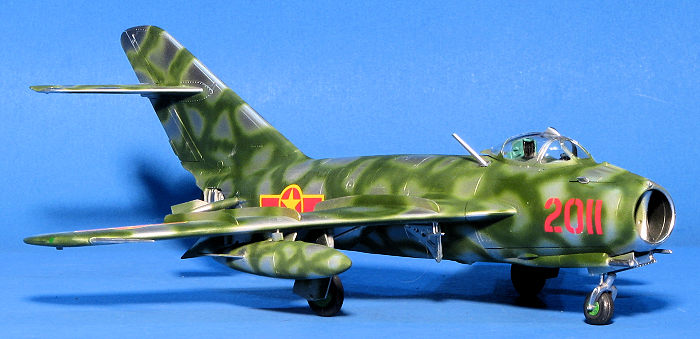
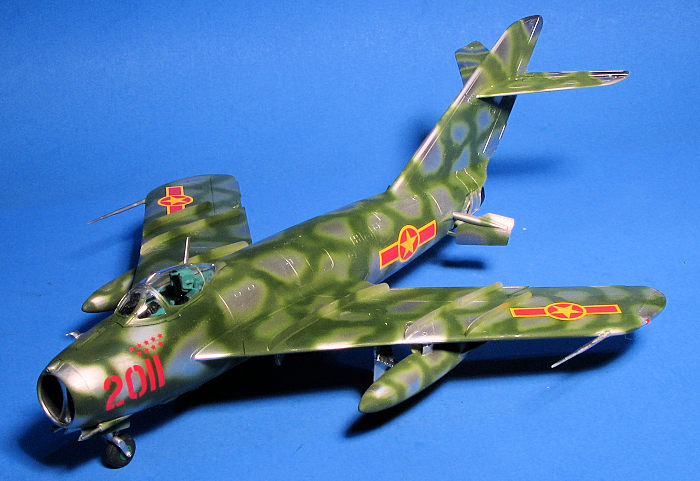
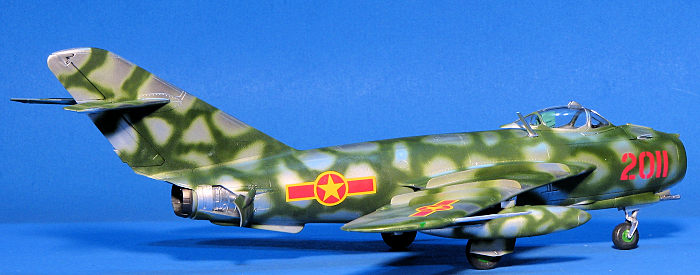
sheet so went with one from the kit. This was a North Vietnamese version in
overall silver with a somewhat heavy dark green pattern on both the top and
bottom of the plane. For the overall silver I used MrColor duralumin. This is
really shiny but went on well and dried to the touch in just a few minutes after
application. For the green pattern, I used Testors FS 34102 as I had some
already mixed up. It took ten seconds to type that painting description and
about four days to paint. When the green was dry enough, I gave the areas that
would take decals a few light gloss coats. The kit decals are excellent and went
on without any issues. I used Microsol and it worked just great. So nice are
these decals, that I'm keeping what I didn't use for other projects.
I actually
wanted to do a non-kit scheme, but could not find my 1/48 MiG-17 aftermarket
sheet so went with one from the kit. This was a North Vietnamese version in
overall silver with a somewhat heavy dark green pattern on both the top and
bottom of the plane. For the overall silver I used MrColor duralumin. This is
really shiny but went on well and dried to the touch in just a few minutes after
application. For the green pattern, I used Testors FS 34102 as I had some
already mixed up. It took ten seconds to type that painting description and
about four days to paint. When the green was dry enough, I gave the areas that
would take decals a few light gloss coats. The kit decals are excellent and went
on without any issues. I used Microsol and it worked just great. So nice are
these decals, that I'm keeping what I didn't use for other projects.
With that done, the wheels were installed. The flaps have a very poor attachment area, but I finally got those in place, again using clear glue. Same for the speedbrakes, which were a bit of a hassle as there is no real positive attachment area for them. The various little antennas were installed, again with clear glue so as to not mar the finish. The landing light lens was attached as was the afterburner part and finally the large main gear doors and the drop tanks. Masking was removed from the windscreen and canopy and that was it.
| CONCLUSIONS |
3 April 2026
Copyright ModelingMadness.com. All rights reserved. No reproduction in part or in whole without express permission.
If you would like your product reviewed fairly and fairly quickly, please contact the editor or see other details in the Note to Contributors.