Eduard 1/72 MiG-15bis
| KIT #: | 7059 |
| PRICE: | $28.73 delivered |
| DECALS: | Five options |
| REVIEWER: | Scott Van Aken |
| NOTES: | Profipack. 2022 release |
| HISTORY |
 While most of us are rather 'western-centric', it has been shown over
the last 100 years, that the Soviets/Russians have been able to produce military
equipment that is either equal or superior to western technology. In the
1930s it was the I-16, in the 1940s it was the T-34 and during the Korean war it
was the MiG-15.
While most of us are rather 'western-centric', it has been shown over
the last 100 years, that the Soviets/Russians have been able to produce military
equipment that is either equal or superior to western technology. In the
1930s it was the I-16, in the 1940s it was the T-34 and during the Korean war it
was the MiG-15.
Here was an airplane that took the US and western nations completely by surprise when it appeared in the skies over Korea. It was fast, climbed like an angel, was equipped with powerful cannon armament and was able to reach altitudes that the Sabre pilots could not reach. It was also easy to fly, easy to maintain and in the hands of an experienced pilot, was a deadly adversary. It did have its issues in that it could not dive all that well and at high speed tended to 'snake' and fall off on the left wing (not a good thing), making it less than a stable platform. However, in a dogfight, it was able to generally outmaneuver the heavier F-86. It also had rather short range.
The type knocked down more US/UN planes than the official histories care to admit and went on to be the standard day fighter of many Soviet friendly nations. Even today, Czech, Soviet and Chinese built MiG-15s are flying as war birds.
| THE KIT |
Though Eduard usually does a 1/48 kit of a subject before producing a 1/72 kit, in this case, the larger kit has not yet appeared. Many of the sprues are used with the two seat MiG-15UTI kit though this kit is just for the single seat version. The dates on the decals and p.e. imply that this isn't the first time this suite has been released. Not surprising is that most of the p.e. is for the interior. This includes seat harness, instrument panel, side panel instruments and rudder pedals. As usual with Eduard, matching the interior grey to the grey on the p.e. will be a bit of a challenge. The cockpit sidewall pieces help to form part of the intake trunking.
 The nose gear well attaches to the cockpit assembly. Once that and the
tailpipe assembly is built, it can be put into the fuselage halves. Weight is
needed, but no specific weight is provided. There is some room above the nose
gear well, but if that is enough I'm not sure. There is room under the cockpit
assembly and that is where I'd put most of the weight. When closing the fuselage
halves the rudder needs to e installed. Wings will need to have holes opened in
the lower piece if one is going to use drop tanks. Three designs are provided
and the instructions state which markings option uses which tanks. Wings and
tailplanes can then be attached.
The nose gear well attaches to the cockpit assembly. Once that and the
tailpipe assembly is built, it can be put into the fuselage halves. Weight is
needed, but no specific weight is provided. There is some room above the nose
gear well, but if that is enough I'm not sure. There is room under the cockpit
assembly and that is where I'd put most of the weight. When closing the fuselage
halves the rudder needs to e installed. Wings will need to have holes opened in
the lower piece if one is going to use drop tanks. Three designs are provided
and the instructions state which markings option uses which tanks. Wings and
tailplanes can then be attached.
Next the lower forward fuselage piece can be installed along with the nose gear and the forward cowling. Gear and guns can then be attached along with the aft fuselage inserts. Then the main wheels and landing gear can be built up and installed. Last pieces to install are the windscreen, canopy, radio masts, and the drop tanks of your choice. The canopy can be posed open and Eduard provides masks.
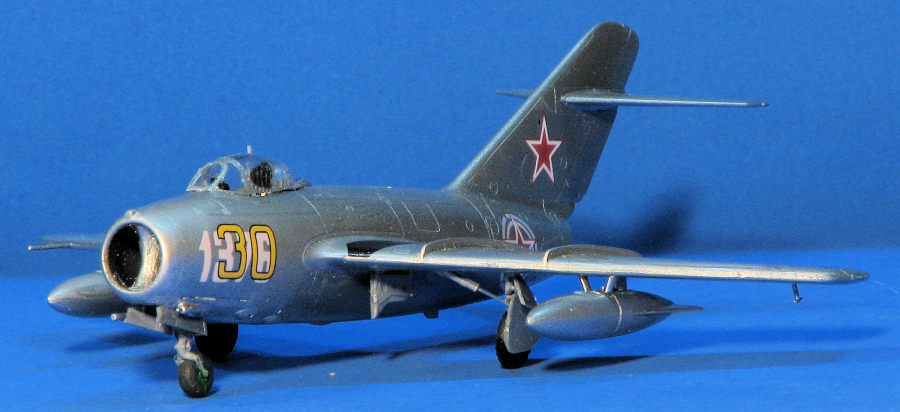
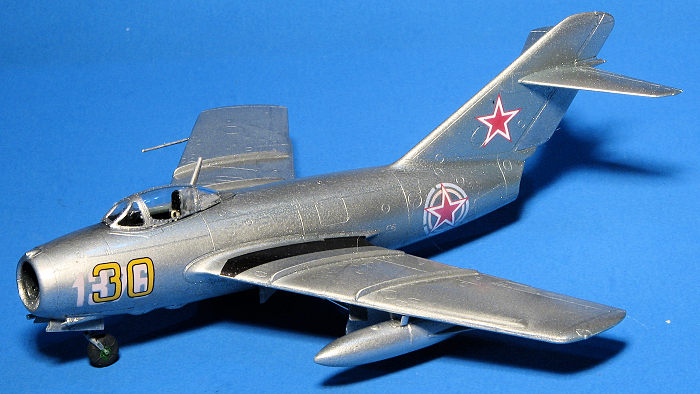
The fairly large decal sheet provides five markings options. First is the box art option in brown, green, and sand over light blue during the Korean War. Next is a Czech display plane in bare metal with blue trim. The large blue lightning bolt is also provided on the masking sheet if you want to paint it. In fact, that would be a good idea as you'll have to paint the upper wing and nose areas. Third is a Hungarian plane in a brown, green, sand over blue grey camo scheme. An Egyptian plane with a green nose is next and finally, a Soviet plane with roundels that have a faint North Korean insignia background. A full stencil suite in two colors is provided along with four pages of stencil placement.
| CONSTRUCTION |
The kit is started by building up the interior after painting the separate parts in a medium grey. A goodly amount of the photo etch is used on the sidewalls, which are also parts of the intake. The seat is constructed and the p.e. belts are attached once painted. Then all of the sidewalls, the floor and the fore/aft bulkheads are attached. It is imperative that these are properly aligned along with the nose gear well assembly or there will be issues later, as I was to find out. Specifically you must be sure that the sidewall pieces touch each other at the front. Mine did not and it caused the intake piece to not fit properly.
 Next the exhaust is built as is the main instrument panel I
crammed as much weight as I could into the nose as I could (which wasn't much).
Then all the sub assemblies were brought together along with the rudder when the
fuselage halves were joined.
Next the exhaust is built as is the main instrument panel I
crammed as much weight as I could into the nose as I could (which wasn't much).
Then all the sub assemblies were brought together along with the rudder when the
fuselage halves were joined.
Wings were next and one needs to ensure that the proper holes are opened for whichever style of underwing tanks one is to use. Then the wings and stabs are attached. Up to this point, the fit was quite good. Now to the area that gave me trouble. There is a lower forward fuselage piece that has to fit in place. It is here that one can add more weight. Because I didn't get the intake halves to fit properly, this piece along with the forward intake and the guns did not fit well. In fact, it was sufficiently poor to cause me to lose interest in the kit for about six months.
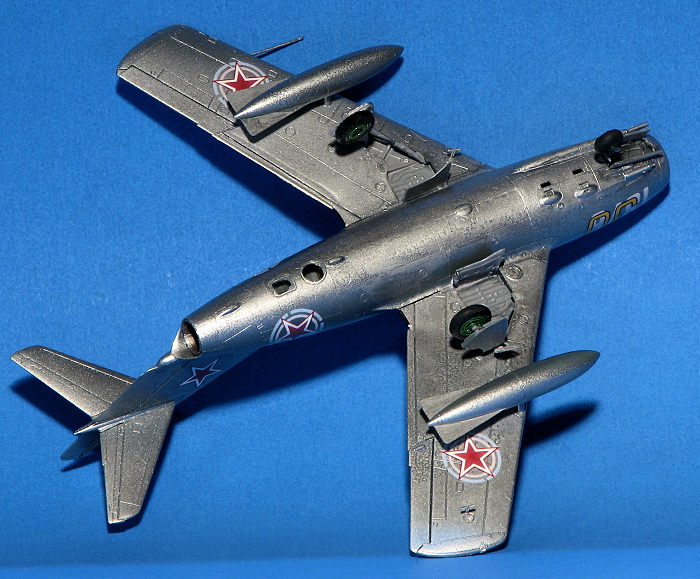
Fast forward to a couple of weeks ago. I decided to go ahead and finish it off. I dealt with the intake issue by a lot of scraping with a knife to get it close to fitting the intake piece then slathered Tamiya glue over it all in an effort to smooth it out. I also dealt with the lower fuselage issue with filler and attached the guns. The clear bits were installed on the rear fuselage and masked. I also masked the windscreen and canopy and installed those. The gear wells were filled with Silly Putty and I headed for the paint shop.
| COLORS & MARKINGS |
 I chose one of the overall aluminum schemes from the decal
sheet so sprayed it with Tamiya TS-17 from a near empty can. This caused some
issues that I couldn't get rid of in terms of the finish so I left it be and
basically wrote this one off as not one of my best efforts. The gear wells and
inside of the doors were painted a medium grey as were the gear legs. Wheels
were painted bright green and the main gear was assembled. The main gear axles
are tiny nubs that really make wheel alignment an issue. Those and the nose gear
were glued in place along with one of the outer gear doors.
I chose one of the overall aluminum schemes from the decal
sheet so sprayed it with Tamiya TS-17 from a near empty can. This caused some
issues that I couldn't get rid of in terms of the finish so I left it be and
basically wrote this one off as not one of my best efforts. The gear wells and
inside of the doors were painted a medium grey as were the gear legs. Wheels
were painted bright green and the main gear was assembled. The main gear axles
are tiny nubs that really make wheel alignment an issue. Those and the nose gear
were glued in place along with one of the outer gear doors.
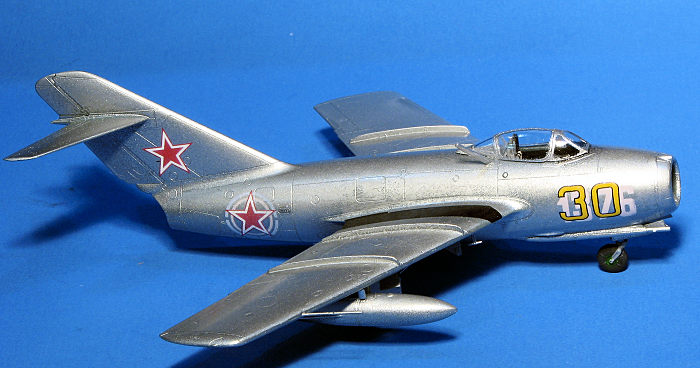
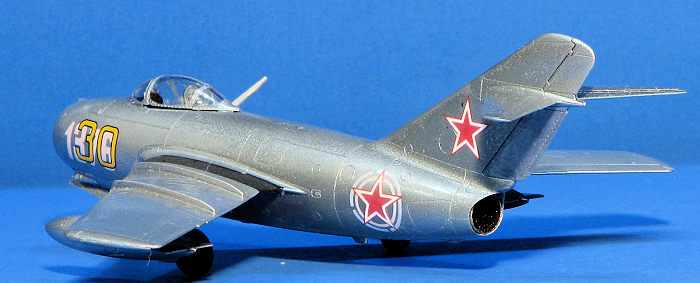
For decals, I used the kit option for a Soviet plane with the ghost image of its North Korean markings. Decals went on without issue. I used none of the tiny stencils. With that done, I added the various gear doors that were not previously attached. This was followed by the antennas and the pitot. I somehow lost the antenna mounted next to the canopy so made a replacement out of plastic. The masking was removed and that was it.
| CONCLUSIONS |
This one didn't go as well as I would have hoped so it sat around for longer than it should before I finished it. I now know what to keep my eye on when I do the weekend boxing that I have in the stash. While it is a nice kit, I prefer the new Airfix tooling as it isn't as fussy a build. Your results may differ.
Scott Van Aken
30 May 2025
Copyright ModelingMadness.com. All rights reserved. No reproduction in part or in whole without express permission from the editor.
If you would like your product reviewed fairly and fairly quickly, please contact the editor or see other details in the Note to Contributors.