Airfix 1/72 MiG-17F 'Fresco'
|
KIT #: |
A03091 |
|
PRICE: |
£12.99 SRP |
|
DECALS: |
Two options |
|
REVIEWER: |
Scott Van Aken |
|
NOTES: |
2019 tooling |
 The Mikoyan-Gurevich MiG-17 (Russian: Микоян
и Гуревич МиГ-17; NATO reporting
name: Fresco) is a high-subsonic fighter aircraft produced in the USSR from 1952
and operated by numerous air forces in many variants. It is an advanced
development of the similar looking MiG-15 of the Korean War. The MiG-17 was
license-built in China as the Shenyang J-5 and Poland as the PZL-Mielec Lim-6.
The Mikoyan-Gurevich MiG-17 (Russian: Микоян
и Гуревич МиГ-17; NATO reporting
name: Fresco) is a high-subsonic fighter aircraft produced in the USSR from 1952
and operated by numerous air forces in many variants. It is an advanced
development of the similar looking MiG-15 of the Korean War. The MiG-17 was
license-built in China as the Shenyang J-5 and Poland as the PZL-Mielec Lim-6.
MiG-17s first saw combat in 1958 in the Second Taiwan Strait Crisis and
later proved to be an effective threat against more modern supersonic fighters
of the United States in the Vietnam War. It was also briefly known as the Type
38 by U.S. Air Force designation prior to the development of NATO codes.
5,467 MiG-17, 1,685 MiG-17F, 225 MiG-17P and 668 MiG-17PF were built in
the USSR by 1958. Over 2,600 were built under license in Poland and China. The
main difference between the MiG-17 and other variants is that the F and other
types had an afterburning engine.
Usually
Airfix has been releasing new tool kits of older offerings from their
catalog. The MiG-17F is different in that Airfix never had one of these in
their older toolings. It is a most welcome kit as the most recent one before
this was the Dragon offering from 20 years back. Even before that, Hasegawa
had an overscale MiG-17PF in this scale.
 Detailing on the kit is excellent as you'd expect. Not as fine as what you'd
find on a Hasegawa or Tamiya kit, but more than acceptable. The kit is
molded in the UK so no issues with short shot pieces. I did find the sprue
attachments to be somewhat larger than with other kits, but not really an
issue. No flash, sunken areas, or visible ejector pin marks.
Detailing on the kit is excellent as you'd expect. Not as fine as what you'd
find on a Hasegawa or Tamiya kit, but more than acceptable. The kit is
molded in the UK so no issues with short shot pieces. I did find the sprue
attachments to be somewhat larger than with other kits, but not really an
issue. No flash, sunken areas, or visible ejector pin marks.
The cockpit is built inside the two halves that make up the intake. While
there are no rudder pedals, I don't think that is an issue as they'd be
fairly hidden. Decals are used for instruments, which is fine. A 'smiling
jack' pilot figure is provided if you wish to use one. There is some belt
detail on the two piece ejection seat.
With the interior/intake assembly done, that is set aside and the exhaust is
built. You have two options here, one for open and another for closed speed
brakes. Speed brake well detail is molded on the exhaust pipe and apparently
this sticks out enough so you can't close the brakes. After installing the
cockpit and exhaust pieces into the fuselage, 10 grams of weight goes in the
nose. Then the lower forward fuselage piece is installed. This contains
about 1/4 of the nose ring. The other 3/4 of it is then attached.
 The only options for things under wings on this boxing are the drop tanks.
There are holes for inner pylons with rocket pods and outer wing rocket
rails, but these are not used with this boxing. One then attaches the build
up wings and the tailplanes. The two pieces for the rudder are separate.
Cannon housings are separate as seems to be standard on MiG-15/17 kits.
The only options for things under wings on this boxing are the drop tanks.
There are holes for inner pylons with rocket pods and outer wing rocket
rails, but these are not used with this boxing. One then attaches the build
up wings and the tailplanes. The two pieces for the rudder are separate.
Cannon housings are separate as seems to be standard on MiG-15/17 kits.
All the landing gear pieces are next and these are well done. Main wheels
are slightly flattened. You can also build this gear up if you wish. The
last items are attaching the wing tanks and the separate windscreen/canopy.
The kit provides a canopy with and without the rear vision mirror. The one
with it is used in this boxing. In case you didn't put in enough nose
weight, an oil drum is provided to prop up the tail.
As
usual, the well done instructions provide only Humbrol paint numbers during
construction. The two markings options are the Shenyang J-5 as shown on the
box art in two shades of green for pretty much everything but the underside
of the wings and tailplanes. The other is a Soviet unpainted metal version.
There are and will be a variety of aftermarket decals out there for this
plane so don't think you are stuck with what's provided in the box. If you
want to use the kit markings they are very nicely printed and past
experience with Airfix decals has been positive.
 I wasn't intending to build this one as I had another kit all ready to
go on the stack, but I ran across it looking for something else and
figured 'why not'. So it was pulled from the shelves and I got underway.
The first step was to paint all the interior bits with dark sea grey. I
had to look up the color callout as Airfix continues that maddening
trend of only providing Humbrol paint numbers. For those of us who
either don't have a full suite of Humbrol paint or cannot get it, this
is my biggest complaint about Airfix kits. Anyway, I used Agama enamel
for this and Tamiya flat black for the other parts of the cockpit. There
are decals for instruments and those went on with no fuss.
I wasn't intending to build this one as I had another kit all ready to
go on the stack, but I ran across it looking for something else and
figured 'why not'. So it was pulled from the shelves and I got underway.
The first step was to paint all the interior bits with dark sea grey. I
had to look up the color callout as Airfix continues that maddening
trend of only providing Humbrol paint numbers. For those of us who
either don't have a full suite of Humbrol paint or cannot get it, this
is my biggest complaint about Airfix kits. Anyway, I used Agama enamel
for this and Tamiya flat black for the other parts of the cockpit. There
are decals for instruments and those went on with no fuss.
I then glued the two cockpit/intake/nose well halves together. I forgot
to put in the floor so had to pry them apart to install that. There is a
little trough atop the nose gear well which the instructions tell you to
install 20 gms. Good luck with that unless you have a stock of depleted
uranium handy. I managed to get 2.5 gms in there. I also stuffed a few
more grams in the intake once the fuselage halves were joined.
With that out of the way, I finished building up the cockpit and
installed it along with the assembled exhaust section in one fuselage
half. I had left out the seat and instrument panel thinking I could
install them later. I could for the seat, but the instrument panel is
held in place by two depressions in each fuselage half so really needs
to be done at that time. You can get it in, but you risk the possibility
of breaking it in the process. Don't forget the fairly large clear piece
that fits in the lower fuselage. I have no idea what this is for as none
of the other MiG-17s I've built have had this.
 At this time, the tail bits were attached and the wings built up. The
holes for the drop tanks need to be opened prior to this. There are also
holes for the rocket rails and the inner pylon that are not used with
this kit, but may be used if using aftermarket decals. Then I went to
attach the lower nose section. Uh Oh. Not a good fit at all and when
installing the upper nose rings I had some considerable gaps that had to
be filled. Suggest adding the lower nose and upper nose ring when gluing
the fuselage halves together. This will allow you to be sure you have
the interior/nose well properly positioned. Obviously I did not. Much
sanding and filling later, and all was done. It is a teeny bit oval, but
not all that noticeable.
At this time, the tail bits were attached and the wings built up. The
holes for the drop tanks need to be opened prior to this. There are also
holes for the rocket rails and the inner pylon that are not used with
this kit, but may be used if using aftermarket decals. Then I went to
attach the lower nose section. Uh Oh. Not a good fit at all and when
installing the upper nose rings I had some considerable gaps that had to
be filled. Suggest adding the lower nose and upper nose ring when gluing
the fuselage halves together. This will allow you to be sure you have
the interior/nose well properly positioned. Obviously I did not. Much
sanding and filling later, and all was done. It is a teeny bit oval, but
not all that noticeable.
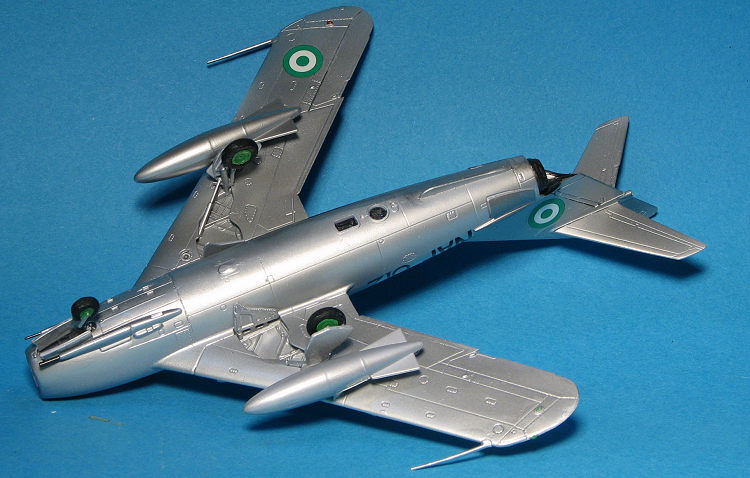
With that done, the landing gear was installed. The aircraft will be
overall aluminum so it is useful to do this at this time. There is a
raised piece atop the intake that is apparently a gun radar. Not sure if
that is really true, but it was not always seen on period photos so I'm
assuming it was something optional that only the best customers got. I
sanded it off as I did not see it on photos of the plane I was doing. Check
your references to see if it is there. This is on the plane at the USAF
Museum from which Airfix got its measurements and details. The canopy
was masked and attached in the closed position. Note that I had to trim
the seat back to get the canopy to fit.
Next I installed the landing gear and found the fit to be fairly good.
While attaching these, I did have to wonder at the method they used for
putting these in place. There are none of the pin and socket attachments
that are so common with other kits. This allowed the kit to stand on its
gear during painting and showed that you can get away with a lot less
than 20 gms of nose weight. I also glued the radio mast and the guns in
place, followed by the wing pitot tubes. Frankly, I'd have preferred
having these slot into holes, as the way they are designed, they do not
positively fit into place as well as I'd have liked. .
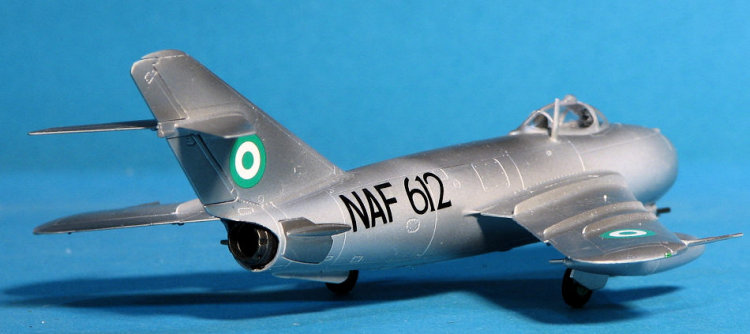
 Since I am doing an unpainted metal version, painting was simple. First
a coat of Tamiya ultra-fine primer, followed by a couple of coats of
Alclad II aluminum. I painted the exhaust in steel and the speed brakes
in dark aluminum. Wheels are Tamiya X-28 dark green with XF-85 tire
black.
Since I am doing an unpainted metal version, painting was simple. First
a coat of Tamiya ultra-fine primer, followed by a couple of coats of
Alclad II aluminum. I painted the exhaust in steel and the speed brakes
in dark aluminum. Wheels are Tamiya X-28 dark green with XF-85 tire
black.
Back on the bench I attached the main wheels. These do not attach to
axles, but tiny stubs on the end of the main gear legs. No surprise that
the first gluing didn't take, even though I scraped away the paint on
both parts. Then the doors. Except for the small outer doors, they all
fit well. Airfix wants you to install all the doors prior to attaching
the main gear and I can see why. With the main gear in place, the area
for the tab on the outer doors was too small for it to fit. I had to
grind away much of the door tab for it to fit in place.
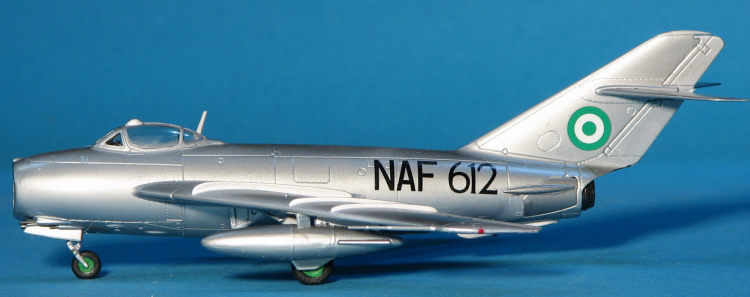
One of the last attachments were the drop tanks. I had drilled the wing
holes prior to attaching the wings, but those were too small and needed
to be enlarged. I also found that those small outer gear doors got in
the way of properly attaching the tanks. It took some bending and
tweaking to get the gear out of the way so t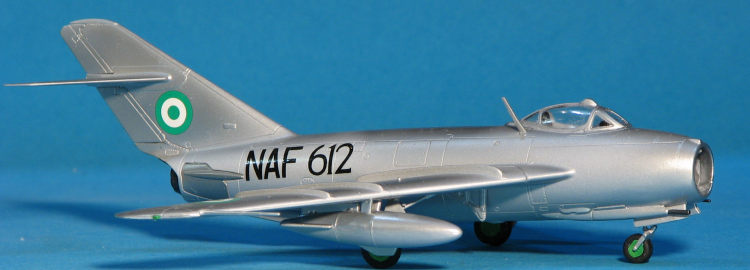 hat the tanks would fit.
This distorted the main gear so the legs are now slightly bowed in. I
also plugged in the speed brakes. These were a very tight fit and needed
glue to help lubricate them into place.
hat the tanks would fit.
This distorted the main gear so the legs are now slightly bowed in. I
also plugged in the speed brakes. These were a very tight fit and needed
glue to help lubricate them into place.
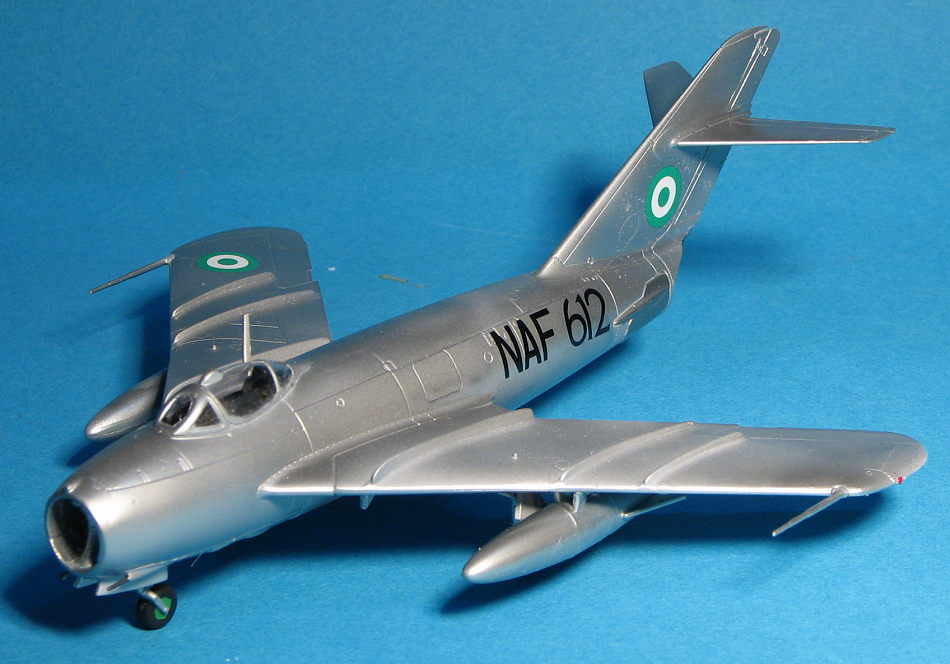
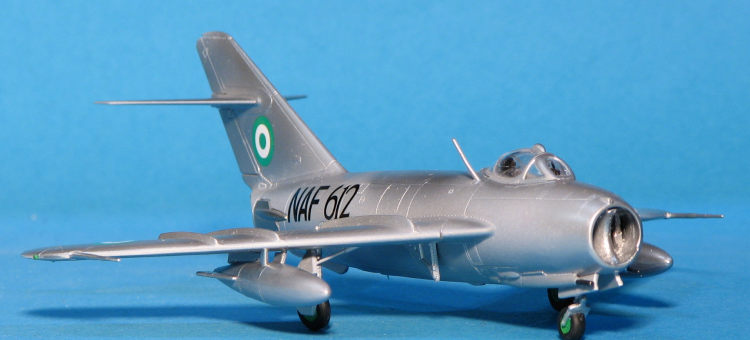
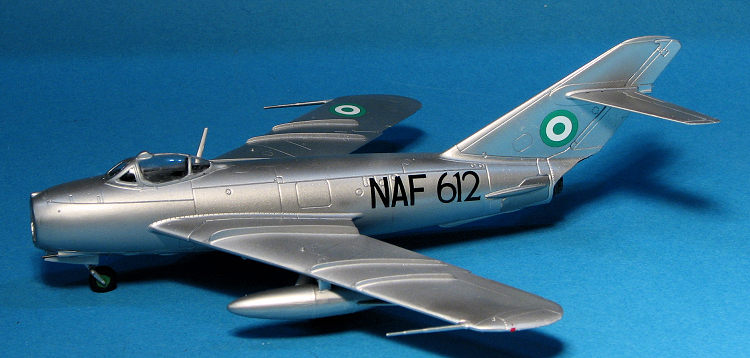
For markings, I chose Begemont BD 72-69: MiG-17 African Air Forces part
2, which had several unpainted metal options. It was tough choosing the
one I wanted to do, but eventually I picked one of the two Nigerian Air
Force options. Not many decals involved in this and the Begemont decals
performed superbly with a touch of Microsol to help them out.
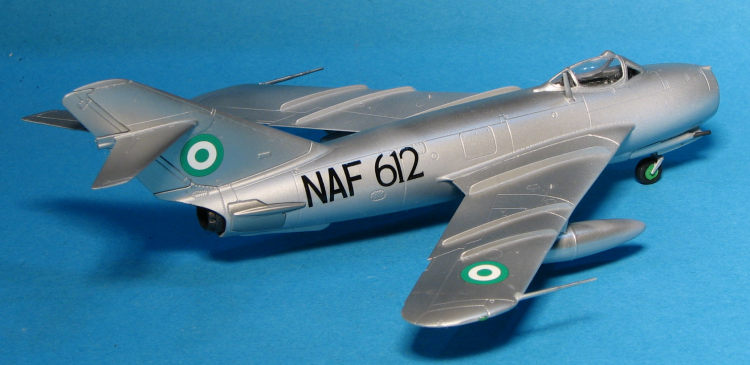
While it is great to see a new tool MiG-17 in this scale, in several areas
mentioned in the article, I found it wanting. There are too many odd features
(like the lack of sockets/pins for parts that are normally assembled by this
method). If these features were so great, we'd have seen them on Tamiya kits. I
am also not sure that using a display plane for the basis of the kit was the
best move. Most MiG-17s apparently did not have the gun radar piece atop the nose and I still don't know what the windows on the underside of the
fuselage are for.
Can I recommend it? Well, yes, but you do have to be aware of some of the
foibles of the kit and to take a lot of care during construction. I have a
second one of these kits and now that I am aware of its idiosyncrasies, I'm sure
the second build will go more smoothly. Besides, I still have a lot of
options on the African MiG-17 decal sheet that I want to do.
https://en.wikipedia.org/wiki/Mikoyan-Gurevich_MiG-17
15 May 2020
Copyright ModelingMadness.com. All rights reserved.
If you would like your product reviewed fairly and quickly, please
contact the editor
or see other details in the
Note to
Contributors.
Back to the Main Page
Back to the Review
Index Page
Back to the Previews Index Page