Anigrand 1/144 MiG-9
| KIT #: | Part of AA-4056 |
| PRICE: | $ |
| DECALS: | One option |
| REVIEWER: | Scott Van Aken |
| NOTES: | Resin |
| HISTORY |
During a meeting at the Kremlin in February 1945, Stalin summoned the chief designers of all the fighter teams and complained about poor performance in the USSR's implementation of jet technology. He ordered that the first generation of Soviet jet fighters was to be equipped with German engines. MiG were instructed to use the BMW 003 engine, while the Yak team were instructed to use Jumo engines. Because the BMW engines were smaller than the Lyulkas originally intended for the MiG-9, the fighter's airframe had to be reduced in diameter. The MiG and Sukhoi teams were also instructed that their aircraft had to incorporate a 37mm Nudelman NS-37 cannon.
 The first test aircraft, the I-300 (also called the izdeliye F {model F or product F} by OKB) prototype, arrived at the Chkalovskaya proving ground in spring 1946 where the Yak-15 prototype was already waiting. A coin was tossed to determine which team was to have the honour of the first Soviet test flight and the MiG won, and was first flown on 24 April 1946 by test pilot Alexei N. "Lesha" Grinchik.
The I-300 was an all-metal design, with simple straight wings with slotted flaps and delta shaped tail surfaces. It was also one of the first Soviet designed fighters featuring tricycle landing gear. Its powerplant comprised two RD-20 turbojets, which were Soviet-manufactured versions of the captured German BMW 003. In some instances, due to shortages and failed delivery of the RD-20 engines, actual BMW 003 engines were used in some production aircraft.
The twin engines were located behind the cockpit in the lower fuselage, with the exhaust exiting under the tail unit. This design was frequently used by the Soviet OKBs in early jet designs. Several issues arose attempting to protect the tail unit from the hot exhaust gasses, which eventually led to a steel laminate heatshield being installed along most of the bottom of the tail. There were four bag-type fuel tanks in the fuselage and three in each wing, providing a total internal fuel capacity of 1,625 liters (429 US gallons).
While the planned armament was based on the NL-57 57mm cannon mounted in the centerline engine intake bulkhead, the production versions of the MiG-9 were commonly armed with a single 37 mm and two 23 mm NS-23 cannons. The mounting of the three cannons was unusual with the NL-37 being mounted in the centerline engine intake bulkhead, and the two smaller cannon firing out the lower lip of the intake. This unusual location of heavy cannon is suspected to have caused several pilot deaths due to gun gas ingestion and led to restrictions on heavy cannon use at various altitudes.
Unusually, the I-300 did not feature an ejection seat.
 The I-300 reached a speed of 910 km/h (565 mph) during initial tests, and after further refinement, it entered service with the VVS as the MiG-9 during the winter of 1946-47. The jet had many performance- and steering-related problems, however it was put into service mainly because of political considerations. These led directly to the death of Alexei N. Grinchik on 11 July 1946 when he crashed a prototype I-300 while flying demonstration flights for the VVS leadership and government officials.
The final production MiG-9 was allocated the NATO reporting name of "Fargo" and the Soviet designation I-301. Later designs of the MiG-9 attempted to resolve many of the issues encountered in the I-300, including the fit of a rectangular fin to the 37 millimeter cannon barrel, giving the configuration the nickname "The Butterfly", however none of them worked very well. In the end, the entire nose was redesigned with the cannon barrel muzzles moved behind the engine intake and with the cockpit moved forward. The result was the single "MiG-9M", which also featured an ejection seat and RD-21 engines, the RD-21 being an afterburning variant of the RD-20 / BMW-003.
The MiG-9 was deployed largely in the ground-attack role and 610 aircraft were built in different versions by the time production ended in 1948.
| THE KIT |
 This is one of the additional smaller aircraft that Anigrand routinely adds in with their larger 1/144 subjects. Most folks do not build these, but I wanted to have what I thought would be a quickie build. The kit is made of fewer than a dozen parts, at least two of which will not be used depending on whether you build it gear up or not. There is a two piece airframe with a clear resin canopy. The main landing gear is molded in with the gear doors. Separate main gear doors are provided for a wheels up version. There is a separate nose strut assembly with a one-piece set of nose gear doors which will need to be cut when doing wheels down. The central cannon is also a separate item.
Instructions are basically an exploded view with theMiG's decals in with the ones for the other planes. We are talking about stars and a bort number.
| CONSTRUCTION |
Well, simple I wanted and simple I got. Step one, clean up the join area and glued the tail section onto the rest of the fuselage/wing 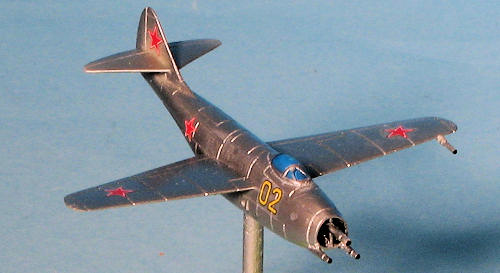 assembly. I used super glue of course, and put it on a bit thick so it would ooze out the seam, acting as filler. That was easily sanded down. Then the big decision. Gear up or down. Down and I'd need either a tail prop or drill out a hole in the nose and fill it with weight. Up and I'd need to build a stand as well as drill a mounting hole in the lower fuselage. I picked Up.
So in this case, I glued the optional gear up main gear doors in place and did the same with the nose gear doors after adding a bit for the piece I accidentally cut off. Hey, it happens. As there is zilch to see in the cockpit, I painted the inside of the canopy with a light blue and glued it in place. Masking this puppy wasn't easy as the windscreen panels are quite small. The nose cannon was then glued in place and I started thinking about paint.
| COLORS & MARKINGS |
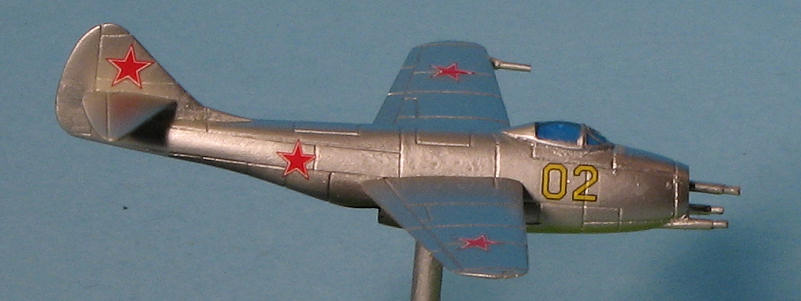
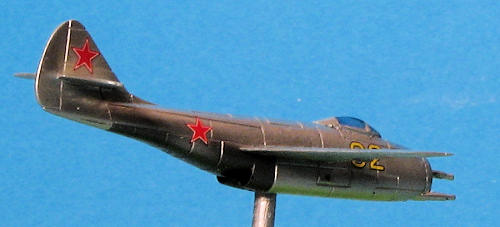
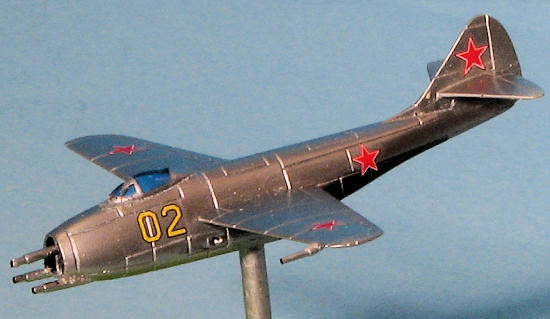
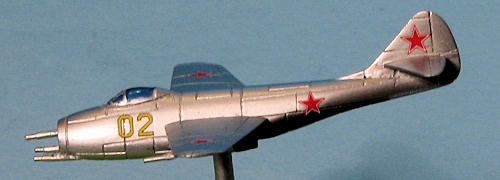
Soviet 1950's airplane = unpainted metal. Out came the Alclad II and it was given a couple of coats Aluminum. A bit of masking for the lower rear section and that was painted Steel as Jet Exhaust just looked too dark in this case. I was brave and didn't prime the resin. Got away with it this time.
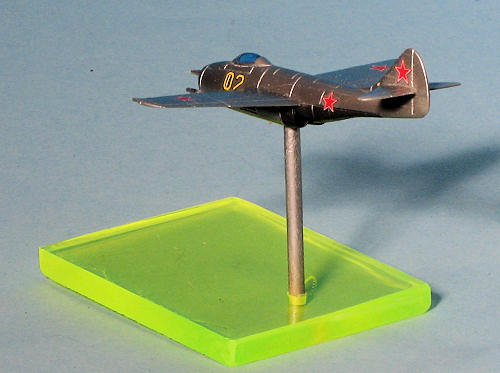
 Then I started looking around for something to use for a stand. Most of what I had was really too large for a model this small. I ended up using a small rectangle of clear bright green plastic with a 1/8" hole drilled in it for a wood dowel. This size hole was also drilled in the bottom of the MiG. Then the dowel was stuck in place in the model and painted silver. Next, it was stuffed in the hole in the base. It is a tight fit so no glue was harmed in this step.
Decals were applied. Now this was a bit of a poser as the instructions showed only fin and lower wing insignia, yet gave me six of them. Looking at photos on the 'net, I saw that MiG-9s were adorned with four, six or eight red stars. I picked 8 and applied the markings using spares on the decal sheet. Bort number was then stuck on. Mr. Decal Mush was applied to soften the decals and these actually cooperated by snuggling into engravings.
| FINAL CONSTRUCTION |
Well, there wasn't any actual constructions, but I did use thinned black acrylic paint in the intake and exhaust areas. Masking was quickly removed and that was it. I then photographed it in such a manner that most of the crummy paint work wouldn't be ob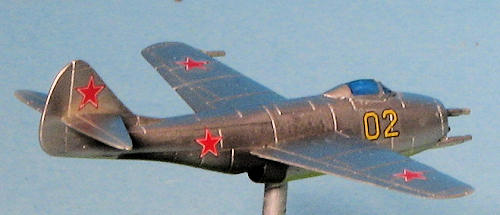 viously visible.
| CONCLUSIONS |
Nice little model. Took me two weeks. Yup, slow and slower is my motto. Really easy and something that just about anyone could handle. Not sure if one would want to fork out the sum for the bigger kit just for the MiG, but it is a nice addition to these kits.
| REFERENCES |
http://en.wikipedia.org/wiki/MiG-9
February 2011
Copyright ModelingMadness.com. All rights reserved. No reproduction in
part or in whole without express permission from the editor. If you would like your product reviewed fairly and fairly quickly, please contact the editor or see other details in the Note to Contributors.