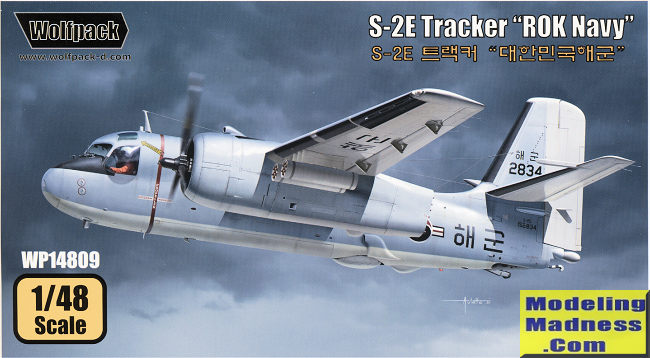
| KIT #: | WP 14809 |
| PRICE: | $50.00 |
| DECALS: | Four options |
| REVIEWER: | Scott Van Aken |
| NOTES: | Reboxed Kinetic kit |
| HISTORY |
The Grumman S-2 Tracker (S2F prior to 1962) was the first purpose-built, single airframe anti-submarine warfare (ASW) aircraft to enter service with the United States Navy. Designed and initially built by Grumman, the Tracker was of conventional design — propeller-driven with twin radial engines, a high wing that could be folded for storage on aircraft carriers, and tricycle undercarriage. The type was exported to a number of navies around the world. Introduced in 1952, the Tracker and its E-1 Tracer derivative saw service in the U.S. Navy until the mid-1970s, and its C-1 Trader derivative until the mid-1980s, with a few aircraft remaining in service with other air arms into the 21st century. Argentina and Brazil are the last countries to still use the Tracker.
| THE KIT |
 This
is a special boxing by Wolfpack models out of South Korea as Korea was one of
the operators of the type. Wolfpack will sometimes rebox another manufacturer's
kit if it is a type that was operated in country. So this is not a new kit, but
the Kinetic kit. From what I can see, aside from a set of masks for the clear
parts, and ROK decals, there is nothing really special about this kit. I would
have thought that perhaps Wolfpack would have included some of their resin bits,
but that is not the case. Still, I saved a bit by getting this boxing and
Caracal does several sheets that cover the S-2 so it is a win either way.
This
is a special boxing by Wolfpack models out of South Korea as Korea was one of
the operators of the type. Wolfpack will sometimes rebox another manufacturer's
kit if it is a type that was operated in country. So this is not a new kit, but
the Kinetic kit. From what I can see, aside from a set of masks for the clear
parts, and ROK decals, there is nothing really special about this kit. I would
have thought that perhaps Wolfpack would have included some of their resin bits,
but that is not the case. Still, I saved a bit by getting this boxing and
Caracal does several sheets that cover the S-2 so it is a win either way.
The kit provides an adequate cockpit section and does not use decals for the instrument panels. There is no cabin detail so I'm not sure why there is a separate entrance door. One thing I can tell you from experience is that the cabin in jam packed with equipment. There are a few holes to open up in the fuselage so pay attention to those. You also have a bomb bay to stick in there. You can install the radome either up or down with a couple of slots provided for that. You also need 80grams of weight to keep it from tail sitting. No way are you going to get that into the nose, but there is a lot of room behind the cockpit section so pack it in. Conversely, you could have it sit on the tail wheel. The real deal will tail sit with two or three people in the far back of the plane with no one in the front.
With the fuselage halves closed, the three piece canopy sectin and the nose piece can be installed. Construction then turns to building up the engines and nacelles. To handle the folding wing option, there are inner wing sections that get completely built up before slotting into the fuselage. One then takes care of the tail hool and other underside bits like the bomb bays, for which there are a pair of torpedoes. The landing gear and doors are next before assembling the outer wings and the pylons. For the pylons you have rocket packs that can be mounted. A searchlight pod also fits on one wing.
Then you decide if you want the wings straight or folded. If
you want them folded, there are hinges to install on the plugs you glued in
place during the build. If you want your wings extended, then you leave out the
inside wing pieces and install a thick section that accommodates both wings. The
last item you glue in place are the props and the horizontal stabilizers.

Instructions are quite well done and provide lots of detail images where needed. Color references are with Gunze paints. The four options are almost identical save for the serial numbers. Two of the planes are in standard USN light gull grey and while while the other two have a darker blue-grey that needs to be mixed in place of the light gull grey. Decals are nicely printed and include a full stencil suite. Rather than show the decals, I've shown the four options.
| CONCLUSIONS |
Probably the most challenging part of this build will be finding room for all the weight. Next would be painting it as you certainly won't be able to paint the completed airframe in one piece. Most of us will build subassemblies like the fuselage and the wing parts and paint them prior to attaching all the bits. I've seen this kit built and it looks great when done well.
| REFERENCES |
https://en.wikipedia.org/wiki/Grumman_S-2_Tracker
April 2021
Copyright ModelingMadness.com. All rights reserved. No reproduction without
express permission. If you would like your product reviewed fairly and fairly quickly, please
contact the editor
or see other details in the
Note to
Contributors.