Trumpeter 1/48 Sea Hawk FGA.6
| KIT #: | 02826 |
| PRICE: | $34.00 |
| DECALS: | Three options |
| REVIEWER: | Scott Van Aken |
| NOTES: | 2020 release |
| HISTORY |
The Hawker Sea Hawk was the first completely successful British jet-powered carrier fighter. It was roughly equivalent to the U.S. Grumman F9F Panther, with which it shared a powerplant - the very successful Nene centrifugal turbojet - and of similar performance to the U.S. Navy's jet mainstay of the Korean War. While the Sea Hawk began its development process two years prior to the Panther, it first flew in the same year as the XF9F-2, and yet it entered service with the Fleet Air Arm in 1951, three years after the Panther had reached the same milestone. Even so, it was the most successful British jet of the to be developed in the immediate postwar period, a time marked by a strange technological lethargy in the British aviation industry.
The P.1040, as the Sea Hawk was initially know at Hawkers, began as a proposal for a single-engine jet fighter in the fall of 1944, which was not acted on until nearly a year later when it was rejected by the Air Ministry in favor of maximizing production of Meteors and Vampires. In January 1946, the design was proposed to the Admiralty as a carrier-based fighter; this resulted in an order in May 1946 for three prototypes, the first of which flew September 2, 1947 - within a few months of the XF9F-2 in the U.S.
The most original feature was the bifurcated engine exhaust, which neatly solved the problem of excessive loss of thrust associated with early turbojets when a longer exhaust pipe was used. While the casual observer might think the Sea Hawk was a twin-engine design like the McDonnell F2H Banshee, it had a single Nene at the center of gravity, which greatly aided its handling in flight. Pilots enjoyed the outstanding handling characteristics of the Sea Hawk, which were in direct opposition to the Supermarine Attacker, the other naval jet fighter under development at the time. Pilots particularly liked the fact the cockpit was as far forward as it was, giving good visibility for both combat and carrier landings.
The Sea Hawk F.Mk.1 was ordered into production in 1949. The outbreak of the Korean War gave added impetus to the need for the airplane, but Hawker was now deeply involved in the problems associated with creation of the Hunter. Production was shifted to Sir W. G. Armstrong Whitworth Aircraft, which had responsibility for further development and all production past the first 35 F.Mk.1s, the first of which flew November 14, 1951.
Service trials with the Hawker-built aircraft occupied most of 1952 while production hit its stride at Armstrong-Whitworth. 806 became the first operational Sea Hawk squadron in March 1953.
Following production of 60 Mk.1s, 40 F. Mk.2s appeared with powered controls. The demand for increased operational versatility was met with 116 F.B.Mk.3s which could carry bombs in place of the underwing drop tanks. The 97 FGA Mk.4s appeared with a "4 store" wing and the ability to carry rockets outboard of the pylons, but performance suffered. The Admiralty decided to upgrade the FB Mk.3s and FGA Mk.4s with the Nene 103, offering an increase in power from 5,000 to 5,200 lbs of thrust, to be known as the FGA Mk. 5 and Mk.6 respectively. Few were re-engined, but 87 new-build FGA Mk.6s were taken into service. When the last of these were delivered in January 1956, production of the Sea Hawk for the FAA came to an end. The FGA.6 was the first variant of the Sea Hawk to see combat action, providing close air support for the Anglo-Israeli-French Suez operation, Operation Musketeer, in November 1956.
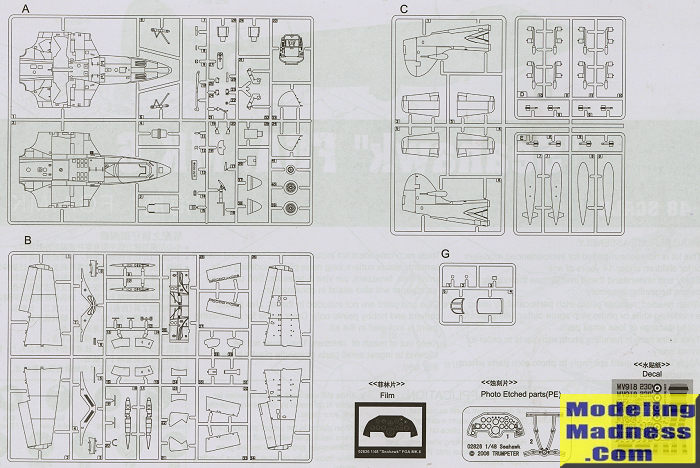
| THE KIT |
 If
you have ever built a modern Trumpeter kit, you know that they are some of
the best fitting kits around. However, they often goof up something.
Sometimes it is a shape issue, but in this case it is a somewhat
shallow cockpit and some would point at the gear wells. Other than that, the
kit is very nice and is undoubtedly easier to build than the earlier Classic
Airframes kit and even earlier Falcon vacuform kit in this scale. For some
reason, the Sea Hawk doesn't catch the attention of many modelers on this
side of the pond and when you do see one, it is inevitably in Suez stripes.
Colorful, yes, but there were more than just a few units that flew this
plane.
If
you have ever built a modern Trumpeter kit, you know that they are some of
the best fitting kits around. However, they often goof up something.
Sometimes it is a shape issue, but in this case it is a somewhat
shallow cockpit and some would point at the gear wells. Other than that, the
kit is very nice and is undoubtedly easier to build than the earlier Classic
Airframes kit and even earlier Falcon vacuform kit in this scale. For some
reason, the Sea Hawk doesn't catch the attention of many modelers on this
side of the pond and when you do see one, it is inevitably in Suez stripes.
Colorful, yes, but there were more than just a few units that flew this
plane.  The last
steps cover landing gear, wheels, gear doors and the rockets. This
also covers the drop tanks which were almost always installed as these early
jets were gas-guzzlers. The final construction step has you attach various
antenna along with the windscreen and canopy. The canopy can be posed
closed.
The last
steps cover landing gear, wheels, gear doors and the rockets. This
also covers the drop tanks which were almost always installed as these early
jets were gas-guzzlers. The final construction step has you attach various
antenna along with the windscreen and canopy. The canopy can be posed
closed. | CONCLUSIONS |
Overall, this is a nice kit. It has been reviewed and gotten decent comments. One doesn't see it built that often, but if you like early jets or are a Fleet Air Arm modeler, this should be considered.
| REFERENCES |
Wikipedia
January 2026
Copyright ModelingMadness.com. All rights reserved. No reproduction in part or in whole without express permission.
If you would like your product reviewed fairly and fairly quickly, please contact the editor or see other details in the Note to Contributors.