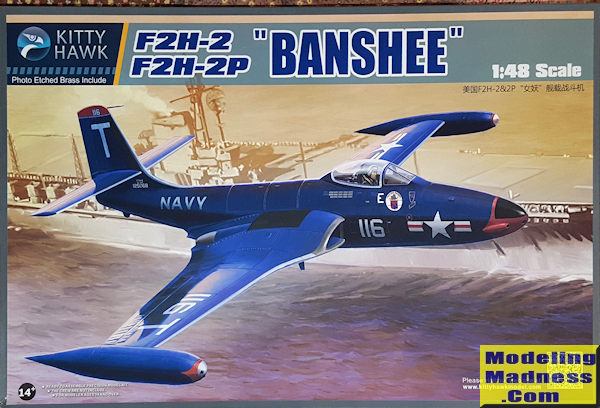
Kitty Hawk 1/48 F2H-2/2P Banshee
| KIT #: | KH 80131 |
| PRICE: | $64.00 |
| DECALS: | Four options |
| REVIEWER: | Scott Van Aken |
| NOTES: | New tool kit 2016 |
| HISTORY |
Although the Navy accepted the F2H-1, it was the more capable F2H-2 that was most widely used. With newer Westinghouse J34-WE-34 3,250 lbf (14.5 kN) thrust engines, it had significantly improved performance. The wing was modified and strengthened to add provisions for 200 gal (760 l) wingtip fuel tanks; unlike the contemporary USN F9F Panther, the Banshee's wingtip tanks were detachable. Two armament pylons were added under each stub and outboard wing, for a total of eight, allowing the aircraft to carry a maximum stores load of 1,580 lb (454 kg), consisting of four 250 lb (113 kg) bombs and four 5-in (12.7 cm) unguided rockets. The “kneeling” nose gear was omitted from the F2H-2 and most other subsequent Banshee variants.
The F2H-2 was the foundation for three minor variants of the Banshee. The first, the F2H-2B, had strengthened wings and a strengthened inner pylon under the portside wing to allow the craft to carry a 1,650 lb (748 kg) Mark 7 nuclear bomb or a 3,230 lb (1,465 kg) Mark 8 nuclear bomb. In order to compensate for the vastly increased load, the F2H-2B was fitted with stiffer landing gear struts and a pilot-switchable power booster for the ailerons; the latter was necessary so pilots could control a roll to the left with a heavy Mark 8 nuclear bomb fitted on the left-hand pylon. One 20 mm cannon was omitted to make room for additional electronics to arm the nuclear weapon.
The F2H-2N was a night fighter variant outfitted with a 2 ft 10 in (0.86 m) longer nose that housed a Sperry Corporation AN/APS-19 radar unit. The cannons were moved rearwards in the nose to make room for the radar. One F2H-2N, BuNo 123311, was eventually returned to McDonnell to serve as the prototype for the enlarged and enhanced F2H-3 and F2H-4 series. A handful of F2H-2Ns retained the "kneeling" nose feature of the earlier F2H-1.
The F2H-2P was a photo-reconnaissance version with six cameras housed in a 2 ft 5 in (0.74 m) longer nose; it was the first jet-powered reconnaissance aircraft used by the USN. Remote controls allowed the pilot to rotate the cameras in the vertical and horizontal planes, and the aircraft could be fitted with a pair of underwing pods that each contained 20 flash cartridges for night photography. The camera bay was electrically heated to prevent frost. The F2H-2P was considered a valuable photo-reconnaissance asset due to its long maximum range for a jet aircraft, maximum operational altitude of 48,500 feet, combined with its speed that made it extremely difficult to intercept by other combat jet aircraft of the early 1950s era.
An interesting note is that the Banshee was one of the few fighters that could intercept the B-36. Thanks to is broad, straight wing, it could not only reach the B-36's altitude, but could maneuver as well. Swept wing jets might be able to get there, but once they maneuvered, they tended to stall.
| THE KIT |
 Modelers have been waiting a long time for a nice Banshee in 1/48
scale. This is not the first time the plane has been kitted in this scale, the
most widely available one being a Hawk kit from back when dinosaurs ruled the
earth that was lacking in detail and had some shape issues.
Modelers have been waiting a long time for a nice Banshee in 1/48
scale. This is not the first time the plane has been kitted in this scale, the
most widely available one being a Hawk kit from back when dinosaurs ruled the
earth that was lacking in detail and had some shape issues.
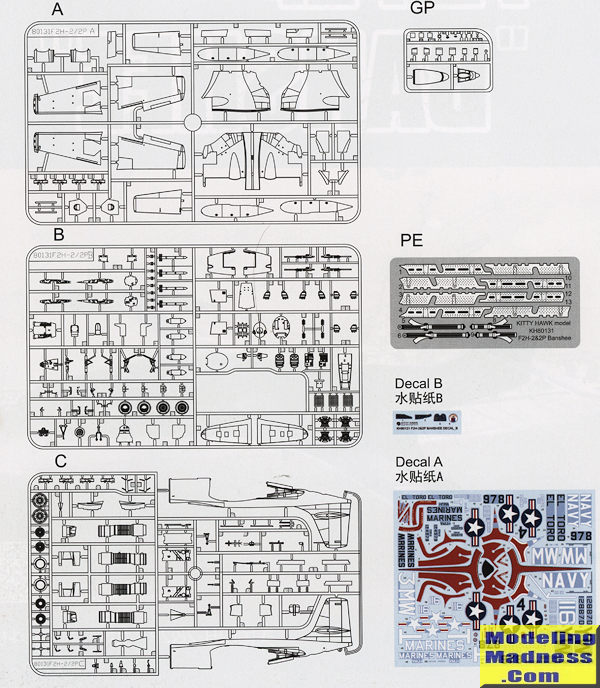
I am not one to break out the micrometer when it comes to kits, but I'd say this one should fill the bill for most of us. The box contains three large sprues and one clear. Detailing is typical of modern kits with engraved detailing and that includes rivet patterns. I did notice some flash and there will be a need to sand down a few very short ejector stubs on some of the pieces.
The cockpit has nice detailing and one gets decals to use on the
panels if one wishes, though the printing on these is not as clear as it could
be. There is an eight piece ejection seat and photo etch harness. This fits into
a tub that you build up with inside panels and aft bulkhead. There is a rear
shelf that fits behind the armor plate.

Nose gear well builds up out of five main pieces with piping on the 'roof' and nose gear door hinges on the side panels. I like that this is done during initial build up as often these are difficult to get in place later. Once the cockpit and nose gear well are built up (and the instructions have to attach the nose gear at this time), Those and the tail hook well fit into fuselage halves and the halves are closed.
Next steps have you construct the main gear assemblies and your choice of nose. The gun nose has full guns with ammo bins. There are panels on the side that can be displayed open and come with door braces. The cap then fits in place. Those not wanting the doors open can leave off the ammo bins to provide room for weight. No weight is indicated, but you will need it. The camera nose is even more complex with all those clear windows on the side of the panels. There are five cameras provided: four are vertical and one is for the nose. The lower windows fit into place once the nose halves are assembled. There is no room for nose weight in the nose, but there may be enough just forward of the instrument panel and behind the nose well.
One reason you'll need weight is that there are two complete engines provided and you won't be able to leave them out as they are integral with the intakes and exhaust. Kitty Hawk has designed the kit with a separate lower central wing section onto which the engines and main gear wells will fit. Instructions would have you paint the gear wells white, but I don't think that is correct for the sea blue options.
Then come the wings. Kitty Hawk's instructions call the folded wings 'closed' and the lowered wings 'open' so be sure to keep that in mind during the build. It can initially be confusing. Before installing the lower fuselage/wing section, one will have to install the two short upper wing pieces and then decide on raised or lowered flaps. While only the lowered option is shown, I'm betting you can model them up.
For the outer wings, there are inserts that fit in the end of both wing sections for the folded wing option. There is a lot of detail in these areas with seven separate bits in each wing stub. For the lowered wings there is no positive alignment section so care will be needed if doing the plane with straight wings. When I build this kit, I'll probably attach the upper wing first and when it is in place, then go with the lower. That should prevent any issues with a step.
You can also model the wing spoilers deployed and that is what the rest of the photo etch is for. Frankly, I don't recall seeing photos with these deployed on the deck, but the option is there. There are wing trailing edge speed brakes, and these will be deployed open with the wings folded. Pictures show that when the flaps are lowered, the lower parts of these speed brakes are also lowered. The inside of these and the flaps are red so I'm assuming the flap wells are this shade also.
Wing tip tanks are designed so you can model the plane without them
installed, but this would be relatively rare on the -2/2P. Kitty Hawk has opened
all the holes for the bomb and rocket racks and you will have to fill them if
not using them all (such as with the photo recce bird). Period photos of the
photo recce version show them usually devoid of lower wing racks, but at least a
couple show Marine
 planes with the outer ones installed.
The kit comes with two bombs and four rockets so you won't be able to fill all eight pylons, but you can get close. The windscreen and canopy are separate so you can show off the interior.
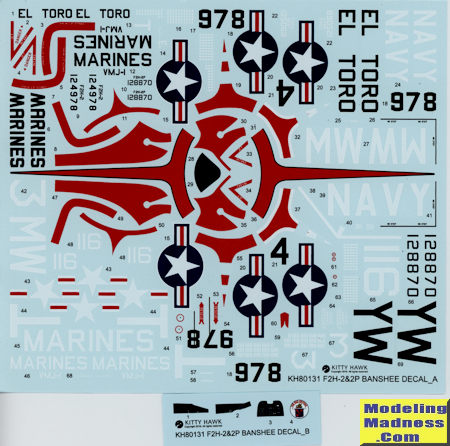
Instructions are very nicely done with a lot of color information and some detail images to help keep things properly aligned. Markings are for four aircraft. Two are in overall gloss sea blue, both markings options which have been in Airfix or MPC 1/72 kits. One is with VF-11 and the other with VMJ-1. Then there is a light gull grey over white plane with red trim which is also a VMJ-1 aircraft. Finally, in light gull grey and white with large international orange pieces is one based at El Toro for use by reservists and desk jockeys who need to get in their hours to keep their flight pay. The decals are very nicely done and should be extremely thin, based on past experience. Note that I've darkened the image so you can see the white bits.
| CONCLUSIONS |
I think that anyone who picks up this kit will be happy with it. It doesn't look to have any major areas of concern, though if there were any, it would be the fit of the center wing section to fuselage and perhaps fitting the outer wing in the lowered position. Kitty Hawk kits are not for the uninitiated and frequently take a bit more work to complete than your average Tamiya kit, but then that is simply the nature of the beast. I have built several Kitty Hawk kits and while none have been 'slap together' kits, they have not been impossible and do require some modeling skill from time to time. Unless you are one of short patience or lacking in experience, you should find this one to your liking.
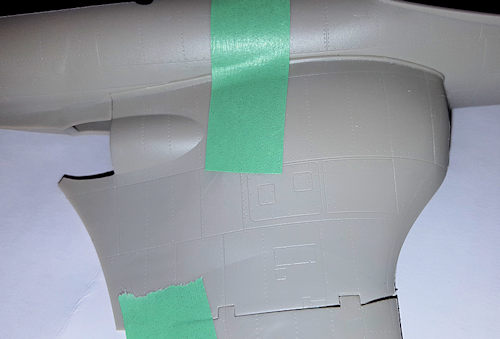 There have
been a lot of questions from readers already regarding the fit of the parts. So
I popped a few bits from the sprue to give them a test. One was the fuselage
halves. These needed a bit of clean up in terms of some light flash and sanding
down an ejector stub on the fin, but the fit is quite good. I also had to trim
out some areas where the sprue gates intruded on the attachment areas where the
nose will fit. I'm not sure how helpful the image to the right will be,
but I did test fit the upper inner wing section to the fuselage where it
attaches much like the same structure on the Cougar. The fit seems very good to
me. I also test fit the outer wing panel in the lowered position. Fit here is
not quite as good, though it should be able to be improved with some trimming.
I'd recommend to those of us who build kits like this with the wings extended to
back up the join with strips of plastic card. This one is already on the work bench.
There have
been a lot of questions from readers already regarding the fit of the parts. So
I popped a few bits from the sprue to give them a test. One was the fuselage
halves. These needed a bit of clean up in terms of some light flash and sanding
down an ejector stub on the fin, but the fit is quite good. I also had to trim
out some areas where the sprue gates intruded on the attachment areas where the
nose will fit. I'm not sure how helpful the image to the right will be,
but I did test fit the upper inner wing section to the fuselage where it
attaches much like the same structure on the Cougar. The fit seems very good to
me. I also test fit the outer wing panel in the lowered position. Fit here is
not quite as good, though it should be able to be improved with some trimming.
I'd recommend to those of us who build kits like this with the wings extended to
back up the join with strips of plastic card. This one is already on the work bench.
| REFERENCES |
https://en.wikipedia.org/wiki/McDonnell_F2H_Banshee
September 2016
Thanks to Glen Coleman and www.kittyhawkmodel.com for the preview kit. You can find this kit at your favorite hobby shop or on-line retailer.
If you would like your product reviewed fairly and fairly quickly, please contact the editor or see other details in the Note to Contributors.
Back to the Previews Index Page