Mini Wings 1/144 Super Mystere B.2
| KIT #: | mini008 |
| PRICE: | $27.00 from www.nostalgicplastic.com includes free US shipping |
| DECALS: | Two options |
| REVIEWER: | Scott Van Aken |
| NOTES: | Resin kit with two vacuformed canopies |
| HISTORY |
The Super Mystère represents the final step in evolution which began with theDassault Ouragan and progressed through theMystère II/III andMystère IV. While earlier Mystère variants could attain supersonic speeds only in a dive, the Super Mystère could exceed the speed of sound in level flight. This was achieved thanks to the new thin wing with 45° of sweep (compared with 41° of 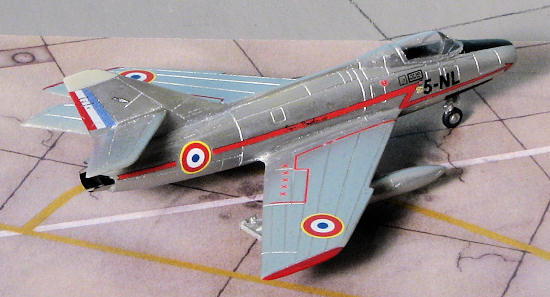 sweep in the Mystère IV and only 33° inMystère II) and the use of anafterburner-equippedturbojet engine.
The first prototype Super Mystère B.1, powered by aRolls-Royce Avon RA.7R, took to the air on March 2, 1955. The aircraft broke the sound barrier in level flight the following day. The aircraft entered production in 1957 as the Super Mystère B.2. The production version differed from the prototype by having a more powerfulSNECMA Atar 101G engine. In 1958, two Super Mystère B.4 prototypes were built. Equipped with a new 48° swept wing and a more powerfulSNECMA Atar 9B engine, the aircraft were capable ofMach 1.4. Production never materialized because the fasterDassault Mirage III was entering service. In 1973, theIsraeli Air Force upgraded their Super Mystère B.2 with a non-afterburning version of thePratt & Whitney J52-P8A and new avionics.
A total of 180 Super Mystère B.2 were built.
| THE KIT |
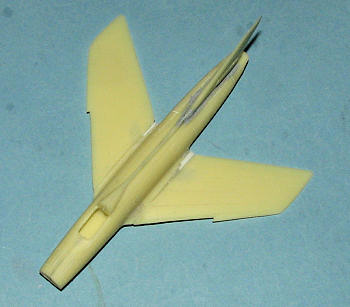
 The kit is designed very much like a standard plastic kit. There are two fuselage halves with a separate intake and exhaust section. No intake trunking is provided, but it appears that the one piece cockpit/nose well piece will take care of that. Finding room for nose weight will be a bit of a challenge if one doesn't want to see it through the intake.
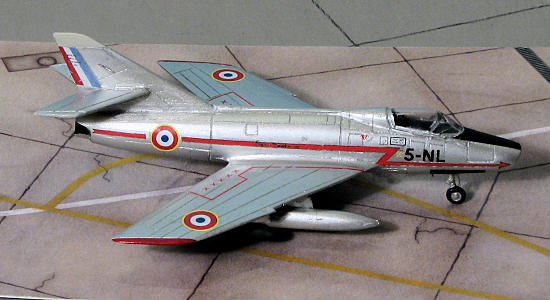
 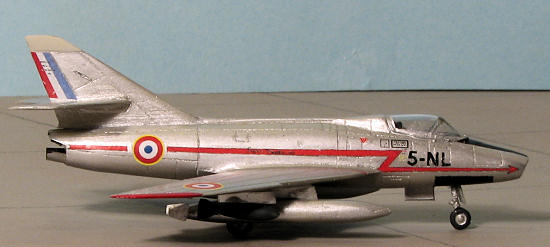 Instructions consist of a small, folded sheet that have an exploded view on one side and color decal placement/camouflage on the other. Generic color information is supplied for the exterior with none for the interior, gear legs, or wheel wells. I believe that black will work OK for the interior and seat while the wells and struts were probably left in bare metal. The two markings schemes include the box art scheme for a EC 1/5 aircraft in unpainted metal with black anti-glare and gun panels. This one has the tri-color rudder flash and red fuselage stripe. The other is for a camouflaged plane from EC 1/12 in what appears to be a US South East Asia scheme. However, looking at color photos of these planes, that scheme is only close. Apparently the French used slightly different colors as the underside is shown as a blue grey vice a light grey as used by USAF planes in this scheme.
 | CONSTRUCTION |
As with all resin kits, cleanup of parts is the first job. To keep from losing some of the very small pieces, I basically did all the big bits first, attending to the smaller ones at they came to be used. I had some difficulty cleaning up the very thin lower afterburner petals. These were quite fragile and I feared breaking them off. I eventually did.
 With the main bits cleaned up. I cemented the cockpit tub into the fuselage. There is no indication of precise placement and one has to fuss around to get it where it looks good. It later turns out I got mine in crooked to one side. The fuselage halves were cemented together and the burner section glued in place. The tail section was slightly larger than the fuselage so needed sanding down. During this operation, one burner petal broke off. . Then the fin was glued in place. It is a bit wider than the fuselage spine so again, more sanding and filler. When I sanded the wing roots to what I thought were flat, they did not match up to the fuselage. In this case, I needed to insert plastic card to get a matching join. I'm not sure how much of this was self-induced (probably most of it), but it was enough to put me off construction for a considerable time.
When I got back to it, I dutifully attached the nose piece, which is thankfully a single bit though a tad larger than the fuselage, tail planes, painted the cockpit and seat, and cleaned up the drop tanks. The fins on the drop tanks are not well molded and one was missing completely. When I installed the seat it was then I noticed that the floor was canted off to one side. SIGH!. The canopy was cut out (it seems a bit too long), and glued in place with clear paint, my adhesive of choice nowadays. It doesn't fog, can be molded in somewhat and actually sticks a lot better than you'd think. I've not yet pulled off a canopy when pulling off masking. It often requires holding the canopy in place with tape while the paint dries, though.
 With the canopy on, I masked it. Much easier than trying to mask the teeny thing while holding it in your fingers. The next step was to glue in the landing gear. I found that one of the main gears was longer than the other so had to trim one a bit shorter. I also managed to snap off the nose wheel twice. Another delay was in order.
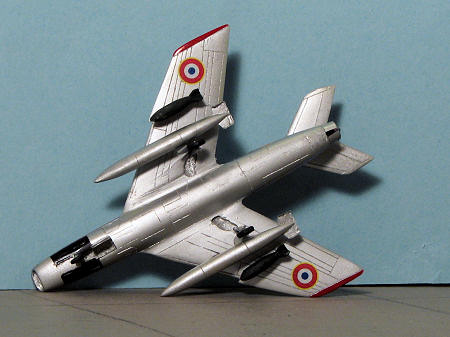
Returning to the fray a few weeks later, I cemented on the two inner pylons. It seems from the instructions that the inner and next out pylon are different sizes, but the ones in the kit all look the same to me. During the attachment, I broke off the other lower burner petal. To fix this and the burner petals, I cut small sections of very thin brass sheet as replacements. Not great, but it does look convincing. With nothing else falling off or snapping, I headed for the paint shop.
| COLORS & MARKINGS |
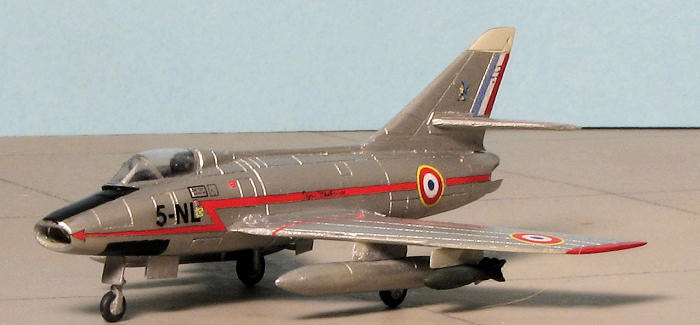
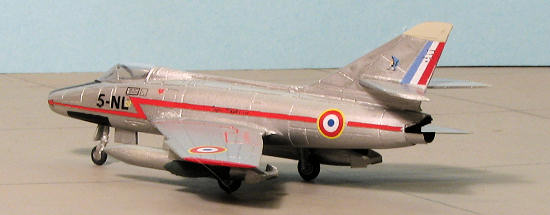
 I had originally wanted to do the camouflaged version, but after all I'd been through and fearing the decals may be a bit transparent, I went with the silver one. For this, it was a simple job of mixing up some Humbrol #11 and spraying it on. I also masked off the nose and gun areas for black paint and the fin tip for some light grey. This last exercise snapped off one of the horizontal stabs.
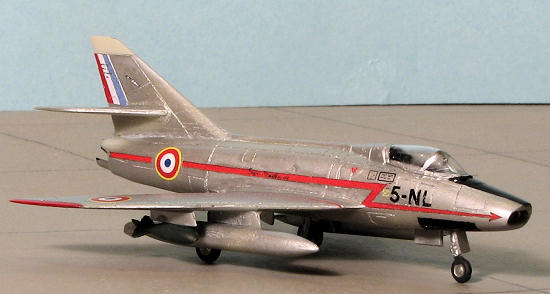
Back on the bench, I cut out the decals. These are ALPS printed and are prone to scratching so one has to take care. To my delight, they didn't disappear when placed on the model. Even the yellow rings on the insignia were visible so I was pleased about that. In fact, they worked very well indeed. The insignia seem to be a tad oversized and the fuselage stripe is way too long. Even trimming it quite a bit in the 'middle', the front and rear of the stripe go to the front and rear of the model when they should be several scale feet back from the ends. The rest was painless. I also painted the wingtips with a brush using Tamiya Red. No clear coat was applied, though I probably should.
| FINAL CONSTRUCTION |
For this, the main wheels were painted and glued on as were the gear doors. The nose gear doors are oversize. I broke off the big nose gear door, which was quickly snatched up by the carpet gnomes and so made a new one out of plastic card. The bombs were painted with Vallejo Bronze Green and then they and the drop tanks were cemented into place. Masking was removed and that was it.
| CONCLUSIONS |
 I have to say that this should not have taken nearly four months to build. But when I run into trouble, I set things aside and hope to have the willingness to get back to them. Anyone else would probably have finished this in a few weeks. Or less. The end result turned out fairly well, despite my ham-handed building. Large it is not, but these 1/144 kits fit nicely into the little spaces around larger models on the shelf. In fact, I'm building up quite a collection of these little planes and can easily foresee more being done in the future.
| REFERENCES |
August 2009
Copyright ModelingMadness.com. All rights reserved. No reproduction in
any form without express permission from the editor. If you would like your product reviewed fairly and fairly quickly, please contact the editor or see other details in the Note to Contributors.