| KIT #: | PK-47 |
| PRICE: | $10.00 |
| DECALS: | Two options |
| REVIEWER: | Scott Van Aken |
| NOTES: | 1987 tooling according to Matchboxkits.org. |
| HISTORY |
T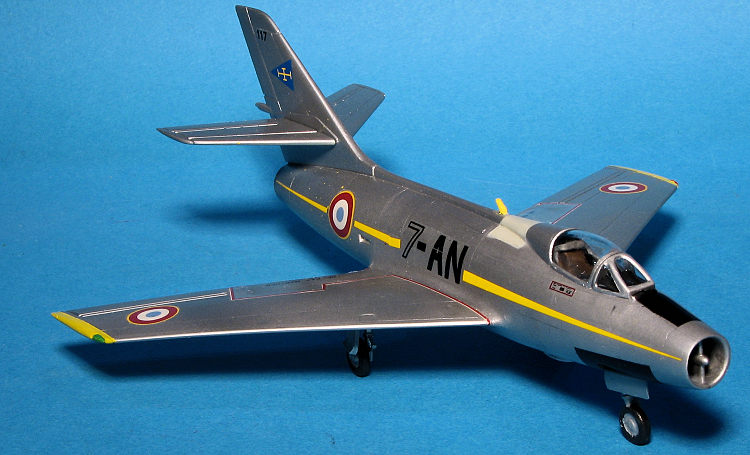 he Mystère IV was an evolutionary development of the Mystère
II aircraft. Although bearing an external resemblance to the earlier aircraft,
the Mystère IV was in fact a new design with aerodynamic improvements
for supersonic flight. The prototype first flew on 28 September 1952, and the
aircraft entered service in April 1953. The first 50 Mystere IVA production
aircraft were powered by British Rolls-Royce Tay turbojets, while the remainder
had the French-built Hispano-Suiza Verdon 350 version of that engine.
he Mystère IV was an evolutionary development of the Mystère
II aircraft. Although bearing an external resemblance to the earlier aircraft,
the Mystère IV was in fact a new design with aerodynamic improvements
for supersonic flight. The prototype first flew on 28 September 1952, and the
aircraft entered service in April 1953. The first 50 Mystere IVA production
aircraft were powered by British Rolls-Royce Tay turbojets, while the remainder
had the French-built Hispano-Suiza Verdon 350 version of that engine.
France was the main operator of the Mystère IV and at the peak usage operated 6 squadrons. Most of the aircraft were purchased under a United States Offshore Procurement contract and many were returned to US custody after they were retired. In April 1953 the United States government and the United States Air Force placed an order for 223 aircraft to be operated by the French.
The new Mystère IVs were used in the 1956 Suez Crisis and continued in use into the 1980s. The type was also used by India and Israel.
| THE KIT |
One thing about Matchbox kits is that they were never really fiddly; or highly detailed. They were basically designed for young modelers, hence the multiple color sprues. The simplest of the kits were the level one kits which had low parts count such as does this one. The colors in this kit are a silvery grey and a light blue. The clear sprue is very thick and while the windscreen and canopy are separate, the cockpit is as sparce as can be with only a seat to fill the void.
 No indication of weight is shown but I'd put in some just to be sure. Once
the fuselage halves are closed, construction moves to two drop tank/pylon shapes
and assembling the upper and lower wing halves. The wings, one piece tailplanes,
cockpit clear bits and intake are attached. There is no intake trunking. Landing
gear is fairly basic but fine for a kit like this one. Gear doors are thick and
it looks like they will fit just fine in the closed position. At one time
Matchbox kits had a display stand, though this kit does not have the notch for
it nor does it look like it ever had one. The drop tanks fit into depressions on
the underside of the wings. The planes did not always carry these so you can
fill those if you are modeling one without them.
No indication of weight is shown but I'd put in some just to be sure. Once
the fuselage halves are closed, construction moves to two drop tank/pylon shapes
and assembling the upper and lower wing halves. The wings, one piece tailplanes,
cockpit clear bits and intake are attached. There is no intake trunking. Landing
gear is fairly basic but fine for a kit like this one. Gear doors are thick and
it looks like they will fit just fine in the closed position. At one time
Matchbox kits had a display stand, though this kit does not have the notch for
it nor does it look like it ever had one. The drop tanks fit into depressions on
the underside of the wings. The planes did not always carry these so you can
fill those if you are modeling one without them.
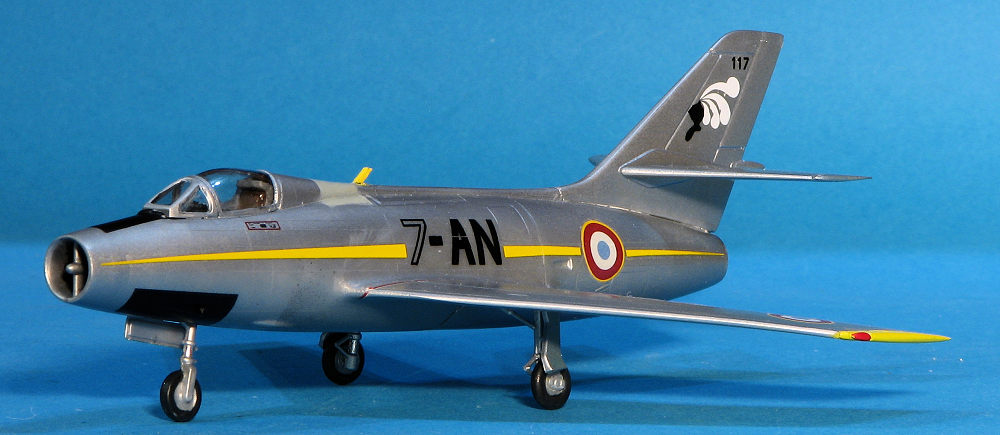
Instructions are well done and in the Matchbox style with painting info separate from the construction sequence. Colors are generic. Two markings options are provided. The back of the box shows the color scheme and decal placement. One is the box art plane from EC 2.12 in 1955. The red spine will need to be painted. The other is an Israeli plane from 200 Squadron in 1967. It is in tan/brown over what looks like painted aluminum, but is probably a light grey. This kit was sealed prior to my opening it for this article, so the decals look very good and should be quite usable.
| CONSTRUCTION |
 ith. The intake piece was next
and fit is not good. This took a lot of filler applications followed by
sanding to get to blend in properly.
ith. The intake piece was next
and fit is not good. This took a lot of filler applications followed by
sanding to get to blend in properly. | COLORS & MARKINGS |
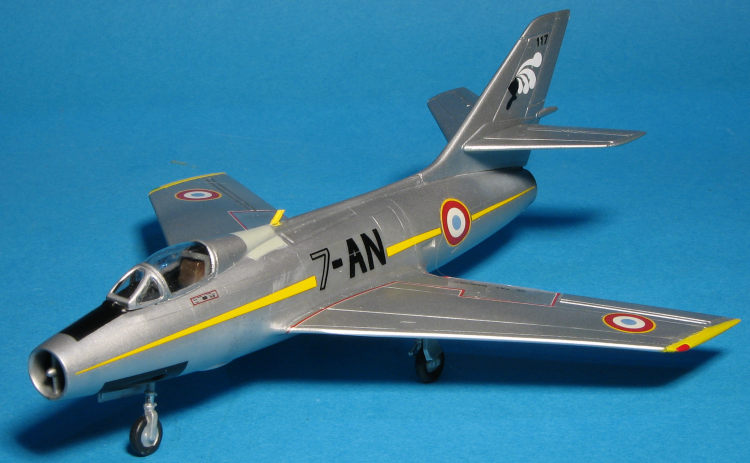 All French planes were in unpainted metal early in their career though
looking at images of later planes shows a fairly solid silver color that
indicates they may well have been painted. Just about all extant
museum/display planes look to have been painted silver. As I'm doing a later
plane, I sprayed everything with Tamiya AS-12. When dry, I masked the wing
tips and painted them yellow. The area around the guns and an upper nose
section were then painted black.
All French planes were in unpainted metal early in their career though
looking at images of later planes shows a fairly solid silver color that
indicates they may well have been painted. Just about all extant
museum/display planes look to have been painted silver. As I'm doing a later
plane, I sprayed everything with Tamiya AS-12. When dry, I masked the wing
tips and painted them yellow. The area around the guns and an upper nose
section were then painted black. | CONCLUSIONS |
As mentioned above, this is very much a beginner's kit, being in their orange series. I've built quite a few Matchbox kits over the year and they are all pretty basic stuff and easy to built. They can also be made to look very nice with proper construction and painting. There are aftermarket decals out there if you don't like the kit option.
14 January 2022
Copyright ModelingMadness.com. All rights reserved. No reproduction in
part or in whole without express permission in writing from the editor.
If you would like your product reviewed fairly and fairly quickly, please
contact
the editor or see other details in the
Note to
Contributors. Back to the Main Page
Back to the Review
Index Page
Back to the Previews Index Page