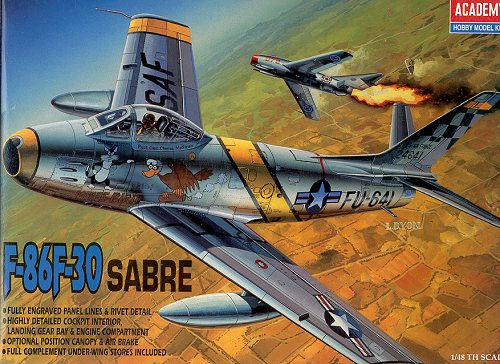
Academy 1/48 F-86F-30 Sabre
| KIT # | 2162 |
| PRICE: | $25.00 |
| DECALS: | See review |
| REVIEW: | |
| NOTES: | Has full engine detail |
| HISTORY & KIT |
I'll direct you to the preview for the particulars on the aircraft and the kit itself. I'll just add that I'll be building this kit as the fighter-bomber variant. There are steps in the kit instructions that are specifically for that version.
| CONSTRUCTION |
For this kit, the first thing I did was to open the holes in the bottom of the wing for the drop tanks and bomb racks. This kit had been purchased at a swap meet so the wings and fuselage had already been removed from the sprue. Rather crudely too as there were some chunks taken out of the parts where they joined the sprues. Anyway, once the holes were cleaned up the wings were joinedtogether.
Then it was on to the cockpit. The cockpit sits atop the intake trunking. I glued together much of the cockpit that would all be painted the same colors as I could. As a note, the instructions say to paint the cockpit grey. This would be correct for all aircraft built in late 1953 and beyond, which would be for nearly all export Sabres. Korean War F-86s are supposed to have flat black cockpits, so that is what I painted it.
Once the trunking had dried, The fuselage halves were joined together. The fit wasn't bad, but was not a perfect fit. Some filler will be needed. While drying, the drop tanks were glued together as were the bombs. Both of these items were painted olive drab. I used the banana shaped tanks as shown in the decal instructions.
Then the wing was attached. Fit is quite good, but not tight. There are small gaps all the way around; some of which needed filler. I also noticed that the right wing had a slight warp in it. Not sure if it is fixable at this stage or not. The next step was to glue in the gunsight to the top of the instrument panel and then installthe windscreen. Fit here is pretty good. Other than the tail planes, I had an airframe at the point where I could start painting it. The windscreen and canopy were masked and the canopy tacked on with white glue. Off to the paint shop.
| PAINT & DECALS |
I really built this kit so that I could try out the
 Once the aluminum was dry, I peeled off the tape to see what
it looked like. There is not really that much difference in tone between the
regular and dark aluminum, but it is there. The exhaust and gun ports were
painted Magnesium using Tesors Metallizer as no similar color was sent by Alclad. There is a jet exhaust, but it is a bronzish color in the bottle and I
wasn't sure how it would turn out. Anyway, I am thrilled with the Alclad II. It
works as advertised and seems to be a bit more durable than SnJ. It certainly
takes fewer applications.
Once the aluminum was dry, I peeled off the tape to see what
it looked like. There is not really that much difference in tone between the
regular and dark aluminum, but it is there. The exhaust and gun ports were
painted Magnesium using Tesors Metallizer as no similar color was sent by Alclad. There is a jet exhaust, but it is a bronzish color in the bottle and I
wasn't sure how it would turn out. Anyway, I am thrilled with the Alclad II. It
works as advertised and seems to be a bit more durable than SnJ. It certainly
takes fewer applications.
The landing gear were painted dark aluminum and then glued into the wheel wells. It was at this time that I got the book F-86 Fighter-bomber units in Korea and came to the realization that I could find no photos of the scheme I wanted to use that matched the Academy kit. Specifically, all of them in the book had slatted wings where the Academy kit isn't. SIGH! Back to hunting for decals and a definite slowdown in construction.
 I finally found a sheet that would fit in with the plane I
was constructing. Unfortunately, the sheet only offered the black stripes for
the yellow wing and fuselage band all Korean war F-86Fs carried. I tried the
fuselage band from the kit decals. Hmm. They fit, but not very well as I could
sea lots of air bubble under the decal. Dragging out the Solvaset, I applied that tothe decal. It only made things worse! I then got frustrated and set the
kit aside for a while (like a few months) and worked on other things.
I finally found a sheet that would fit in with the plane I
was constructing. Unfortunately, the sheet only offered the black stripes for
the yellow wing and fuselage band all Korean war F-86Fs carried. I tried the
fuselage band from the kit decals. Hmm. They fit, but not very well as I could
sea lots of air bubble under the decal. Dragging out the Solvaset, I applied that tothe decal. It only made things worse! I then got frustrated and set the
kit aside for a while (like a few months) and worked on other things.
Getting back into the kit, I first removed as much of the fuselage decal as I could. Then these areas were painted white, as was the nose. The nose was then painted red and when dry, masked off. Then the other areas received a coat of yellow. I used Testors Model Master enamels for these colors. Knowing how Alclad II reacts with enamels unless one is very careful, the areas that were painted were given a coat of clear acrylic gloss when dry.
At least I thought it was dry. Within a day some horrible cracks appeared in the yellow paint. Nothing to do but to sand it off and respray the white. I didn't fully strip the paint, just the clear coat and yellow, though some of the white also disappeared, which is why the respray. I waited a full three days between coats just to make sure this time.
 After the final clear coat, I used 18mm Tamiya tape to mask off the
yellow stripes. The decal instructions stated that the yellow bands were 15mm. Add the2mm black stripes and I think that I'll have them properly covered.
Once everything had dried for several more days, I applied a couple of coats of Alclad II Aluminum over all the affected areas. The Alclad II did a great job
of covering even the red and yellow paint. Just reinforces how much I like this
stuff!
After the final clear coat, I used 18mm Tamiya tape to mask off the
yellow stripes. The decal instructions stated that the yellow bands were 15mm. Add the2mm black stripes and I think that I'll have them properly covered.
Once everything had dried for several more days, I applied a couple of coats of Alclad II Aluminum over all the affected areas. The Alclad II did a great job
of covering even the red and yellow paint. Just reinforces how much I like this
stuff!
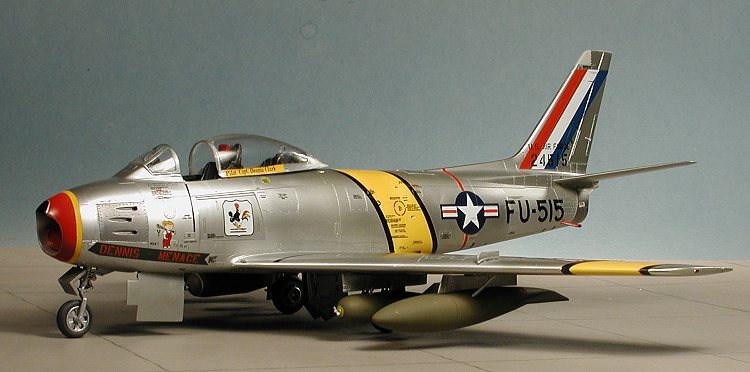
It was then time to start decaling this beast. I used Aeromaster 48-278, Sabres over Korea pt. III and chose the mount of Capt. Dennis Clark of the 67th FBS/18th FBG. His aircraft was appropriately named "Dennis the Meanace" after the cartoon character. This same plane was later 'given' to Lt. Reid Irvins when Clark's tour of duty was over.
The Aeromaster decals worked as advertised, and are fully compatible with Solvaset, my fave setting solution. It took a bit of work to get the nose decal to fit and the fuselage black stripes were a bit of a fuss as well, but finally succumbed. The wing stripes were WAY too long, but better long than short! Obviously, there is some difference between the Academy Sabre and those of Monogram and Hasegawa as most of the decals from this sheet seemed abit large. After getting on the larger decals, it was off to the kit decals for the myriad data and other markings. The kit decals had the white rather badly-off register, so any decals that had white in them (not many, thankfully) had tobe trimmed when possible. A few were beyond fixing and were not used, though I doubt anyone will notice their absence. Once all the decals were on, the kit was wiped down to remove dried Solvaset and other decal residue. Then it was back to the bench to apply the rest of the parts.
| EVEN MORE CONSTRUCTION |
 Now that it
was pretty, I still had a considerable number of bits to add to it. First, I drybrushed the interior to bring out any detail that was there. At this time,
I also installed the seat. The head rest can be painted any of three colors; black, red or olive drab. The reference shows all three colors being used.
The seat is actually pretty basic and really needs to be replaced with a resin
one with greater detail, but I used it anyway. The part behind the seat consists
of an ARN-6 antenna (with the little clear bit that actually needs to be a smoky
brown on the inside) and some structure. This was glued to the bottom of the
canopy and set aside.
Now that it
was pretty, I still had a considerable number of bits to add to it. First, I drybrushed the interior to bring out any detail that was there. At this time,
I also installed the seat. The head rest can be painted any of three colors; black, red or olive drab. The reference shows all three colors being used.
The seat is actually pretty basic and really needs to be replaced with a resin
one with greater detail, but I used it anyway. The part behind the seat consists
of an ARN-6 antenna (with the little clear bit that actually needs to be a smoky
brown on the inside) and some structure. This was glued to the bottom of the
canopy and set aside.
Now the wheels were installed and then the gear doors. The fit on these was very good indeed as is the fit for the extend/retract pistons. While the instructions would have to install the completed main gear with the outer doors attached, it really isn't necessary and will save a lot of hassles. The nose door needs to be bent at a 45 degree angle and then glued to maintain that angle. You can simply hold it in a clamp for a day while the glue dries. The gun doors were then glued on. Fit here is not the best and I ended up filling the gun bays with putty to keep the doors from 'sinking' in. The speedbrakes had no such trouble and fit so well that I could have just pressed them into position! Now I know that many of you are going to think I am some sort ofheretic by not having the speed brakes open. After all, almost every picture you see of a Sabre on the ground has the speed brakes extended. Well, I wanted anice, clean looking airframe so glued them shut! :oÞ
 Next the
wing pylons were installed. The holes in the wings need to be enlarged a bit for
the pylons to fit. The fit of these is not that good and there are all sorts ofgaps, especially at the leading edge. Frankly, the curvature of the pylons
is not the same as the wing at this point, the pylons not being curved enough.
It is just the opposite for the small upper wing fences, they are too curved! Fix it or live with it as you choose. I should mention at this point that it
is important for you to not install these things until AFTER the decaling
is done or you'll be asking for trouble.
Next the
wing pylons were installed. The holes in the wings need to be enlarged a bit for
the pylons to fit. The fit of these is not that good and there are all sorts ofgaps, especially at the leading edge. Frankly, the curvature of the pylons
is not the same as the wing at this point, the pylons not being curved enough.
It is just the opposite for the small upper wing fences, they are too curved! Fix it or live with it as you choose. I should mention at this point that it
is important for you to not install these things until AFTER the decaling
is done or you'll be asking for trouble.
With the pylons in place, the tailplanes were installed using superglue. Fit here is good, but a bit sloppy as the holes in the tail are a bittoo large. The fuel dump tube is then installed. I suggest installing this as late as possible or you'll just knock it off. Same with the wing pitot tube.
At this time, the only aftermarket bits other than the
decals were installed. I have learned to really like MV lenses, and use them whenever I can. They just look a ton better  than what comes with the kit and are made in an amazing number
of sizes for all sorts of applications. The ones I used on the Sabre are part # LS29. With those installed I could then glue on the forward nose gear door. At therear a pair of lights, one amber and one white, were glued in. I like to
use white glue (Elmers) for these things as it eliminates any major screw-ups
with superglue.
than what comes with the kit and are made in an amazing number
of sizes for all sorts of applications. The ones I used on the Sabre are part # LS29. With those installed I could then glue on the forward nose gear door. At therear a pair of lights, one amber and one white, were glued in. I like to
use white glue (Elmers) for these things as it eliminates any major screw-ups
with superglue.
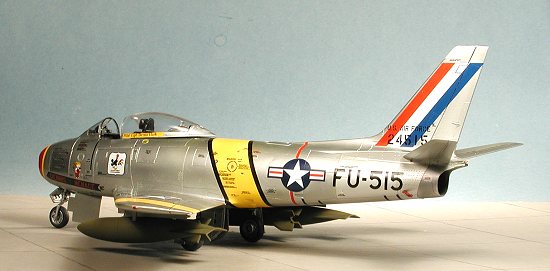
Last things were the stuff under the wings. I had painted the drop tanks O.D. for use with another decal option (see sob story several paragraphs above). Having already painted them, I decided 'to hell with it' and used them anyway. No one can say for sure that it never flew with them as they were available. The fit of the tank support strut is ok, but not really that good. Finally a pair of M117 bombs were glued on the inner pylons, the canopy attached with white glue and the intake and exhaust plugged with the covers that come in the kit. Alright, call me lazy, but I'm not about to do all that filler work on intake and exhaust seams when there are perfectly good covers available!
Once that was done, a mission was planned and some suspected communist felines were reconnoitered and strafed. They were last seen fleeing over the border!
| CONCLUSIONS |
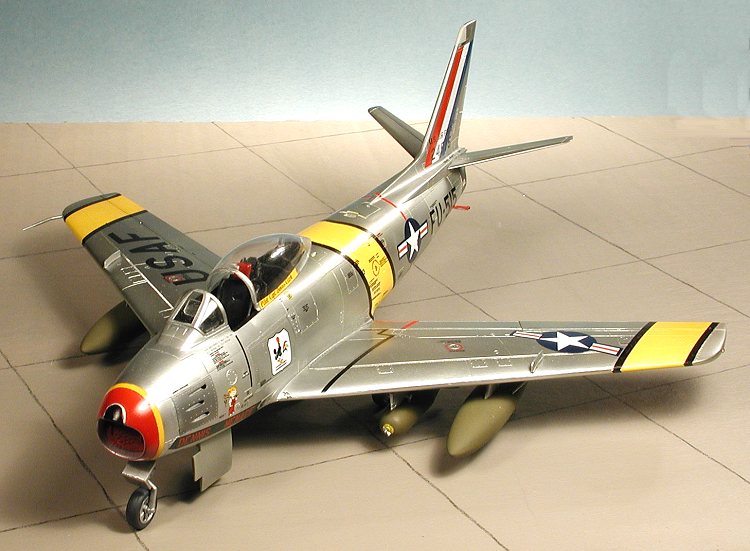
 To say that
this kit turned out great would be about right. It sure beats the heck out of
the Monogram kit, despite the few shortcomings noted in the review. Haven't
built the Hasegawa version yet, so can't really compare the two, however, I am not
at all dissatisfied with the Academy offering. Some of the plusses of the
Academy kit are a lower price, a proper Korean War vintage fuselage and wings, and
full engine and gun bay detailing. Let's not forget those engine covers, too!
To say that
this kit turned out great would be about right. It sure beats the heck out of
the Monogram kit, despite the few shortcomings noted in the review. Haven't
built the Hasegawa version yet, so can't really compare the two, however, I am not
at all dissatisfied with the Academy offering. Some of the plusses of the
Academy kit are a lower price, a proper Korean War vintage fuselage and wings, and
full engine and gun bay detailing. Let's not forget those engine covers, too!
A very pleasant building experience and a kit that I can easily recommend to most modelers. Just remember to get a different decal sheet for it!
| REFERENCES |
F-86 Sabre Fighter-bomber Units Over Korea, by WarrenThompson, Osprey, 1999
April, 2001
Copyright ModelingMadness.com. All rights reserved. No reproduction in part or in whole without express permission.
Review kit courtesy of me and my wallet!
If you would like your product reviewed fairly and fairly quickly, please contact the editor or see other details in the Note to Contributors.
Back to Reviews Page 2021