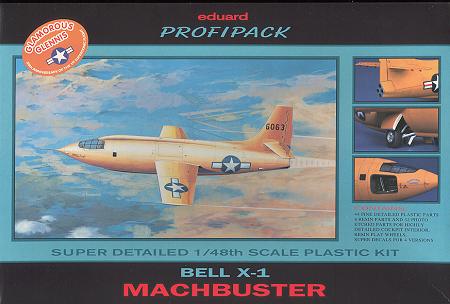
Eduard 1/48 X-1
| KIT # | 8032 |
| PRICE: | $39.95 |
| DECALS: | Enough to do one of four variants |
| REVIEW: | |
| NOTES: | Profipack version |
| HISTORY |
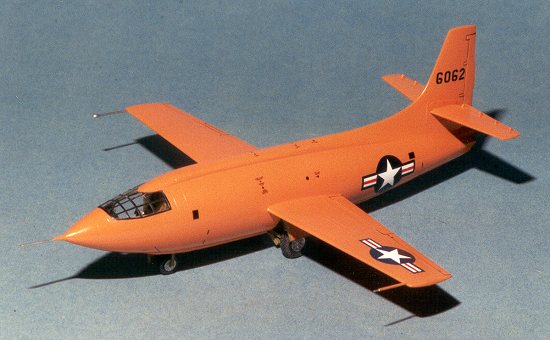
To me, this aircraft is the real hero of the movie The Right Stuff.I'm sure by now that everyone knows the story of how Chuck Yeager flew thebullet-shaped X-1 to break the sound barrier over the Mojave Desert on October14, 1947. Also how this information was not released until quite some time laterin fear that it would somehow give the Russians an edge in the Cold War.
The X-1 was probably the first pure research aircraft built by the US whoseonly purpose was to go fast. In order to accomplish this, it was felt that theonly way to get the required speed was by use of rocket engines. Many believethat much of the research into rocket power was pioneered by the Germans duringWorld War Two, however there were a number of American scientists working on thesame applications. Bell Aircraft was chosen to provide three aircraft for theattempt at the sound barrier. In order to do this the aircraft had to be devoidof unnecessary weight and it was felt that ground launching the aircraft wouldnot allow sufficient fuel for the attempt. To this end a B-29 was speciallymodified to carry the X-1 to launch altitude. At that time, the aircraft wasdropped and, after firing its rocket motors, allowed to speed away.
After success at the sound barrier, additional X-1s were built and older onesmodified to perform other tasks. Chuck Yeager flew the much-improved X-1A to aspeed of 2,500 mph, all in an airframe with straight wings! Yeager named hisbarrier breaking aircraft Glamorous Glennis after his wife, similar to anumber of P-51s that Yeager flew during the war. This historic aircraft is nowin the main hall of the Smithsonian Air and Space Museum in Washington DC alongwith the Wright Flyer and Apollo 11.
| THE KIT |
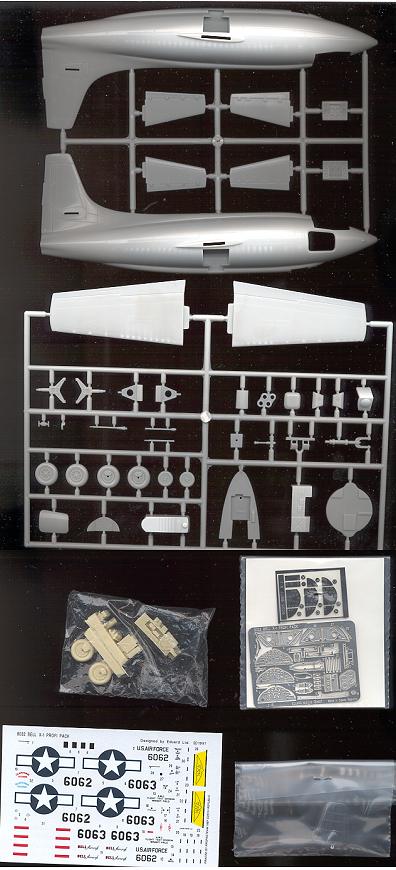 Eduard'skit of the X-1 is the first really good one in 1/48 scale. Included in theProfi-pak version are resin bits to replace the wheels and most of the cockpitas well as etched metal parts for at least three different versions of the X-1.Apparently there were instrument panel changes and those are taken care of withthis set. There are four distinct color schemes provided for on the decal sheet.Two of them are orange overall, one white and one orange with white tail andfuselage sections. A very nice touch for this kit is the inclusion of aninjected plastic canopy. Frankly, I'm not very good with vacuform canopies as Ifind there is little mating surface, making them rather fragile, so this is anice surprise.
 The plastic is typical Eduard in that it has fine engraved detailing and is abit softer than normal, making gluing and sanding much easier. There is no flashon any of the parts that I could see and the resin pieces are very well done.The decal sheet is printed by Propagteam, so you know the quality is good andthey are super thin. It will be interesting to see how the white of the nationalinsignia holds up to the orange background. Most decals have trouble withintense colors like orange and red. In addition to the optional decals andinstrument panels, Eduard has supplied both types of horizontal stabilizer; onewith the external hinges and one without as used later in the program.
The instruction sheet is eight pages. The first page is a brief history ofthe X-1. Page two is a parts breakdown and color guide. The next two arepictorial building instructions. One has the choice of not using the photoetchedor resin bits, but frankly, you would be missing a lot should you decide not touse them. Their locations in the aircraft are shown in smaller inset boxes,leaving no doubt to their location. Finally, the last four pages are used toshow the different color schemes available in the kit.
| CONSTRUCTION |
Not wanting to be toodifferent, the interior was the first place to start. Well, not exactly as thefirst thing I did was to saw off those resin bits that are used in the interior.The resin is quite good, but my left side panel had an incompletely moldedoxygen hose. Have to so some scrounging for a replacement segment somewhere.Here is the standard warning about resin. If you are sawing or sanding it, do soin a well ventilated place or wear a dust mask and the dust is not good for yourlungs. In order to accept the resin left panel, the attachment point for theplastic one needs to be removed from the wall.
Ok, now on to real construction. First pieces glued together were the backwall, nose gear well (yep that vertical thingy is the nose gear well!), and thenose gear attachment panel. Then the interior floor was glued on, and thisassembly was then set into the nose section to make sure all the bits wereproperly aligned. Lucked out and they were! Various resin bits and pieces werethen glued to the cockpit assembly. The whole thing was then painted US interiorgreen using Aeromaster acrylic. The interior of the fuselage was also paintedthis color as were the wheel wells.
 Along theleft inner wall, a wire run from the etched fret was installed. Then theinterior had a couple of items painted flat black, the etched seat beltsinstalled and then it was glued into the left fuselage half. At this time, someetched pieces were installed in the main gear wells. Two large fishing weightswere superglued against the back of the cockpit bulkhead and the door handleglued to the right fuselage half. Finally, the rudder pedals were glued into theleft half. Now the instructions would have you put them in the right half, butthey must clear some resin pieces on the cockpit floor so you need to put themon the left half first. Hopefully you didn't get the resin bits too far offcenter or the pedals will not fit. Once all that was dry, the fuselage halveswere glued together.
 Now you are probably wondering about the other stuff that has to go into thecockpit. Fortunately, the canopy hole is big enough for those to fit in afterthe halves are glued together. I checked this out by dryfitting the pieces beforegluing the halves together! After dryfitting, the fuselage halves were thenglued together. The fit was quite good with only a teeny bit of filler needed.Once the filling was done, it was time to fit the wings. These fit quite well,but I had a terrible time getting them square. Once I was satisfied with thewings, the tailplanes were installed. Since I was doing the record breaker, thetailplanes with the large external hinges were used. It was then that I realizedwhat was giving me fits with the wings. They and the tailplanes were not evenfrom the right to the left side! Instead, they were stepped a bit. I immediatelypulled off the tailplanes and started to enlarge the attachment holes for them.A bit of filing and sanding and I was able to get them even. Of course, thismeant there were some gaps that needed filling, but not a real problem.
Once the tailplanes were square with the rudder, a good look at the aircraftshowed that the wings were now out of whack. I flooded the wing fuselage joinwith liquid cement to soften up the join. When they were a bit soft, the wingswere then realigned and held in place with tape. Once the tape was removed,things looked a lot better, and the wing/fuselage join area was cleaned up usingsome filler. Next the photo-etched rocket exhaust was glued to the plasticexhaust piece and those were glued to the tail. A bit of trimming with files andfiller got that area fixed up.
Now the interior needed some bits added to it. First the left side equipmentrack was glued into place after a couple of pieced of photo-etch were added toit. Then it came time to install the instrument panel. No matter what I did, Icouldn't get it to fit. Finally, the rudder pedals had to be removed in order toget the instrument panel installed. Not exactly what I would have wanted, butthere really was no other fix. I couldn't install the pedals any further aft andshortening them and lowering them wasn't an option as they were already scrapingthe cockpit floor. The downside to removing them is that this is what theinstrument panel was supposed to set on. Instead, it is held in by supergluingthe end panels to the sidewalls. Not an easy operation at all!!
| PAINT & DECALS |
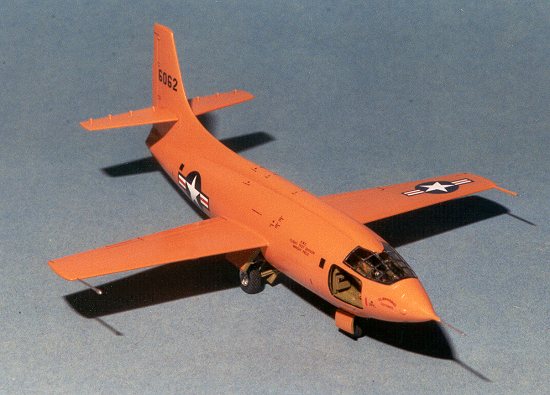
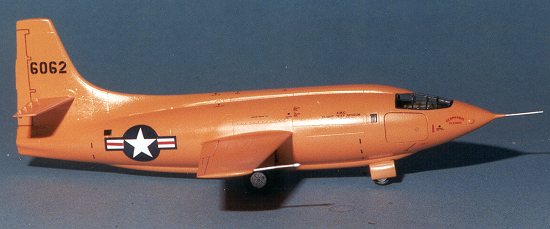
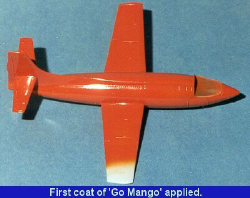 Oncethe instrument panel was installed, it seemed like as good a time as any tostart painting. I was in a bit of a quandary as to what shade of orange to paintthis kit. I had a choice between a deep orange and a pale orange according tothe photos I have seen of this aircraft. Perusing the paint racks at my favehobby shop, I came across a Testors Model Master shade called Go Mango. I reallyliked the look of the shade in the bottle and so picked it up. After filling thealready painted wheel wells with either tissue or a gear door, and taping offthe cockpit section, I sprayed the airframe with this shade. It took twosessions to get a good coat as I always need some part of the kit to hold on toand there is an unpainted section for it to rest on while drying. When finished,it was a very pleasant deep orange color.
 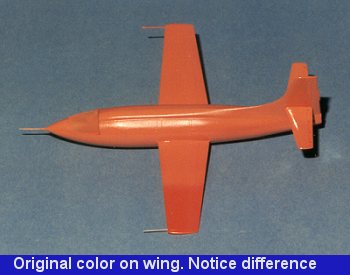 Notreally sure if this should be the final shade, so I thought about it a lot andlooked at more images of the first X-1. While that was going on, I also added afew more external bits to the kit, such as the nose and wing probes. The plasticbreaks a lot easier than I would wish as I broke one of the wing probes. Tookthis time to repair a few glitches in the paint as well. Finally deciding thatit should be lighter, I mixed in some white with the orange paint to get a morepastel look to it.
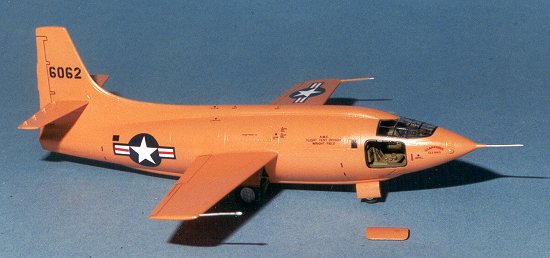
Once that was dry, it was time to add on the landing gear. Prior to paintingthe gear, there were several bits of photo etch that had to be added to the gearlegs and the edge of the main gear door. These bits were then painted chromategreen. When dry they had the oleos wrapped in chrome bare metal foil and thenthey were glued in place. They had to be trimmed back a bit before gluing, butthe fit was great. Then the last cockpit bit, the control column, was assembled,This is actually a five piece affair. First cut the vertical column from theround bottom bit and glue it on the resin bit. Then attach the etched nametag tothe control wheel. Then glue the control wheel to the column. To the back goes abrass etched part, but I forgot about it until after the canopy was attached!!
Next the canopy was masked (a very tedious job) and painted flat black. Itwas just after this that I unknowingly dropped the canopy on the floor. It wasfound with my foot as I heard a 'crunch'. AAAUUGH! It was broken clean in half.Not having a spare, I just glued it in place (fit was very good) and hoped forthe best.
After the canopy was installed, it was time to install the landing gear. Themain gear legs needed to be trimmed back a bit despite the additional drillingin the main wheels. On one wheel, there was a big blob of resin on the brakeassembly that needed carved back before it could be installed. Superglue workedgreat on this. Then I started hunting for the resin nose wheel. No where to befound. The carpet monster must have chomped on it. Fortunately, I still had thestyrene one and after gluing and painting, it snapped in place on the nose leg.
Next, the main gear doors were glued in place. This was accomplished withlittle fuss. One thing that has to be done with the upper ones is to have a bitof the attachment point trimmed. This is because it was designed for the kitwithout the etched wheelwell inserts. With those in place, the well was narrowerso the trimming was necessary. This left only a couple of etched door struts toinstall, so I waited until after decalling.
The kit decals are by Propagteam and super, as always. However the insigniaon mine were very fuzzy so I didn't use them. I also totally hosed the blue noseart background so that part isn't on there. The rest fit quite well. I hadseveral sheets of insignia in both 1/48 and 1/72, however the Propagteam oneswere somewhere in between in terms of size. I ended up using some 1/72 insigniafrom an old Scalemaster sheet. These were doubled up as the orange is veryintense and bled through the first insignia. I put on a Propagteam one to seehow opaque it was an the bleedthrough was no better!
The final assembly consisted of attaching the etched bits to the gear doorand replacing the wing probes which kept getting broken off. A final touchup wasdone by painting around the door rim in black as this was a rubber seal on thereal aircraft. A thin coat of Future to seal in the paint and decals and thatwas it. The masking was taken off the canopy. Actually, a pretty clean job,though you can tell where the canopy had been broken.
As an addendum; just before writing this, two replacement canopies arrivedfrom Eduard. Very quick service, however, these items were packed in a flat boxand they, too, were broken.
| CONCLUSIONS |
Overall, I am quite pleased with the kit. If this is thedirection that Eduard is going, then I am glad to see it happen. The quality ofthe kits is getting to be top rate. This kit was relatively trouble free andcould be built by anyone with a little experience. Even the non-Profipackversion is a bit pricey, but you will not find a better 1/48 X-1 on the market.
If X-Planes are your favorite thing to build, then you need topick up one of these kits. You'll be very glad you did.
In the many years since this kit was released, it has become more and more difficult to find but is well worth the search.
| REFERENCES |
Bell X-1 Variants: Datagraph #3, Guenther and Miller, Aerofax, 1988 (oop)
Copyright ModelingMadness.com. All rights reserved.
Back to Reviews Page 2017