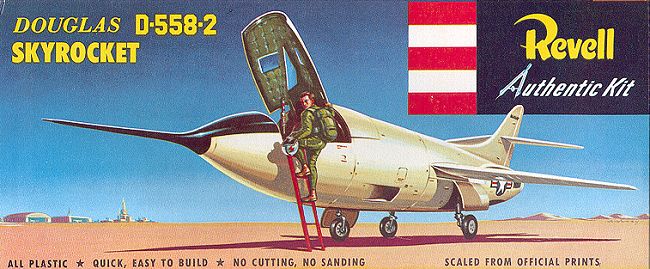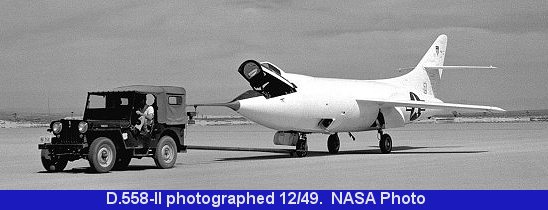
| KIT: | Revell 1/65 Douglas D-558-II Skyrocket |
| KIT # | H-213 |
| PRICE: | $10.00 |
| DECALS: | Only one aircraft; BuNo 37974 |
| REVIEW BY: | |
| NOTES: | This is the 1994 re-release |

| HISTORY |

Back in the heady days of the mid 1950's, the attention of the aviationcommunity was on 'X-Planes'. These aircraft were purely experimental and veryexciting. Their sole purpose was to fly higher, faster, and farther than anyother. While often under the auspices of NACA (later NASA in 1958), they werefunded by the USAF and, to some extent, the US Navy. The Skyrocket was one ofthese Navy aircraft. Borne aloft by a PB2B (B-29), the Skyrocket was thendropped and off to set records. It was originally designed to take off using ajet engine and then use it's rockets to give the final push to the stratosphereand a new record.
There were three D558-2's built, BuNos 37973-5. All were initially deliveredwith just the J-34 jet engine and then later the XLR-8 rocket engine wasinstalled. All three subsequently had their jet engine removed when it wasapparent that no record breaking would be done with the aircraft having to takeoff from the ground, due to the weight of the jet and the limitation of rocketfuel. The modification also included the ability to air-launch the Skyrocket. On20 November, 1953, the second D558-2, BuNo 37974, now operated by NACA andrenumbered NACA 144, was the first aircraft to break the 2,000 MPH barrierpiloted by Scott Crossfield. That record attempt was done, as were most, withthe jet engine removed and on pure rocket power.
At least two Skyrockets still exist. One was with the Planes of Fame museumback in the early 1980's, and the other is in the Smithsonian collection.
| THE KIT |

Revell produced this kit of the Skyrocket back in 1956, according to the dateetched in the fuselage. This version is the one with both jet and rocket power.In 1994, it was re-released, much to the delight of many who were dreadingpaying collectors prices to own this kit.
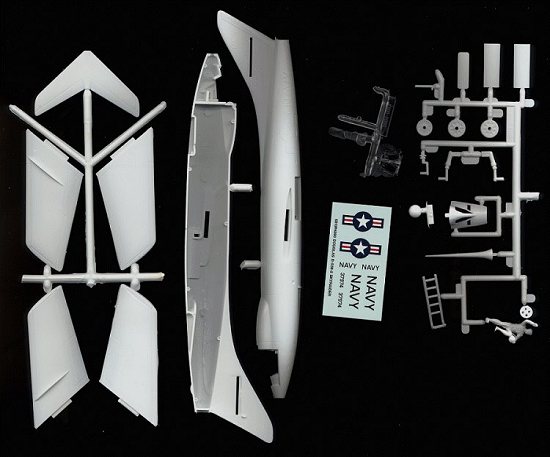
It is basically unchanged from that original release; including the nicetouch of having the decal placement easily found by having the locationsengraved on the fuselage. As you can see from the small sheet, the nationalinsignia will need to be replaced, but the rest is very usable.
You will also note that there is no interior to speak of. You get a pilotfigure and a boarding ladder for him to climb on, and that is it. Interestingly,you have the option to prop the canopy open and a small support is given. Theclear bit is very flashy and thick, but should not be a problem. It can easilybe replaced with sheet acetate as there are no compound curves to worry about.
With only 24 pieces, including the ball for the stand (not included), it isbound to be a rather quick build. After much thinking about it, this kit will bebuilt in-flight to represent the aircraft that A.Scott Crossfield flew on hisrecordbreaking flight. This will require the engine intakes to be faired over,the decal placement marks to be sanded off and the cockpit section to bedecreased. Looking at photos and drawings of the aircraft, Revell has made thecockpit area too bulbous. This will be the biggest challenge of this kit.
| CONSTRUCTION |
Since I am not using half of the pieces, construction is rather quick.However, that cockpit bulge and the filling in of the jet intake and exhaustrequired some thought. After discussing the options with some friends, fillingthe bulge with superglue and using plastic bits for the exhaust seemed to be thebest way to attack this obstacle.
The first thing done was the removal of the raised areas that showed wherethe decals go. A few healthy swipes with various grades of sandpaper took careof the problem. Then the cockpit spine was filled with superglue. Once that wasaccomplished, the putty was brought out and used to fill the intakes as well asa lot of sink marks on the fuselage. While the filler was drying, the wings wereglued together.
|
|
|
The tailplanes were slipped into their location and the fuselage gluedtogether. Then begins a few day's routine of filing, filling and sanding. Firstof all the cockpit spine was filed down and shortened. This took several days,during which the exhaust port was also filled with scrap plastic and superglue.The gear doors were glued in place and the canopy glued down as well. Finallythe needle nose was glued in place. None of these parts really fit very well,though they weren't as bad as I had originally feared. All of these bits neededsome work and the actual length of time spent with the body putty and sandpaperwas around two weeks. Not really that long for me as I let each coat of fillerdry at least a full day before sanding on it. The end result is a nice, smoothfuselage and a conversion from jet/rocket to pure rocket power. Next step was toglue in the little ball for the stand. This was then faired into place withputty and smoothed out.
|
|
|
It was at this time that the wings were glued in place. They need to have aslight anheadral to them. The gaps were filled with putty and sanded smooth. Thekit nose is a needle shape that is the right form, but too big. However, I couldnot see any easy way to thin this down and still keep the needle shape needed,though it was thinned down a bit. My past experiences with this type of workhave always ended in disaster, so I left it alone. Because of all the filler, aprimer coat is pretty well required for this bird. I used light grey enamelsince the airframe was to be painted white.
| PAINT & DECALS |
A few trouble spots were discovered at this time and rectified. Then the coatof white was applied. The white had a tiny amount of blue added into it to keepit from looking so stark. After the airframe was well painted, it was set asidefor several days to cure. The stand was the next item to be painted. This standcame from a very old Heller kit. Fortunately, it is perfect for these old 'S'kits. Once the Heller logo was sanded off it was given a bit of filler for somescratches and then painted gloss black.
Once the airframe had cured, the area around the cockpit was masked off andpainted flat black. Then the nose was painted titanium using Testors Metallizer.The exhaust area was painted steel. That is it for painting. Decals are anotherproblem.
The kit decals are for the aircraft as flown by the Navy. Unfortunately, itwas NACA that had the bird for the record flight. Thankfully, there is (or was)a sheet of decals available several years ago that have NACA logos on them. Thismeant the yellow tail stripe had to be painted (which was done using Xtracolorpaints), and then the logo and other black stripes applied. The lettering on theaircraft had to be gleaned from other sources as well.
| CONCLUSIONS |
| REFERENCES |
McDonnell Douglas Aircraft since 1920, Vol 1 by Rene J Francillon
Review copy courtesy of me and my wallet!! If any of you manufacturersor shop owners want to send products for review and building, please
contactme.