PM 1/72 C-45
|
KIT # |
PM 0304 |
|
PRICE: |
$6.98 |
|
DECALS: |
Three aircraft |
|
REVIEW : |
|
|
NOTES: |
|
HISTORY |
The Beech C-45 'Expeditor' was developed from a long line of Beech twins and similar to the Lockheed model 10 which was the plane flown by Amelia Earhart on her final, fateful flight. The C-45 was a super general purpose light transport plane that was purchased in significant numbers during WWII. It was also used as the primary twin-engined trainer and in its AT-11 guise, was used for training bombardiers and turret gunners. The Navy used the C-45 as the SNB . Its twin engines allowed it to carry a decent payload of parts or personnel and also gave it a measure of safety if an engine was lost. Fuel could also be carried inside to increase the range if the extra range was needed. Both the C-45 and SNB versions lasted well into the late 1950s as trainers and general hacks. A rather substantial number of them are still flying on the civil register.
|
THE KIT |
 PM brought this kit out in the late
1980s and that is when I put the grabs on it. It was and still is a fairly crude
kit consisting of just the basics in terms of airframe and interior. It really
is more like a late 1960's Frog kit in its overall presentation. Its one saving
grace is that it has (rather large) engraved panel lines. It was also the only
injected C-45. Since then, Hobbycraft has released this aircraft and while it
isn't that much better, is still a step ahead of the PM version.
PM brought this kit out in the late
1980s and that is when I put the grabs on it. It was and still is a fairly crude
kit consisting of just the basics in terms of airframe and interior. It really
is more like a late 1960's Frog kit in its overall presentation. Its one saving
grace is that it has (rather large) engraved panel lines. It was also the only
injected C-45. Since then, Hobbycraft has released this aircraft and while it
isn't that much better, is still a step ahead of the PM version.
Instructions are quite basic, but sufficient to build the kit. Decals were for three aircraft. One was a Burma-based plane with the 1st Air Commandos complete with fuselage stripes. A second was a post war Japanese SNB and the third a USN SNB. Decals were not that good, being poorly printed and with lots of carrier film.
|
CONSTRUCTION |
Can you say 'filler'? Sure you can, and you'll need to for this kit. First of all, the very basic cockpit of seats and sticks was built and painted flat black as was the rest of the interior. The theory being if you don't see it, you can't comment on how basic it is! The same for the cabin. The clear bits are quite thick, but fit fairly well. Thanks to the distortion of the clear pieces, the lack of interior detail is disguised even more.
 The wings were glued together and
fit to the fuselage. Fit was fairly good, but the underside needed quite a bit
of filler to smooth things out. The single mold horizontal stabilizer was then
fitted as were the fin/rudders. Again, filler was needed at the joins. The
engines and nacelles on this kit were just horrible. Fortunately, Aeroclub made/makes
replacements in metal that are a huge improvement and actually look like proper
C-45 engines. These were carefully grafted onto the engine nacelles.
The wings were glued together and
fit to the fuselage. Fit was fairly good, but the underside needed quite a bit
of filler to smooth things out. The single mold horizontal stabilizer was then
fitted as were the fin/rudders. Again, filler was needed at the joins. The
engines and nacelles on this kit were just horrible. Fortunately, Aeroclub made/makes
replacements in metal that are a huge improvement and actually look like proper
C-45 engines. These were carefully grafted onto the engine nacelles.
The wheel wells are not boxed in and the gear looks a bit underscale and flimsy. Perhaps it is the wheels that give it that impression. Other pieces that fit on the plane are the under fuselage radio antennas and the upper ADF 'football'. This part was scrounged from a Heller T-6 kit as it was needed for the version I was doing.
|
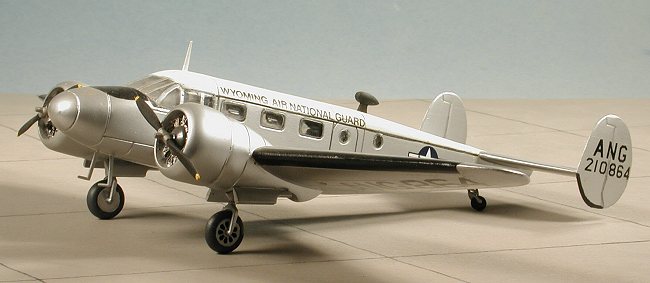
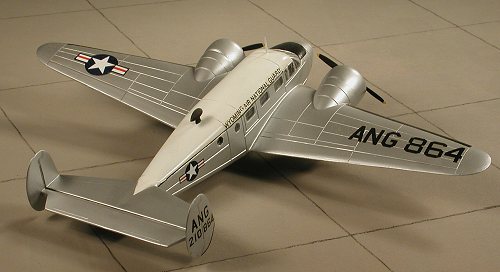
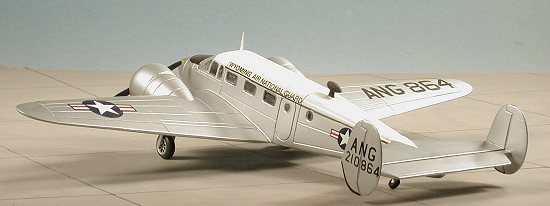
PAINT & DECALS |
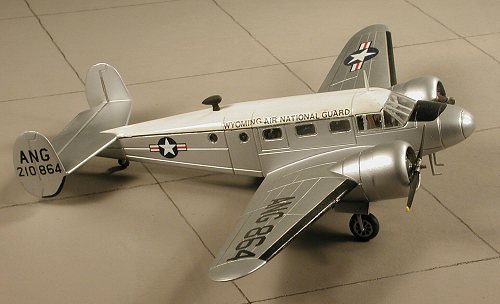 I was determined to do something a
bit different. Digging through an old 'Aircraft of the US Air National Guard'
book, I ran across a rather plain C-45 of the Wyoming ANG. It was overall
aluminum paint with a white top. Using the image in the book, I painted the
plane using Metallizer for the aluminum and Testors white for the top. Decals
all came from the spares bin. I used dry transfers for the cabin markings and
put those onto clear decal paper. This didn't work quite as well as I'd have
hoped and the decal was a pain to get to stick. I really should have applied the
dry transfer directly to the kit
I was determined to do something a
bit different. Digging through an old 'Aircraft of the US Air National Guard'
book, I ran across a rather plain C-45 of the Wyoming ANG. It was overall
aluminum paint with a white top. Using the image in the book, I painted the
plane using Metallizer for the aluminum and Testors white for the top. Decals
all came from the spares bin. I used dry transfers for the cabin markings and
put those onto clear decal paper. This didn't work quite as well as I'd have
hoped and the decal was a pain to get to stick. I really should have applied the
dry transfer directly to the kit
The wing and tail markings were from various Scalemaster and Microscale sheets. The leading edge de-icer boots were made from black decal, though it could have easily been painted on. A clear coat using Testors Gloss cote was applied. As you can see, it has yellowed a bit over the years. That is why I no longer use Testors as I have had some pretty horrible experiences with yellowing.
The last things done were to have a nose anti-glare panel applied and some Aeroclub metal props installed.
|
CONCLUSIONS |
Were the PM kit the only one around, I'd say go for it. However, the Hobbycraft kit is supposed to be a bit better so it would be the one I'd have to choose this time around. PM kits are a bit of a conundrum. Some are really horrible and some are not too bad. The C-45 fits closer to the former than the latter. Late note: This kit is not accurate for a post war C-45 as it does not have the extended nacelles and other bits common to the majority (if not all) ANG planes. Keep that in mind.
Copyright ModelingMadness.com. All rights reserved.
Review kit courtesy of me and my wallet!
If you would like your product reviewed fairly and fairly quickly, please contact the editor or see other details in the Note to Contributors.
Back to Reviews Page 2020