SIGA Models 1/72 AM-1 Mauler (early)
| KIT # | 72015 |
| PRICE: | $ |
| DECALS: | Two aircraft |
| REVIEWER: | |
| NOTES: | New tool |
| BACKGROUND |
For a look at what is in the box and a brief history of the aircraft, visit the preview.
| A SHORT HISTORY OF SHORT RUN KITS |
Thought that before getting into this kit review, I'd do a bit of a background on short run kits. Those of us who have been around for a long time (in modeling years) can remember a company called VeeDay. These were probably some of the earliest short run (back then called garage kits for where they were molded). Well they were really nothing more than just a basis for a kit. Plastic was very thick, detailing was poor, the sprue attachment gate are large, and they generally offered no decals. This tradition was continued by Merlin, though they did manage to produce over 100 kits and though crude, they were buildable with some extra work.
 All of these models were done with a low pressure injection molding machine. The big boys use high pressure. The differences are that low pressure doesn't have the ability to use harder plastics and that parts cannot be very small or petite. With high pressure you can force the harder plastic into every nook and cranny and get incredible detail. The machines are also VERY expensive. As a result, many start-up companies use low pressure machines for their models. This means thick and soft plastic as well as soft details. These start up companies will often use molds that are unable to have a lot of detail in them as they are not made from the copper/beryllium alloys that are used by more established companies.
As finances improve, so does the quality of the moldings, the quality of the injection molding machines, and (generally) the hardness and quality of the plastic. If you have been tracking companies like MPM since their inception you'll have seen the improvement in the quality of their kits.
 Siga is one of those start up companies. This is one of their first in-house kits (they have reboxed others) and while nowhere as crude as VeeDay or Merlin kits, they share many of their traits in terms of soft, thick plastic, large sprue gates, soft detail, large attachment holes/stubs and no petite parts. Every part needs to be cleaned up before use, the mold seams are relatively large, and the plastic thick on even the smallest bits. Every seam needs filler or at least some good sanding to get the parts to join. I say all of this now so that I don't have to repeat myself on every step.
When reviewing kits like this, it is fairer to start with two premises. First, it cannot be judged in the same manner as a Tamiya kit. To do so would be patently unfair. One must comment on the kit as what it is, an early offering, and go from there. So don't get too upset when I don't vehemently condemn it! Secondly when reviewing a kit that has been sent in, I'll generally review it as it is without doing any modifications such as adding aftermarket to it (though I will often use aftermarket decals if the subject has them available). Most modelers build kits OOB and that is the way I'd prefer to review them. So, on to the review.
| CONSTRUCTION |
 As you know, I'm a subassembly type. With that in mind, I first started looking for subassemblies. This turned out to be the wings and the cockpit. Much thinning needs to be done to the trailing edges of the wings to get them properly sharp. I didn't spend a lot of time on that. Thanks to the soft plastic, hot glue works very well and allows the plastic to ooze out of joins. The wings are five pieces with a separate lower center section. Before gluing them, I opened up all the attachment holes in the lower wing sections for the weapons pylons. The fit of the outer panels to this center section was less than perfect. In fact, there were some rather large gaps that needed filled. For this purpose I used super glue as the gaps were not full chord and there was plenty of plastic to keep things from falling apart.
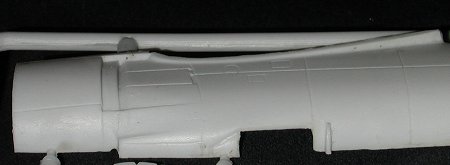
Meanwhile, the interior was glued together. Because of the thickness of the plastic, the control column is about as thick as the landing gear on a 1/72 Bf-109. A serious builder will replace this from the spares box. This subassembly was painted flat black. Back at the rest of the kit, the fuselage was glued together. The rudder and part of the fin is located on one half. The other half has a portion of the fin on it. Much trimming was needed to get a good fit and there still was a step between one fuselage half and the upper fin. Thanks to the soft plastic, this was easily sanded down to get a good match, but several filler applications were needed to blend things in.
Now the tail wheel well is supposed to be trapped between the fuselage halves but I left it out as it has the wheel doors and I figured I'd damage them during sanding. This proved to be a mistake as I'll relate later. With the fuselage together, the forward cowling was glued in place. This was also a mistake at this time as I didn't get it perfectly straight and it is misaligned as a result. I should have waited until the wings were glued on to give me a good reference point.
 After getting the fuselage smooth, I started to test fit the wings. Some trimming was needed on the fuselage wing roots to get a proper fit and then I found I needed to shim one side to fill the gap. After much trimming and sanding, I had it in and looking good. It was then that I saw the interior sitting on the work bench. The last thing I wanted to do was to rip open all that work to install the cockpit so I painted the interior flat black and just hoped that it wouldn't look too terrible.
I had a consoling soda and then got back to construction. With the wings in place, next were the tail planes. There are two large holes on the lower part of the stabs so make sure they are down. They hold some sort of antenna. The fit of these is fair, in par with the rest of the kit.
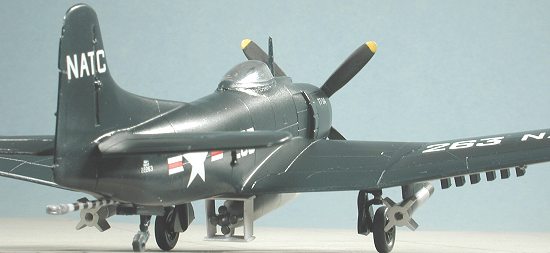
Turning to the underside of the kit, the tail wheel well was glued in. Or I should say I tried. The opening was too small for the well. The opening was enlarged and the well installed. It then split open the seam around it and that had to be filled and sanded smooth again. The main gear and struts were cleaned up and installed. The retraction strut is too long so will need a touch of trimming. Again, the soft plastic means a very strong bond. The small gear doors were glued in place.
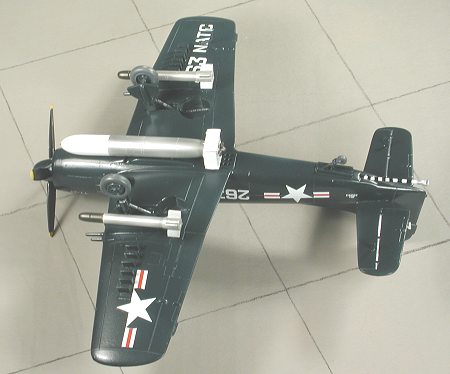
SIGA had kindly sent their weapons set along so I prepared the pylons. The molding is the same as the kit with thick plastic, soft detail and large attachment points. I chose two Tiny Tim pylons and bomb pylons for the rest of the wing. I had to open the holes more to get them all to fit. I then assembled a torpedo and the Tiny Tims. The box structure around the tail of the torpedo was a bit tricky to get in place.
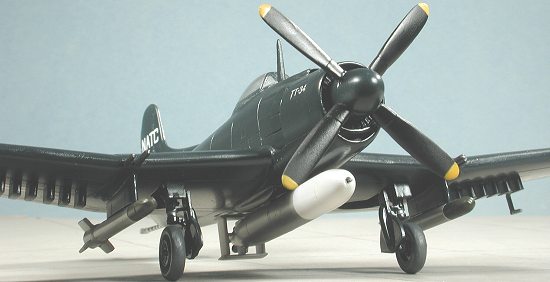
 Turning to the upper fuselage, the cowl flaps were glued in place, these need to be bent to conform to the openings, but it is not difficult. The upper nose intake took several filler/sanding sessions to fit properly. I then attached the canopy. Because of the thickness of the plastic, you'll need to trim the detail just behind the cockpit to get a reasonable fit. The overhang was faired in using superglue. Fortunately, the thickness of the plastic prevents any real detail from being seen through it so the lack of an interior isn't readily apparent.
Some of the additional under side bits and the antenna was glued onto the fuselage. While all that was being done, the prop was assembled. The backing on my kit was short shot so I had to use some superglue to fill it. There is an insert inside the prop which is supposed to help hold the blades in place. Obviously it goes in before the blades are attached as to do it the way the instructions show just doesn't seem to work. Needless to say, it can easily be left off as the blades fit well without it. The canopy was masked and it was painting time!!
| PAINT & DECALS |
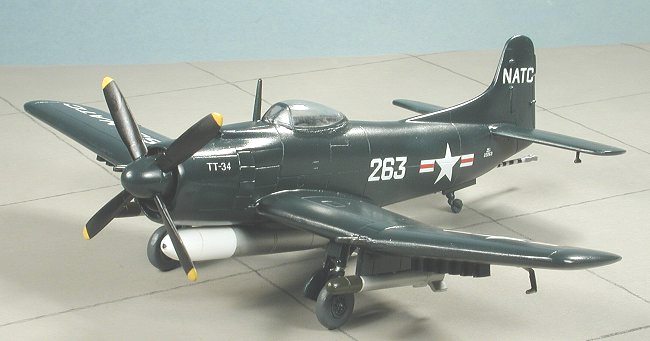
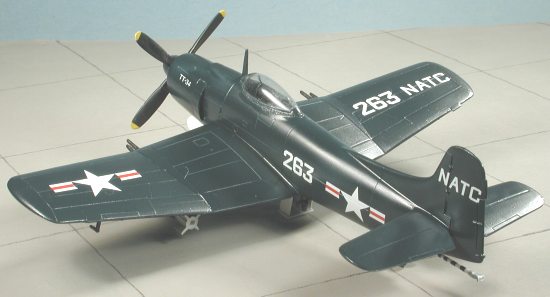
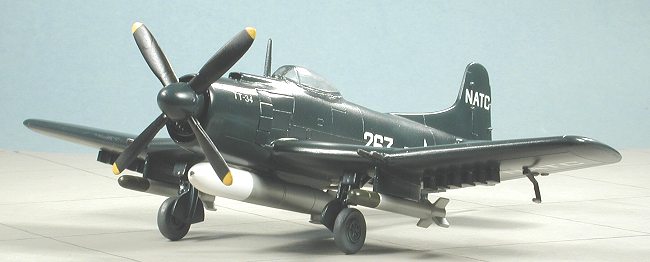
 Navy planes of this period are a breeze. Everything that is metal is gloss dark sea blue. This means wheel wells, and gear struts as well. I used Aeromaster enamels for this purpose. It took a couple of applications to cover everything, but the end result was a nice glossy plane that was ready for decaling with no other preparation.
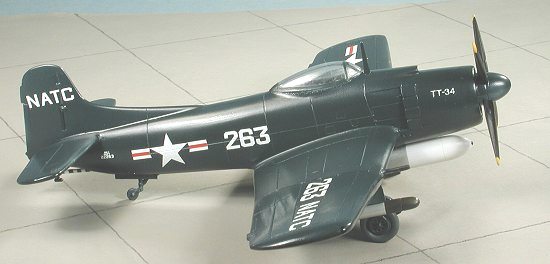
When all was dry, the kit was returned to the bench for the decals. Siga has switched decal makers since their first kit so I was looking forward to some quality decals. Dark blue is a real test for the opacity of the white on decals. I found that I should not have added the pitot tube before putting on the decals and had to cut it off for reattachment later. It would also have been helpful to have put on the outer pylons after the decals as well. The decals are absolutely superb. They are ultra-thin and very opaque. There was no bleed-through at all. They also stuck like limpets and crawled into all the panel lines as they should. I tried all the various setting solutions on them (Microscale, Solvaset, and Champ) and there was no adverse reaction.
| CONSTRUCTION CONTINUES |
 With the decals in place, I wiped down the kit to get rid of any glue residue. Then the other bits were added. This consisted of the gear doors, the reattachment of the pitot tube and the tail hook. A semi-gloss clear was sprayed on the kit to seal in the decals and to cut back on the shine of the Aeromaster paint. Even test birds were not that glossy for long!
I then glued on the torpedo and Tiny Tim rockets. The fit was snug. I should mention that painting these is very simple and that I used the operational colors as shown in the weapons set instructions. The masking was removed from the canopy and the kit was finished.
| CONCLUSIONS |
I'm personally very glad to see that someone like SIGA has taken the time and effort to produce an interesting kit like this. Those who shy away from vacuform kits will be happy to see it and it will add interest to your model collection. This isn't a kit I'd recommend to beginners. You do need to have intermediate skills and be willing to spend time on parts clean-up and on thinning down or making replacements for some of the smaller bits. However, with a bit of time and effort, you can make it into a superb replica. And don't forget to install the interior!!
June 2002
Review kit courtesy of SIGA Models. Thanks for your support.
If you would like your product reviewed fairly and fairly quickly, please contact the editor or see other details in the Note to Contributors.