 So what can one do about it that is easy and makes
sense?
So what can one do about it that is easy and makes
sense?Taking pictures.
Probably the most important part of an article aside from a comprehensive and useful write-up are the images. In fact one could easily say that in today's era of visualizations, images may well be more important that what is said.
I can't really show you how to take sharp images other than to tell you that you need to use the highest f/stop that your camera allows. A high f/stop is something like f/16 while f/4 is a lower f/stop. At the high f/stop your camera allows less light through the lens. The result is a slower shutter speed (why a tripod is often needed), but a much more sharp image.
I am often asked about images and what I look for when someone sends in a review article. I am also not asked often enough, for there are many times when I'll have to get back to an author and ask for either more, or better images.
I'll leave the 'better' part for later, but fully realize that if an image is out of focus or generally poor when you look at it, I cannot fix it and sending it in is just wasting both of our time. I'll just concentrate on image composition for the time. There are a few things that seem to be in common when I get images and request more. One is that the photographer will 'fixate' on one side of the subject. I'm not totally sure why that is, but even the best modelers will often send in the vast majority of their images from one side. As I state in the Article Requirements section (which seems to be either not read at all, or not carefully read, or ignored), I alternate images from left to right as the article unfolds. This provides a sort of 'walk-around' feel to things and shows the subject from all angles.
There are also angles that to me, are rarely pleasing. Those are the 'straight on' type. An image from dead ahead, or dead rear has little interest and often shows construction errors in alignment.
Then there are those who either flood me with more images than I can ever use, or send in so few that they don't properly complement the article.
Finally, I get images that are overly distorted by using a wide angle lens too close to the subject. This can be corrected by simply moving the camera back farther and using a more normal to mild-telephoto setting.
So what can one do about it that is easy and makes
sense?
Well, long ago, I came up with something that works well for me. But first, a bit of nomenclature so that we are all on the 'same page'. I think we all can relate to 'head on' and 'tail on' as well as 'profile'. In between those are the 'quarter views'. The accompanying image shows those parts and this applies to any object, not just aircraft.
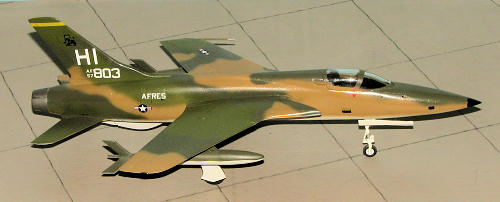
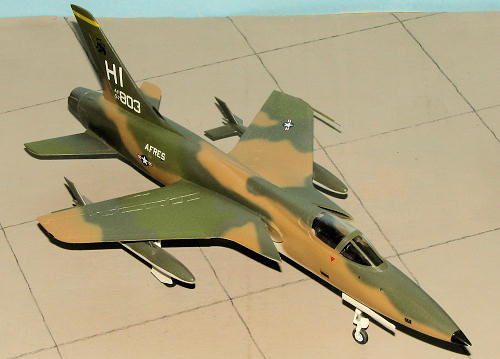
Then there is the subject of elevation. To me, a model looks better when taken from a perspective of someone who is the same scale as the subject. That means 'ground' level. If you are one who doesn't take ground level images because of a cluttered background, then use a sheet or other solid color background to eliminate that clutter. Of course, we can't see upper details from ground level, so then taking some more images from a higher elevation is often called for. This is fine, but more often than not, most people overdo it and take pictures that look like they were photographed from a balloon. Unless the airframe has an interesting planform or special markings that require this sort of angle, I won't use these sorts of images. I usually increase my elevation about 25-35 degrees from the flat for the high up photos. Generally, the only time I go higher is when doing a photo of the underside of the subject. If you look at the two accompanying images of an old and poorly built model of mine, you can see that for the 'air' shot, the angle of elevation is not that great, yet it shows the upper surface detail. It is as if the picture was taken from the roof of the hangar or perhaps a tall maintenance stand.
OK, so we have azimuth and elevation taken care of. Now what about the photos?
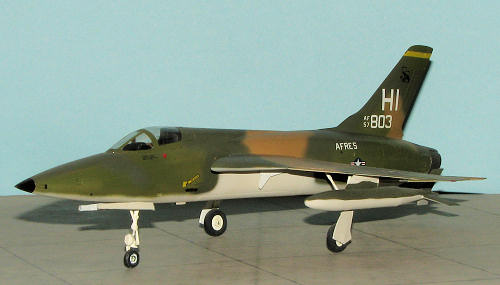
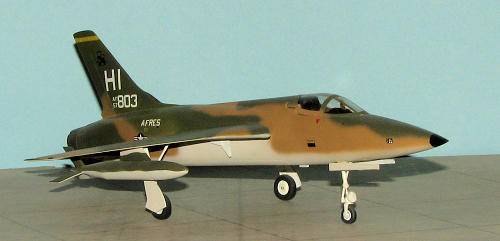
This is the simplest part of things. Starting at ground level, take three images per side. One from front quarter, one profile and one rear quarter. The image on the left is an example of the left forward quarter. Three on the right and three on the left make for six images. Next, do the higher angle shots. Again, three per side from the three angles mentioned for another six images. That makes a total of twelve. Add in an underside image for thirteen.
New Addition: Here, using an old Hasegawa 1/72 F-105B that I built about 1984 or so, are the thirteen images of which I spoke:
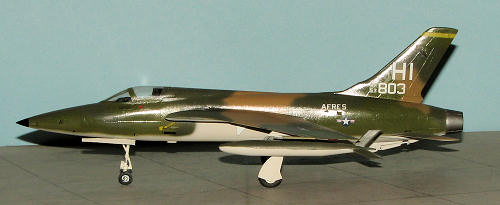
| Starting at Ground level, left side: |
 |
 |
 |
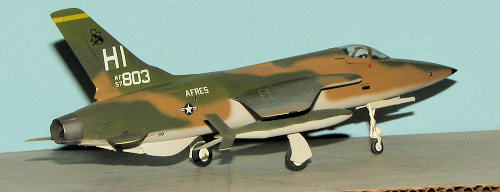
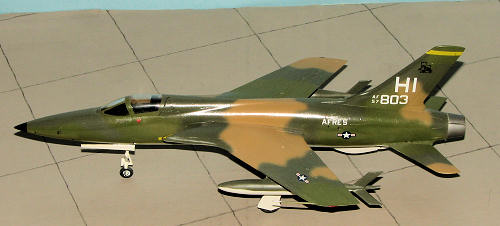
| Then moving to Ground level, right side: |
 |
 |
 |
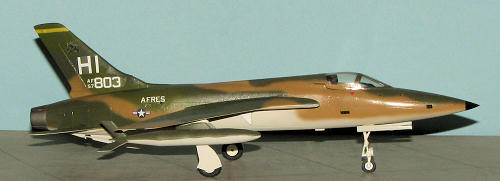
| Now we move up in elevation and go back to the left side: |
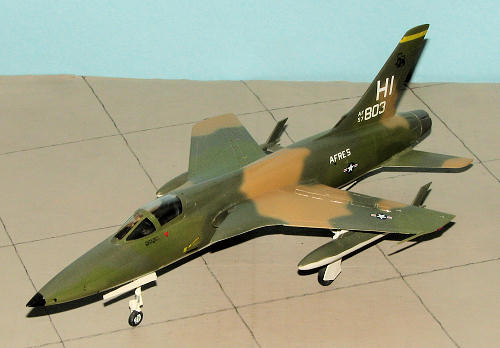 |
 |
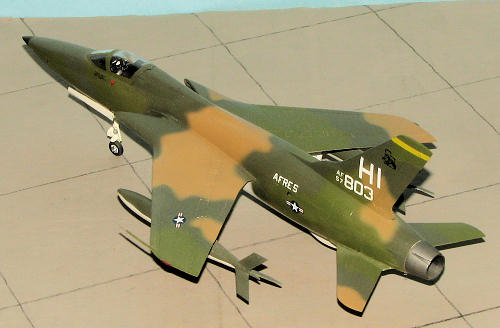 |
| Then the right side from the same general elevation: |
 |
 |
 |
| Finally, one of the underside: |
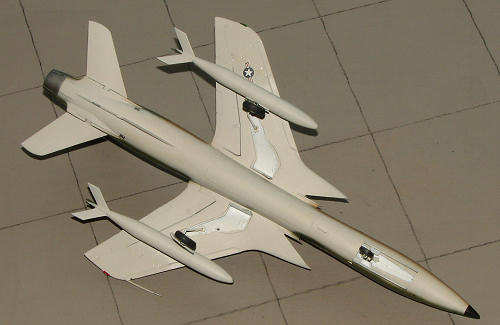 |
While I used a flash on these examples, using a tripod is exactly the same. Total time to take photos is around 15 minutes or less. You may also notice that I don't seem to have any fuzzy parts of the image caused by depth of field problems. One reason is that these were photographed from a distance of about 3-4 feet from the model, using the maximum f/stop of my camera (in this case, f/8). You can use the same 13 steps regardless of the subject, be it a car or boat or figure (though perhaps the underside one may not work as well with a boat or figure).
Now would be a good time to talk about 'head on' types of images. As I stated, they are rarely pleasing to me, however, if you have a subject that has a good visual impact from this angle, instead of going straight on, move your camera about 15-20 degrees from the centerline to take the shot. You get both the impact of the angle and add in some side detail as well. Makes for a much more visually interesting image.

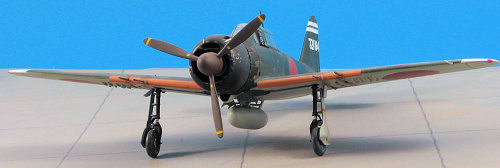 As
you can see from the Zeke images, the head on shot really shows how poorly done
the wheels are and it is just not an interesting shot. Just moving the camera a
bit to the right will lessen the impact of the wheel alignment and shows more of
the side of the model.
As
you can see from the Zeke images, the head on shot really shows how poorly done
the wheels are and it is just not an interesting shot. Just moving the camera a
bit to the right will lessen the impact of the wheel alignment and shows more of
the side of the model.
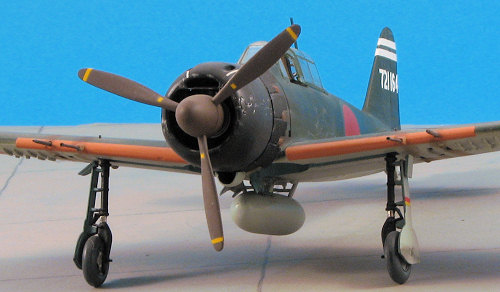 Then, if you want to do a closeup or two, you can add
those in as well as any 'in work' shots you've done. One easy way to do a
close-up is to send in a 'piece' of a previous image as I've done with one of
the Zeke images. Now, depending on the size
of your article, send in a selection or all the images you've taken. By having
fifteen or sixteen images from which to choose, you can weed out the poorly done
or out of focus shots, or retake them. If you have a short article then pick the
best eight or nine, being sure to send in a nearly equal number of left and
right side images. If a long one, send them all.
Then, if you want to do a closeup or two, you can add
those in as well as any 'in work' shots you've done. One easy way to do a
close-up is to send in a 'piece' of a previous image as I've done with one of
the Zeke images. Now, depending on the size
of your article, send in a selection or all the images you've taken. By having
fifteen or sixteen images from which to choose, you can weed out the poorly done
or out of focus shots, or retake them. If you have a short article then pick the
best eight or nine, being sure to send in a nearly equal number of left and
right side images. If a long one, send them all.
This is what I do for each and every article that I write. It assures that I'll get good coverage of the subject and provides a choice of images with which to illustrate the article. If you will follow these guidelines, then I'll not be asking for more images to properly highlight your next article.