Valom 1/48 BN-2/2A Islander
| KIT #: | 48008 |
| PRICE: | $44.00 delivered |
| DECALS: | Two options |
| REVIEWER: | Scott Van Aken |
| NOTES: | Short run with photo etch parts |
| HISTORY |
The Britten-Norman BN-2 Islander is a British light utility aircraft and regional airliner designed and originally manufactured by Britten-Norman of the United Kingdom. Still in production, the Islander is one of the best-selling commercial aircraft types produced in Europe. Although designed in the 1960s, over 750 are still in service with commercial operators around the world. The aircraft is also used by the British Army and police forces in the United Kingdom and is a light transport with over 30 military aviation operators around the world.
Initial aircraft were manufactured at Britten-Norman's factory in Bembridge, Isle of Wight, UK. After Fairey Aviation acquired the Britten-Norman company, its Islanders and Trislander aircraft were built in Romania, then shipped to Avions Fairey in Belgium for finishing before being flown to the UK for flight certification. The Islander has been in production for more than 50 years.
| THE KIT |
 The
Islander is not exactly an aircraft that is high on most people's want list, but
if you think about it, it makes perfect sense for a company like Valom to
produce. So far there are four boxings of this kit and from the look of the
sprue layout, there could easily be more on the way if these four do well. Not
surprising is that all the different variations (so far) are included on the
sprues as it is fairly easy to tell builders not to use the extra bits.
The
Islander is not exactly an aircraft that is high on most people's want list, but
if you think about it, it makes perfect sense for a company like Valom to
produce. So far there are four boxings of this kit and from the look of the
sprue layout, there could easily be more on the way if these four do well. Not
surprising is that all the different variations (so far) are included on the
sprues as it is fairly easy to tell builders not to use the extra bits.
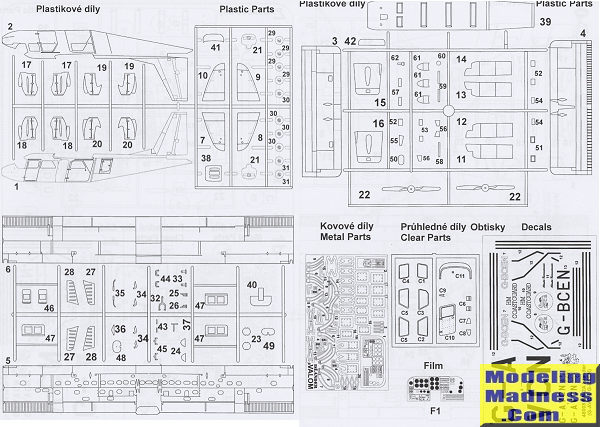
So on to the kit. Three brownish sprues and one clear. All the transparencies save the windscreen fit from the inside so it may be worthwhile to do some pre-painting of the fuselage prior to assembly. It will also be a bit difficult to mask any windows once the wings are attached so keep that in mind. You are started off building up the instrument panel. One sandwiches the acetate instruments in between the p.e. panel face and the main mounting surface. Photo etch also covers the center console and you have p.e. throttle handles to install therein. You have to build up the control wheels and those fit into the control panel. An overhead panel is also provided. The two seat shapes are provided with photo etch belts and that is set aside while you move elsewhere.
Surprisingly, the second and third construction steps deal with the landing gear and engines. Wheels are in two halves and all have ejector towers to remove before assembling. P.e. is used for oleo scissors. For this build you use the engine cowlings that have the long carb intake. There is no engine, just a blanking plate on which to attach the prop. It would have been nice to have some sort of cylinder casting on this part, but you don't .
Back at the interior, you attach the cockpit parts to the floor along with some rudder pedals. Then the three double wide bench seats with p.e. belts. These seem to take up the full cabin width so getting into the middle row of seats has to require some contortionist skills as the doors only seem to be wide enough for the front and rear sections. At this point the windows are installed, the fuselage halves glued together and the windscreen attached. No indication of how much weight is required, but it does need some so fill up any empty space in the front.
Upper and lower wings have separate wing tips and the horizontal stab is also an upper and lower piece. These are now fit in place along with the rounded nose cone (if doing the kit markings options). One then flips things over and attaches the engines, the rest of the nacelles and the landing gear. Note that the nose gear has just one wheel, not the two shown on the box art. There are various hinges and a tail bumper to add at this time. There are also some bits that are dependent on the option you have chosen to model so pay attention. The rest of the p.e. fret, which are a couple of dozen plates of various shapes all fit on the underside of the fuselage. A placement guide is offered as there is no guide on the plastic itself.
 Instructions
are standard Valom and are adequate to complete the model. Unlike their earlier
instructions, they are not as crowded and offer color information. A chart on
the back page offers all the colors from a number of manufacturers. There are
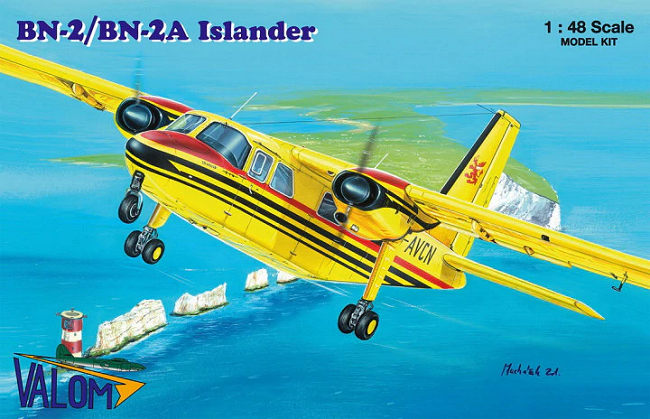
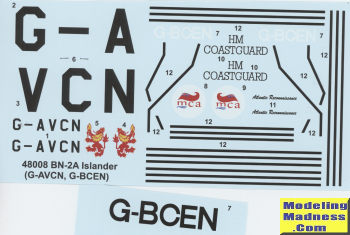
two options, both of which will require some masking to do properly. The box art
plane is with Aurigny Air Services in 1970 and is basically overall yellow with
red trim and black stripes. The black stripes are provided, but the red needs to
be painted on. The other is a UK Coast Guard plane in while with very large
areas of red outlined somewhat in black. Decals are nicely done, but as I said,
will require some masking to duplicate. Fortunately, Caracal has a nice sheet
for this airplane (48-153) that provides some interesting options.
Instructions
are standard Valom and are adequate to complete the model. Unlike their earlier
instructions, they are not as crowded and offer color information. A chart on
the back page offers all the colors from a number of manufacturers. There are
two options, both of which will require some masking to do properly. The box art
plane is with Aurigny Air Services in 1970 and is basically overall yellow with
red trim and black stripes. The black stripes are provided, but the red needs to
be painted on. The other is a UK Coast Guard plane in while with very large
areas of red outlined somewhat in black. Decals are nicely done, but as I said,
will require some masking to duplicate. Fortunately, Caracal has a nice sheet
for this airplane (48-153) that provides some interesting options.
| CONCLUSIONS |
Overall a nice kit near the top of the short run ladder that any modeler with some experience should be able to build. It will take patience and a bit of skill if past kits are an example, but will result in a very nice model when you are done.
| REFERENCES |
https://en.wikipedia.org/wiki/Britten-Norman_BN-2_Islander
April 2019
Thanks to me for getting this one so you can see what it is like. If you would like your product reviewed fairly and fairly quickly, please
contact
the editor or see other details in the
Note to
Contributors. Back to the Main Page
Back to the Review
Index Page
Back to the Previews Index Page