
F-RSIN 1/144 Martin 202
| KIT #: | FRP 4065 |
| PRICE: | ~$25.00 |
| DECALS: | Several options |
| REVIEWER: | Scott Van Aken |
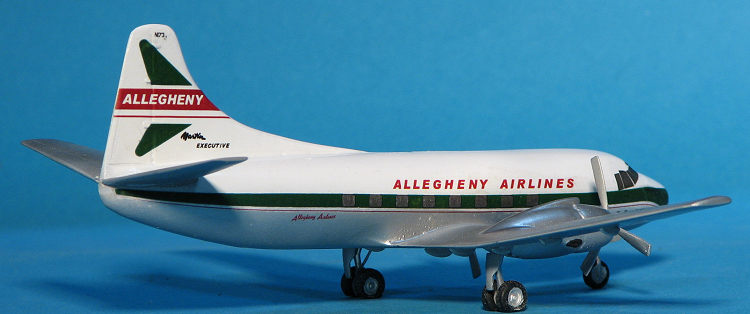
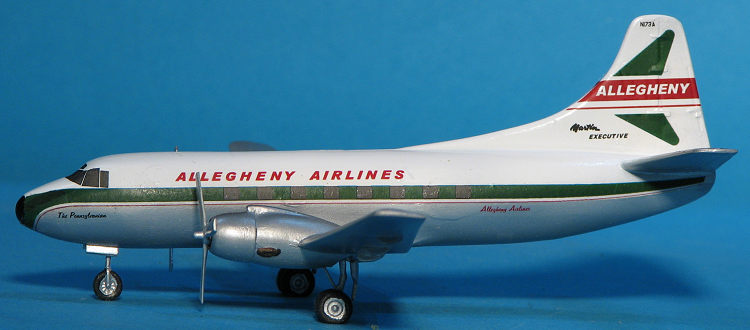
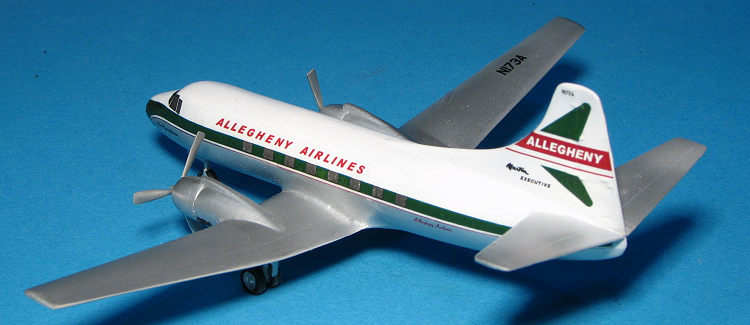
| NOTES: | Short run. Allegheny Airlines livery |
| HISTORY |
Glenn L. Martin, president of the company, intended that the Model 2-0-2 would be a replacement for the Douglas DC-3. It was also known as the "Martin Executive".
The first flight of the model was in November 1946. Full civilian certification was gained in August 1947, several months before competing aircraft types. The total production of 2-0-2s and 2-0-2As was 47 aircraft.
 The aircraft was not pressurized, but was considered a long-range
airliner. The fatal crash in 1948 of Northwest Airlines Flight 421 revealed a
serious structural problem in the wings. Structural metal fatigue was the
problem in a major wing spar. Alloy 7075-T6 was used, which is susceptible to
stress-corrosion cracking and low toughness. The airliner was grounded and
modifications were made. The wing components were redesigned and the engines
replaced. The changed type was designated the Martin 2-0-2A.
The aircraft was not pressurized, but was considered a long-range
airliner. The fatal crash in 1948 of Northwest Airlines Flight 421 revealed a
serious structural problem in the wings. Structural metal fatigue was the
problem in a major wing spar. Alloy 7075-T6 was used, which is susceptible to
stress-corrosion cracking and low toughness. The airliner was grounded and
modifications were made. The wing components were redesigned and the engines
replaced. The changed type was designated the Martin 2-0-2A.
Allegheny Airlines (IATA: AL, ICAO: ALO, Call sign: ALLEGHENY) was a U.S. airline that operated out of Pittsburgh, Pennsylvania, United States, from 1952 to 1979. It was a forerunner of US Airways, now merged into American Airlines.
| THE KIT |
F-RSIN started by offering resin kits of a variety of aircraft, usually airliners. They still do this but have developed a line of short run plastic kits as well. Their kits are ones that are not for the weak of heart as they have large sprue gates, ejector towers on many parts, flash of some level on every part and often you'll find bits that are short shot. In many ways, similar to Mach 2 kits.
Once you get past all that, you'll find that the kits are not complex to build and once you have finished cleaning up parts, they go together fairly well. This kit offers a variety of radomes as you can see. There are no transparencies with all the windows being provided on the decal sheet. No indication of nose weight is offered in the instructions but you will need a goodly amount. Fortunately, there is a lot of room.
 The kit offers the rear air stairs in a deployed
position, despite there being zilch provided for the interior. Mine has one of
the side supports short shot. Though the kit does not offer a decent retracted
covering for this feature, I'll be building this with it raised.
The kit offers the rear air stairs in a deployed
position, despite there being zilch provided for the interior. Mine has one of
the side supports short shot. Though the kit does not offer a decent retracted
covering for this feature, I'll be building this with it raised.
Instructions are a single folded sheet with a history of the aircraft in French and English on one side. On the other is an exploded view of assembly. Despite the parts being numbered on the sprue, they are not in the assembly view. There is a full color decal placement profile for the two different schemes carried while in Allegheny service. This aircraft was also converted to a cargo hauler by Allegheny and you can build one of those as well if you so desire. The decal sheet has been printed on a laserjet printer so that means the white parts are missing. Not an issue if you have carefully masked your kit while painting. The sheet appears to be covered with a single coating of clear so all the markings will have to be closely cut prior to application. I would test one marking you won't be using to ensure that you don't need to apply another clear coat.
| CONSTRUCTION |
 In my mind, there are typical French short run kits. These
kits have a good basic shape, but lots of ejector towers, short shot pieces,
flash galore, large, intrusive sprue gates, and very basic instructions. They
require a lot of pre-gluing prep in terms of getting the parts to where they
will mate together, so one has to be one with their sanding stick/paper. This
kit is just like that.
In my mind, there are typical French short run kits. These
kits have a good basic shape, but lots of ejector towers, short shot pieces,
flash galore, large, intrusive sprue gates, and very basic instructions. They
require a lot of pre-gluing prep in terms of getting the parts to where they
will mate together, so one has to be one with their sanding stick/paper. This
kit is just like that.
I first removed the wing halves and fuselage halves from the sprue. Then spent quality time preparing them for construction. When the wings were ready, I first glued the engine nacelles and when dry, glued the rest of the wing halves. These have short shot areas on the trailing edges and right next to the nacelle that need filler work and that was done.
When attaching the fuselage halves, there were three things
that needed doing. One was to install the nose gear well such as it is. It is a
bit too wide for the opening so some trimming is needed to get it in position. I
also did not want the air stairs lowered as the railings were short shot so
after some work on the opening, this was glued into one half.
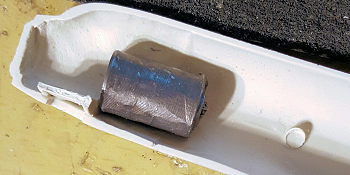 Pretty sure this
kit needs nose weight so I installed 11 grams, hoping it would be enough (it
was: barely). The
halves were then glued together, starting with the fin an making sure things
lined up fairly well. Clamps are helpful. Since the plastic is fairly soft, you
can fill some of the seams by pressing the parts together for a while until the
melted plastic oozes out. Just be fairly reserved with the amount of glue you
use. At this time, I also cleaned up and assembled the horizontal stabilizers.
Pretty sure this
kit needs nose weight so I installed 11 grams, hoping it would be enough (it
was: barely). The
halves were then glued together, starting with the fin an making sure things
lined up fairly well. Clamps are helpful. Since the plastic is fairly soft, you
can fill some of the seams by pressing the parts together for a while until the
melted plastic oozes out. Just be fairly reserved with the amount of glue you
use. At this time, I also cleaned up and assembled the horizontal stabilizers.
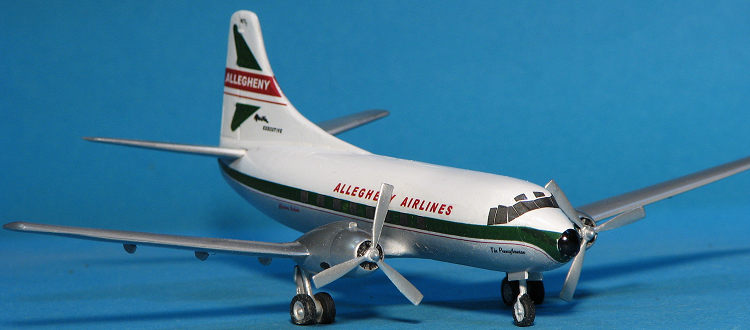
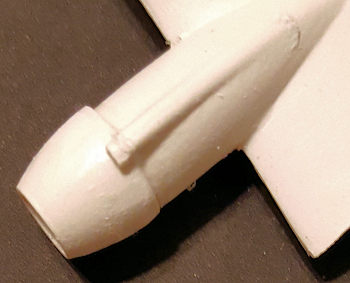 With that done,
the wings were assembled. Fit is fair. The engine cowlings are not accurate in
shape so some serious sanding was done on them once they were glued to the
wings. In the image the lower section has been sanded while the upper portion is
untouched. Were I a perfectionist, I'd have added putty to the forward part to
reduce the conical shape even more. After dealing with this, I attached the
wings to the fuselage. Note that the 2.0.2 has a fairly pronounced dihedral on
the wings and tailplanes so locate some 'net images to help you with this.
With that done,
the wings were assembled. Fit is fair. The engine cowlings are not accurate in
shape so some serious sanding was done on them once they were glued to the
wings. In the image the lower section has been sanded while the upper portion is
untouched. Were I a perfectionist, I'd have added putty to the forward part to
reduce the conical shape even more. After dealing with this, I attached the
wings to the fuselage. Note that the 2.0.2 has a fairly pronounced dihedral on
the wings and tailplanes so locate some 'net images to help you with this.
After the wings were attached and the usual work was done on it with filler and sanding, I attached the main and nose landing gear. These are not exactly super-detailed, but adequate. I used wire for the main gear retraction strut and had to trim the sides of the gear attachment point to get it to fit in the well. I also had to open up the nearly totally filled in attachment slots. The gear doors were then glued in place. These are far too thick, and those who want something more scale will have to make them from plastic sheet. I also added all the flap hinges in preparation for the paint shop.
| COLORS & MARKINGS |
 aluminum.
The mask was removed and the excess glue was scrubbed off using an old
toothbrush and water. As I mentioned, the main stripe decal is too short,
but fortunately, I was able to cut up the unused tail marking for the green
I needed to straighten it out. Unfortunately for me, the left and right side
stripe are not the same height, something I did not realize when painting
it.
aluminum.
The mask was removed and the excess glue was scrubbed off using an old
toothbrush and water. As I mentioned, the main stripe decal is too short,
but fortunately, I was able to cut up the unused tail marking for the green
I needed to straighten it out. Unfortunately for me, the left and right side
stripe are not the same height, something I did not realize when painting
it. | CONCLUSIONS |
These kits are not impossible to build as you can see, but you do have to be willing to overcome frustration and put a lot of effort into building them. In my hands there is no way they will be contest quality, but I like stuff like this and so I do put forth the effort to add them to my collection. If you like airliners and want something you are pretty sure that Roden or Minicraft won't be doing any time soon, then these kits may be for you. If you want a fairly quick build of an accurate kit, then look elsewhere.
| REFERENCES |
https://en.wikipedia.org/wiki/Martin_2-0-2
January 2020 Copyright ModelingMadness.com.
All rights reserved. If you would like your product reviewed fairly and
fairly quickly, please
contact
the editor or see other details in the
Note to
Contributors.