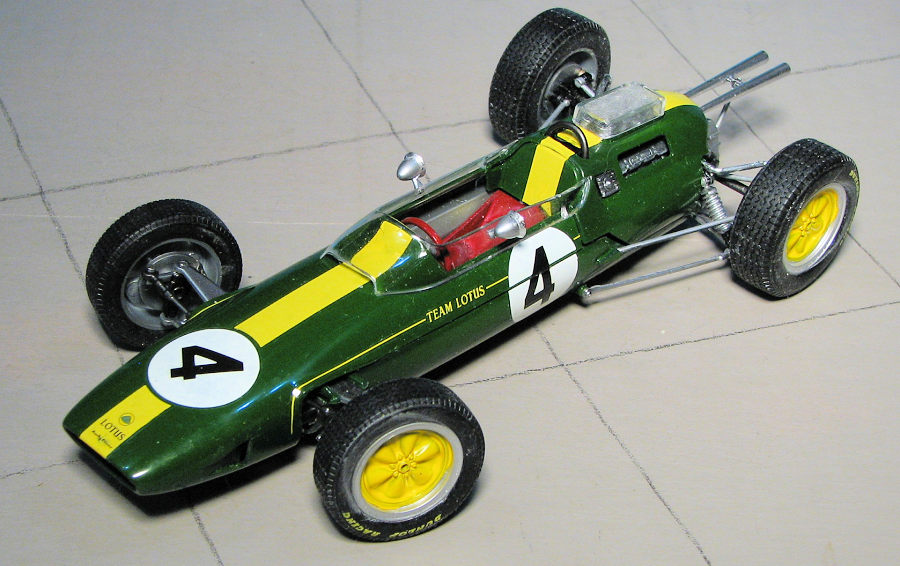
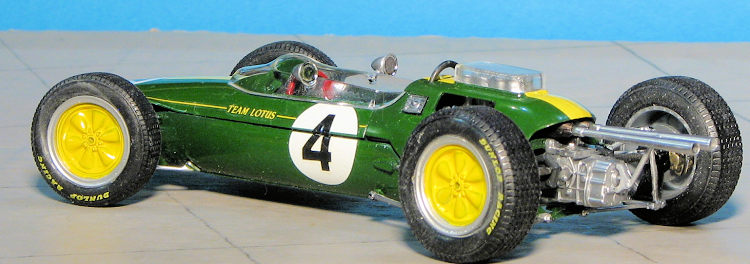
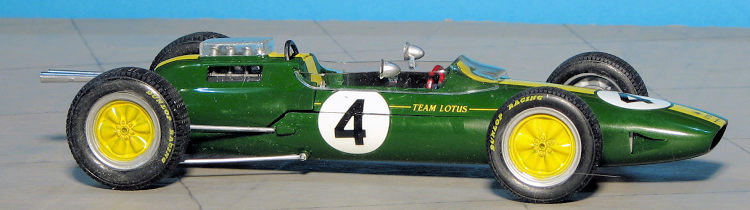
Tamiya 1/20 Lotus 25 Coventry Climax
| KIT #: | 20044 |
| PRICE: | 2400 yen SRP$11.98 on sale |
| DECALS: | Several options |
| REVIEWER: | Scott Van Aken |
| NOTES: | 1997 release |
| HISTORY |
|
In 1961 the engine capacity for Formula 1 was reduced to 1.5
liters. Engines also need to run on 101.5 octane fuel instead of the
130 octane Avgas. The first year of the new regulations found all of
the British teams down on power compared to Ferrari with the
expected results. For 1962 Lotus would answer with the Lotus 25.
Mid-engined cars were now standard and the Lotus 25 was not the
first racing car with a monocoque chassis but its artistic
simplicity and immense success in the hands of Jimmy Clark
revolutionized Grand Prix racing car desi
Colin Chapman had experimented with a backbone chassis for the Lotus
Elan sports car. He decided to apply the same techniques to a
single-seater racing car. By using box-sections he created a tub
just wide enough for a driver and within the box-section would go
rubber bags to hold the fuel. While this was going on there was also
a Type 24 being developed using a spaceframe just in case. As part
of the design, the driver would now sit in an almost reclining
position that took some use to, and it took a brave man indeed to
drive one of these cars at full speed. The main benefits of this
design were increased torsional rigidity for less weight and with a
smaller frontal area. The resulting stiffness allowed Lotus to use
more supple suspension which offered gr Power was again provided by Coventry-Climax, the British forklift, fire pump, racing, and other specialty engine manufacturer. At £3000 per motor they hoped that Ferrari's engine advantage would be bridged. The car was fast straight out of the box and with Clark driving, when it finished it usually won. In 1963, Engineer Len Terry was coaxed in to returning to the team that had fired him in 1959. One of his duties was to improve the car's reliability. His work bore fruit when Scotsman Jim Clark after finishing 8th in Monaco won the next four races in a row. Clark would go on to win a then record seven out of ten races and his first World Championship. Graham Hill and Richie Ginther finished 2nd and 3rd respectivly. |
| THE KIT |
 The front and rear suspensions are also carefully thought out and one can
have steerable front wheels if one wants. In fact, when installing the driver
(if you want) you can pose his arms as if he is steering the car around a tight
corner. All of the wheels are held in place by polycaps and you have nicely done
vinyl tires.
The front and rear suspensions are also carefully thought out and one can
have steerable front wheels if one wants. In fact, when installing the driver
(if you want) you can pose his arms as if he is steering the car around a tight
corner. All of the wheels are held in place by polycaps and you have nicely done
vinyl tires.
| CONSTRUCTION |
It has been many years since I built a Tamiya F.1 car. What has generally
stopped me from building more is that these kits are really quite paint
intensive. Unlike an aircraft or tank, you pretty well need to paint each bit or
subassembly prior to adding it to the kit. There is also masking to be
considered as many of the parts will
 take multiple shades. For example, the
front spindle/brake assembly is three colors. This tends to extend the
construction time.
take multiple shades. For example, the
front spindle/brake assembly is three colors. This tends to extend the
construction time.
I bought this kit started and so at a reduced price. However, the seller ripped me off in shipping so it was pretty much the same as buying one from a shop. The previous owner had started assembly on the engine block and had glued the lower front nose piece to the upper bodywork. Both were done well so no issues on sloppy construction.
The first thing I did was to paint parts on the sprue. In this case I did all the bodywork pieces in Tamiya rattle can green and a lot of aluminum parts in Alclad II. I also stripped the chrome pieces using oven cleaner. This does a fairly good job, but only takes off the chrome plating and not the gloss clear under it.
The lower body was masked and large areas of it were painted
aluminum as directed in the instructions. I followed the instructions pretty
much to the letter when it came to paints. In one area, they tell you to mix
gold 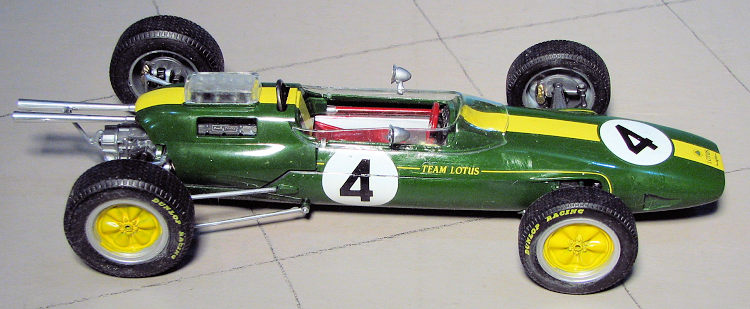 and silver for the brake calipers, but that isn't necessary as since then Tamiya has produced a Titanium Gold that works well. I worked on both the engine
and the body at the same time and slowly things started to come together. There
are areas that need to be painted red and I think my red may well be too dark,
but there it is.
and silver for the brake calipers, but that isn't necessary as since then Tamiya has produced a Titanium Gold that works well. I worked on both the engine
and the body at the same time and slowly things started to come together. There
are areas that need to be painted red and I think my red may well be too dark,
but there it is.
Instructions have you build up the tub to a point, and that includes the front suspension. When it came to the rear suspension, I had some issues, both of them dealing with the upright piece. One is that it broke when removing it from the sprue. The other is that the lower attachment point on one side was short shot. Super glue fixed both issues, but it isn't contest quality. You then build up the engine with most of the exhaust. The time consumer here, as with much of the build, is the constant painting one has to do after cleaning up the parts. When that was done, the engine was installed in the waiting chassis.
With the engine in place you can go on to the final bits which include a few more rear suspension pieces as well as attaching the windscreen (I used the clear glue Cementine on this), and the mirrors. The body pieces are meant to be removable and simply click into place. Finally, the wheels were pushed on.
| COLORS & MARKINGS |
As mentioned
earlier, building these cars requires one to be constantly painting during the
build process. Generally, I followed Tamiya's painting guide for the various
shades, though I did use a considerable number of Alclad II paints for this.
When Tamiya does a car kit, they generally produce the paint that is needed for
the overall color. Such is the case with this one. There is some mixing required
if you want to do so, but there are
 other sources for some of the more
interesting metallic shades. All this painting does tend to slow down the build
to some small extent, but the end result is well worth it.
other sources for some of the more
interesting metallic shades. All this painting does tend to slow down the build
to some small extent, but the end result is well worth it.
The kit decals are very nice, but do take an age to come free of the backing when using cold water. I used some setting solution on a decal and regretted it. One thing to keep in mind is that the numbers on the side have to be cut. The roundels are precut, so that is an issue. I also had the devils time getting the front and rear bodywork to fit with the rear section needing some trimming to where the suspension would allow it to fit properly. To get the intake stacks to fit they had to be slightly squeezed. The front body piece will not fit flush with the lower on the left and I think that is because of the coolant line. I recommend that when you glue that part in place, fit the forward body piece before it dries to ensure a flush fit. I used Cementine to attach the windscreen and the mirrors. The final items to add were the wheels which had to be carefully squeezed in place using flat pliers.
| CONCLUSIONS |
As often happens, the final result belies the work that goes into the model. The fit is generally quite good, though not in the snap-kit category. Hindsight shows some areas where I could have improved things, but overall, I'm pleased with the result. It makes an interesting comparison to the Lotus 29 Indy car I built ten years back. I'd like to think it won't be nine years before I do another F.1 kit.
| REFERENCES |
http://www.grandprixhistory.org/lotus25.htm
21 February 2020
Copyright ModelingMadness.com. All rights reserved.
If you would like your product reviewed fairly and fairly quickly, please contact the editor or see other details in the Note to Contributors.
Back to the Main Page Back to the Review Index Page Back to the Previews Index Page
 gn. Monocoque construction
had been used in aeronautical engineering for over 50 years. In 1915
Harry Blood campaigned a metal-fuselaged Carnelian at Indianapolis.
Gabriel Voisin used a monocoque chassis for his car that he raced in
the 1923 French GP and in 1955 BRM incorporated a semi-monocoque
chassis in their Grand Prix cars.
gn. Monocoque construction
had been used in aeronautical engineering for over 50 years. In 1915
Harry Blood campaigned a metal-fuselaged Carnelian at Indianapolis.
Gabriel Voisin used a monocoque chassis for his car that he raced in
the 1923 French GP and in 1955 BRM incorporated a semi-monocoque
chassis in their Grand Prix cars.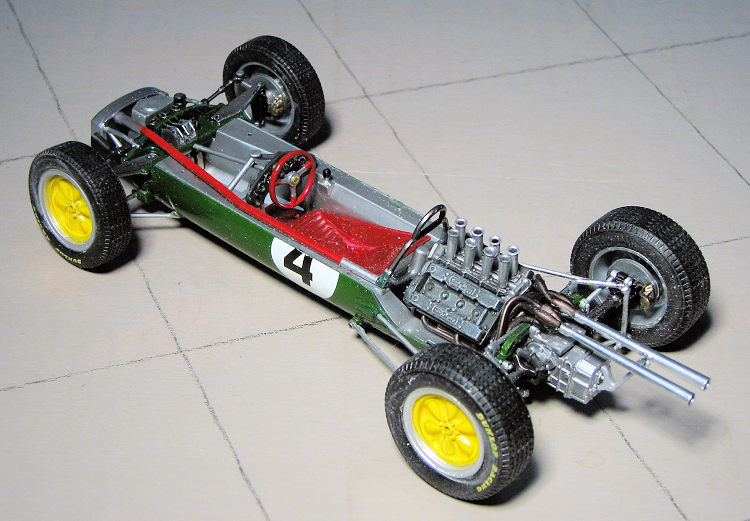 eat advantages in slower,
tighter, turns. Colin Chapman was known as an instinctive seat of
the pants designer. In fact when the first prototype was being built
he took the opportunity of sitting in the car. To his surprise he
found that he could fit quite comfortably and announced forthright
that: "This cockpit's too wide ... take another inch and a half out
out of it!" Dick Scammell, one of the mechanics that built the first
car would later remark that: "None of us really knew what we were
doing, but it all took shape very nicely and it certainly looked
right."
eat advantages in slower,
tighter, turns. Colin Chapman was known as an instinctive seat of
the pants designer. In fact when the first prototype was being built
he took the opportunity of sitting in the car. To his surprise he
found that he could fit quite comfortably and announced forthright
that: "This cockpit's too wide ... take another inch and a half out
out of it!" Dick Scammell, one of the mechanics that built the first
car would later remark that: "None of us really knew what we were
doing, but it all took shape very nicely and it certainly looked
right."