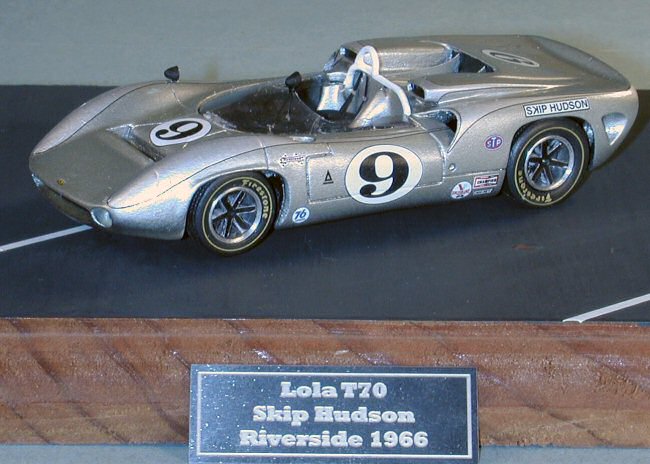
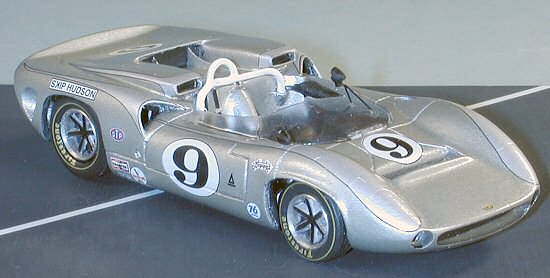
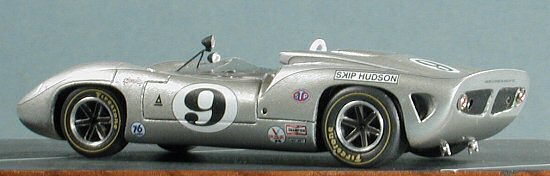
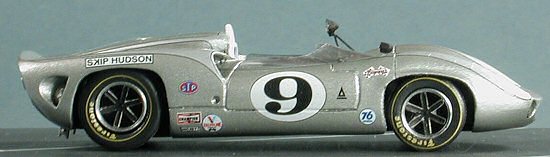
Marsh Models 1/43 Lancer Lola T-70
|
KIT # |
MM24H |
|
PRICE: |
$49.99 |
|
DECALS: |
One car: # 9 Skip Hudson 1966 Lancer car |
|
REVIEWER: |
|
|
NOTES: |
Multimedia |
|
BACKGROUND |
Please check the preview for more info on the car and a look in the box.
|
CONSTRUCTION |
As with all things that have resin in them, I began by cleaning up those pieces. Not really that much to do other than get rid of some flash and a bit of light sanding on a few other areas to rid it of lumps and bumps, mostly on the bottom of the car body.
 The
next thing I did was to prep the cast metal parts. These are a touch on the
rough side so need some careful sanding and filing to remove seams. I made double sure
that the chassis fit into the body with minimal fuss. Then I started on
some actual construction.
The
next thing I did was to prep the cast metal parts. These are a touch on the
rough side so need some careful sanding and filing to remove seams. I made double sure
that the chassis fit into the body with minimal fuss. Then I started on
some actual construction.
In this case it began by gluing in the seat back area and adding what filler was needed. I did this as it was going to be painted the same color as the exterior of the car. Then I removed the cockpit tub from the etched fret and bent it to shape. This kit does not have etched brass, but etched stainless steel. Upside is that it bends well by hand and downside is that it is VERY hard to cut if that is needed. The attachment points can be easily cut by scissors, but thicker parts require some heavy duty cutters. The stubs had to be filed/sanded off.
Once the tub was bent to shape, it was test fitted into the chassis/body to make sure that all was well. I can't emphasize enough how every single part needs to be test fit prior to any application of adhesive (which on this kit is basically superglue). It saves a ton of grief. With the tub shaped, the foot pedals were glued in as was the shifter. I had to back up the pedal piece with a section of scrap to get it to fit properly. The tub will basically stay 'bare metal' as these were aluminum in the real cars.
Next I formed the radiator outlet and test fit that into
the opening in the nose section. Some trimming was required to get a proper
fit and it was superglued into place. I found out later that it would have
been wiser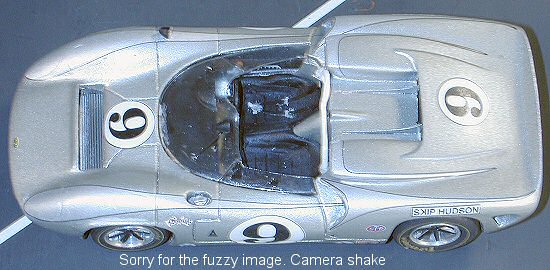 to wait until the body was painted to glue in this part as I
ended up having to mask it; not an easy task.
to wait until the body was painted to glue in this part as I
ended up having to mask it; not an easy task.
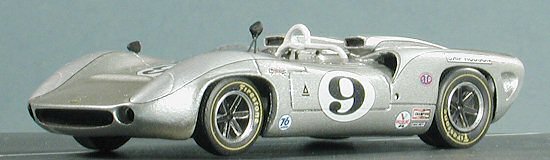
My attention then turned to the wheels. These have several inserts; an aluminum ring followed by a cast spoke assembly, followed by an etched spoke part. The sprue gate for the wheels is large and cannot be easily fixed so it is recommended that when the model is done, that it be secured to a base of some sort with those gate areas down! The spoke etched parts fit rather well, though you need to be warned that there are distinct front and rear spokes, something the instructions failed to get across to me. You also need to press down on the center of these etched parts when they are glued in place. I had one wheel not match up well at all and I'm not sure just what the problem is with it, but I'd blame the cast metal section. These spokes were painted black and the aluminum edges scraped free of paint.
|
PAINTING |
 The car itself is to be painted an overall metallic silver. I thought I'd
be clever and use a metallic undercoat so prepped the body with Alclad II
black primer, followed by several thin coats of Alclad II chrome. When that
was fully dry, the body of the car was sprayed with
Testors Model Master German Silver enamel. A couple of coats of Future was
then applied to smooth out the paint. The kit provides small etched metal
inserts for the various intakes. The ones for the front and back were used,
but not the very little ones for the engine. Those were painted instead and
look much better because of it. I also took the time to paint the seats,
dash, steering wheel and body pan flat black using Floquil Engine Black.
The car itself is to be painted an overall metallic silver. I thought I'd
be clever and use a metallic undercoat so prepped the body with Alclad II
black primer, followed by several thin coats of Alclad II chrome. When that
was fully dry, the body of the car was sprayed with
Testors Model Master German Silver enamel. A couple of coats of Future was
then applied to smooth out the paint. The kit provides small etched metal
inserts for the various intakes. The ones for the front and back were used,
but not the very little ones for the engine. Those were painted instead and
look much better because of it. I also took the time to paint the seats,
dash, steering wheel and body pan flat black using Floquil Engine Black.
The next step was application of the decals. These are rather well done. All the custom stripes and numbers are in perfect register, but the same cannot be said of the very small decals. They all showed some misalignment of the colors. Nothing really horrible, but you can see it when you look close. Anyway, the decals all needed help in terms of setting solution, and it seems that Solvaset worked well. The decals were not immediately overcome by the Solvaset, so there was time after application to move them a bit. I had to put slices into the ones that covered the headlights and those on the aft intakes. Once the trim and number decals had been applied, I went back to building the kit, saving the little ones until the end.
|
MORE CONSTRUCTION |
At this time, I started to bring the major bits together. The step that I REALLY dreaded was the windscreen. I've always made a real mess of these kinds of things, and fate was to prove that this one was no exception. I carefully cut out the vacuformed windscreen and carefully test fit it to make sure that it would fit. No problem. I drilled two small holes for the rear view mirror mound. No problem. Then I carefully placed small amounts of superglue around the base of the body where the part would fit and carefully slid in the windscreen. Still no problem. A touch of accelerator had the glue set instantly. I was feeling good.
 Then I placed the
decal instruments onto the dash. These were actually supposed to go behind
the etched instrument panel, but they didn't completely correspond with the
openings so I put them on the outside. It actually looks pretty good,
despite the fact they are a bit off register. Then I test fit the dash
panel to make sure it would fit. No problem. I took a small dollup of
superglue and placed bits of it on strategic places along the dash
attachment rim. I carefully moved the dash into place and promptly sneezed.
This caused the dash to slip and I got superglue on my vac windscreen. All
attempts to remove the glue failed miserably. After quietly weeping, I
reattached the dash and continued with the construction.
Then I placed the
decal instruments onto the dash. These were actually supposed to go behind
the etched instrument panel, but they didn't completely correspond with the
openings so I put them on the outside. It actually looks pretty good,
despite the fact they are a bit off register. Then I test fit the dash
panel to make sure it would fit. No problem. I took a small dollup of
superglue and placed bits of it on strategic places along the dash
attachment rim. I carefully moved the dash into place and promptly sneezed.
This caused the dash to slip and I got superglue on my vac windscreen. All
attempts to remove the glue failed miserably. After quietly weeping, I
reattached the dash and continued with the construction.
The seat really didn't fit too well in the slot in the back piece, though it is in there, it isn't as snug a fit. Then I slid in the tub. It fit well and wasn't glued in place. I noted that one couldn't see the pedals so I won't bother installing those if I do another Lola. Then the frame was installed. This didn't line up well with the pre-drilled screw mounts, so new ones were drilled. Once that was done, the screws were carefully installed.
 Next was
installation of the wheels and axles. The axles are way too long so need
trimmed back. I'm not sure what the metal is, but it took some major
cutters to get through them. They were then glued first into one wheel,
then slid through the frame and the other wheel glued in place. I made sure
the sprue attachment points were on the bottom and, of course, I was unable
to get all four wheels on the ground at the same time. Must be some sort of
curse.
Next was
installation of the wheels and axles. The axles are way too long so need
trimmed back. I'm not sure what the metal is, but it took some major
cutters to get through them. They were then glued first into one wheel,
then slid through the frame and the other wheel glued in place. I made sure
the sprue attachment points were on the bottom and, of course, I was unable
to get all four wheels on the ground at the same time. Must be some sort of
curse.
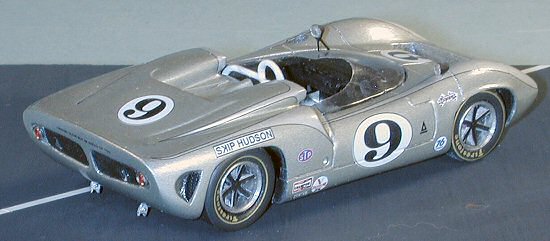
Now for some of the more fiddly bits. First the front and rear grilles (pre-painted flat black) were glued in place. This car does not have the extended exhaust pipes so the holes were painted flat black. I'll also mention that the grilles and pre-drilled holes didn't line up so the exhaust had to be re-drilled. The tail lights were installed and painted clear red. Moving forward, the gas cap was installed, as was the right rear-view mirror. The etched mount for the left mirror was installed and properly bent, then the other mirror was mounted. These both were painted flat black with silver mirror areas. The gas cap was left in bare metal. The roll bar, which had been painted white, was glued in place. At this stage, the rest of the smaller decals was applied and the screws painted flat black to match the bottom of the car.
 Looking at the
instructions and the bits in the box, it seemed there were more to go. I
did install the rear jack points after the mounting holes were made a bit
larger so they'd fit. I tried like all get out to fit what seemed to be the
rear transaxle and suspension bit on the back, but no matter how hard I
tried, there seemed to be no way to fit it on. The photos supplied were of
no help as they didn't show it installed either. I looked in several
references, but the rear of a Lola T-70 was apparently not photographed
very much as I couldn't find a helpful photo. I left it out. Same for the
little ring thingies that were supposed to fit in the holes on the rear
bodywork. There were some other bits, like what seemed to be lug nut
arrays, but weren't shown on the instructions at all. I also managed to
install the harness, but it didn't look as convincing as I'd have hoped.
Looking at the
instructions and the bits in the box, it seemed there were more to go. I
did install the rear jack points after the mounting holes were made a bit
larger so they'd fit. I tried like all get out to fit what seemed to be the
rear transaxle and suspension bit on the back, but no matter how hard I
tried, there seemed to be no way to fit it on. The photos supplied were of
no help as they didn't show it installed either. I looked in several
references, but the rear of a Lola T-70 was apparently not photographed
very much as I couldn't find a helpful photo. I left it out. Same for the
little ring thingies that were supposed to fit in the holes on the rear
bodywork. There were some other bits, like what seemed to be lug nut
arrays, but weren't shown on the instructions at all. I also managed to
install the harness, but it didn't look as convincing as I'd have hoped.
|
CONCLUSIONS |
 All in all, I'm
pleased with the outcome and not because I'd spent nearly $50 on it and
wanted to save face. I do darn few cars and kits with all that etched stuff
usually spell my doom. I've always liked Can Am cars and to finally have
one on my little car shelf is a kick. I was also rather pleased with the
way the two silvers contrasted with each other. I was so afraid that the
German Silver would be the same shade as the silver decals! It is a kit
that I can recommend if you have the patience for the fiddly bits and like
the subject enough to spend the loot on it. I have other 1/43 car kits,
some from nearly 20 years ago that I should hunt out and see if I'm up to
building another.
All in all, I'm
pleased with the outcome and not because I'd spent nearly $50 on it and
wanted to save face. I do darn few cars and kits with all that etched stuff
usually spell my doom. I've always liked Can Am cars and to finally have
one on my little car shelf is a kick. I was also rather pleased with the
way the two silvers contrasted with each other. I was so afraid that the
German Silver would be the same shade as the silver decals! It is a kit
that I can recommend if you have the patience for the fiddly bits and like
the subject enough to spend the loot on it. I have other 1/43 car kits,
some from nearly 20 years ago that I should hunt out and see if I'm up to
building another.
July 2003
#1275
Copyright ModelingMadness.com. All rights reserved.
If you would like your product reviewed fairly and fairly quickly, please contact the editor or see other details in the Note to Contributors.