LS 1/24 Chaparral 2C
| KIT #: | 2267 |
| PRICE: | $37.00 delivered |
| DECALS: | One option |
| REVIEWER: | Scott Van Aken |
| NOTES: | Curbside |
| HISTORY |
 The Chaparral 2C is a sports prototype race
car designed and developed by both Jim Hall and Hap Sharp, and built by
American manufacturer Chaparral in October 1965, to compete in a few
non-championship sports car races that same year.The 2C introduced
the innovative in-car adjustable rear wing. The integrated spoiler-wing
was designed to lie flat for low drag on the straights and tip-up under
braking through the corners. The car's clutchless, semi-automatic
transmission kept the driver's left foot free to operate the wing
mechanism. The 2C was based on a Chevrolet-designed aluminum chassis and
was a smaller car in every dimension than the 2B. Without the natural
non-resonant damping of the fiberglass chassis, Hap Sharp nicknamed it
the EBJ — "eyeball jiggler".
The Chaparral 2C is a sports prototype race
car designed and developed by both Jim Hall and Hap Sharp, and built by
American manufacturer Chaparral in October 1965, to compete in a few
non-championship sports car races that same year.The 2C introduced
the innovative in-car adjustable rear wing. The integrated spoiler-wing
was designed to lie flat for low drag on the straights and tip-up under
braking through the corners. The car's clutchless, semi-automatic
transmission kept the driver's left foot free to operate the wing
mechanism. The 2C was based on a Chevrolet-designed aluminum chassis and
was a smaller car in every dimension than the 2B. Without the natural
non-resonant damping of the fiberglass chassis, Hap Sharp nicknamed it
the EBJ — "eyeball jiggler".
| THE KIT |
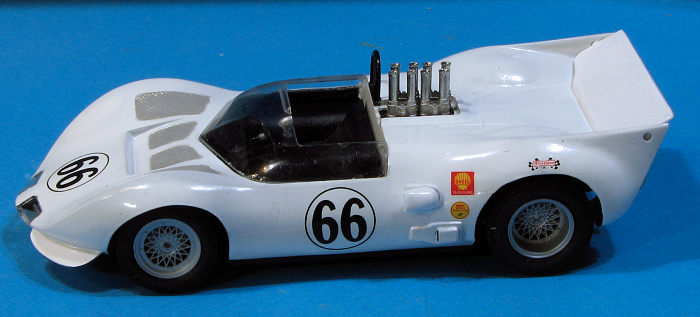 The kit provides a one piece body and one piece pan chassis. Some of the
parts, most notably the body have a bit of flash and some fairly large mold
seams, but nothing major. Each of the front wheels is held in place with a
metal stub and the front wheels are designed to steer, while the rears have
a metal axle. Four rubber/vinyl tires are included. The interior is quite
minimal and not up to today's standards. A plate holds the vertical carbs
with velocity stacks and that fits from the underside of the body. Rear
spoiler has to be bent slightly to snap into the rear and there is no
actuating rod. The body basically just snaps into place atop the chassis
once all is done.
The kit provides a one piece body and one piece pan chassis. Some of the
parts, most notably the body have a bit of flash and some fairly large mold
seams, but nothing major. Each of the front wheels is held in place with a
metal stub and the front wheels are designed to steer, while the rears have
a metal axle. Four rubber/vinyl tires are included. The interior is quite
minimal and not up to today's standards. A plate holds the vertical carbs
with velocity stacks and that fits from the underside of the body. Rear
spoiler has to be bent slightly to snap into the rear and there is no
actuating rod. The body basically just snaps into place atop the chassis
once all is done. | CONSTRUCTION |
 The first thing I did was to sand down and fill sections of
the body that needed kit. I then attached the body mounting posts in the rear.
It is obvious from the chassis that this was originally motorized or at least
provided that option as there is a mount for the electric motor and holes on the
underside for the switch and spur gear clearance. Could a slot car be made with
this body? Yes indeed as there is plenty of room for all the appropriate
components, though finding proper wheels with the 'spider' pattern might prove
to be difficult. The kit also provides another chassis with built in interior
and engine, though it is not shown as being used for this kit.
The first thing I did was to sand down and fill sections of
the body that needed kit. I then attached the body mounting posts in the rear.
It is obvious from the chassis that this was originally motorized or at least
provided that option as there is a mount for the electric motor and holes on the
underside for the switch and spur gear clearance. Could a slot car be made with
this body? Yes indeed as there is plenty of room for all the appropriate
components, though finding proper wheels with the 'spider' pattern might prove
to be difficult. The kit also provides another chassis with built in interior
and engine, though it is not shown as being used for this kit.
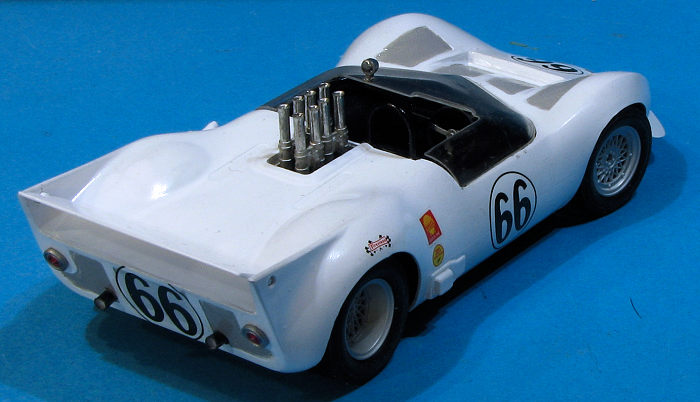
Though the kit seems to be pretty simple (and it is in terms of parts used), it has its issues. I found that the wheels were particularly fragile as the spider wheel insides can be easily deformed. I also discovered that the front axle stubs were far too long and so had to cut them with my Dremel. The exhausts will point down if installed as molded as the angle was not taken into consideration during tooling.
I also found that the injector piece, once built, was too large for the opening provided and so that had to be sanded larger to get it to fit. The clear pieces are not very clear and needed a fair amount of trimming in order to fit the openings. The steering wheel attachment point is too small to fit over the steering shaft so is a butt join.
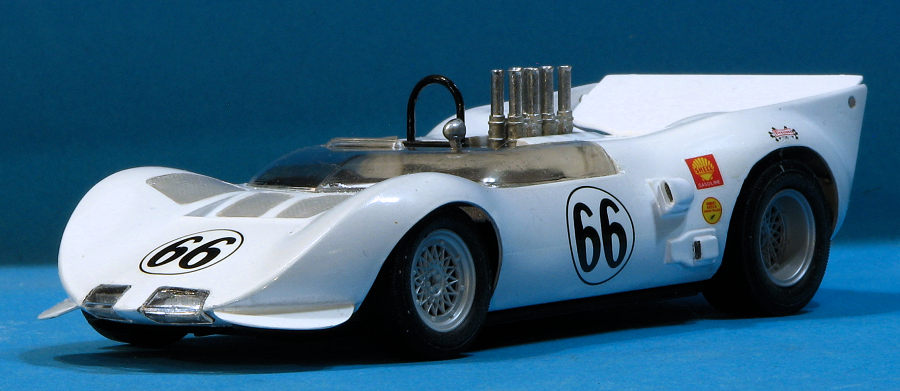
 Chaparrals are overall white so painting is fairly
straight forward. I used Tamiya gloss white for this. The 2C has a lot of
screen areas. I wasn't sure just how to treat those as leaving them white
would make things too bland. Painting them black would be overkill so I
painted these areas a light grey. I then drybrushed the screen detail white,
however the molding in these areas is patchy at best with large areas just
flat plastic with no detail. It may not be prototypical, but it does break
up all that white.
Chaparrals are overall white so painting is fairly
straight forward. I used Tamiya gloss white for this. The 2C has a lot of
screen areas. I wasn't sure just how to treat those as leaving them white
would make things too bland. Painting them black would be overkill so I
painted these areas a light grey. I then drybrushed the screen detail white,
however the molding in these areas is patchy at best with large areas just
flat plastic with no detail. It may not be prototypical, but it does break
up all that white.
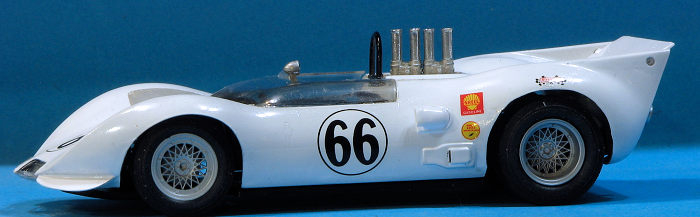
Once painted, I applied the decals. Despite their age, they worked perfectly. At least most of them did. I was unable to salvage the tire markings. A gloss clear was then applied using Testors lacquer in a spray can. With that done, all the little bits and clear parts were permanently attached with some pieces being glued using either Cementine clear cement or E6000 in addition to standard glue. I then simply snapped the body onto the chassis and that was it.
| CONCLUSIONS |
I have always liked the Chaparral and while the 2C had a fairly short racing career compared to the earlier 2A, it was an important car in the evolution of the line. This kit is really a three footer as its lack of decent detail is readily apparent once one gets closer to the model. I'm sure it would make a great starting place for those who like to do scratchbuilding, but I simply wanted a fairly nice out of the box build and this does fill the bill.
| REFERENCES |
5 April 2024 Copyright ModelingMadness.com. All rights reserved. No
reproduction in part or in whole without express permission from the editor.
If you would like your product reviewed fairly and fairly quickly, please contact the editor or see other details in the Note to Contributors.