|
HISTORY |
|
KIT: |
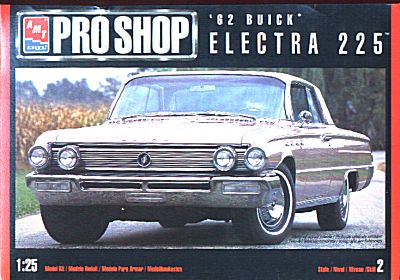
AMT 1/25 1962 Buick Electra 225 |
|
KIT # |
6116 |
|
PRICE: |
$11.00 |
|
DECALS: |
|
|
REVIEW & |
|
|
NOTES: |
'Pro Shop' release |

|
HISTORY |
All I can say as a preview is that I learned to drive in a 1962 Buick. It was a natural that I would pick up this kit when I saw it.
|
THE KIT |
Upon opening the kit, the first thing I noticed were all the extra parts. Unless one is doing a custom job, those will go in the parts bin. The next was the amount of flash. Not really that bad considering the age of the mold and where it is done. There are bits of flash on many of the parts. The body suffers from it mostly in the front and the front quarter windows. No big problem, and considering that these are probably 35 year old molds, a lot less than expected. Of course they haven't been used since the initial release back in 1962.
Unlike the kits of yesteryear, this one is molded in a very light brownish grey plastic. They used to be white. Detail is pretty crisp, though since I build few cars, I don't know what the standards are nowadays. I do know that there really are few parts to this one. To build a stock version, 45 parts are used. An equal number are for the other versions.
There are giant ejector pin marks in the interior floor that will be a pain to remove. The chrome looks well done and doesn't flake off like some other AMT kits I have built. The tires are properly skinny Firestone Supremes. They are, however, blackwalls. No self respecting Buick Electra 225 would be caught dead without whitewalls!
|
CONSTRUCTION |
Well first step is prep. For cars, that means cleaning up the mold lines and polishing the heck out of the body. Once that was done, it was primered in light grey and then a coat of Floquil Old silver was painted on. After about two weeks of drying, Testors Colors by Boyd Champagne Metalflake was sprayed on in several light coats. Not bad, but there was a large fisheye on the trunk. The paint was removed from that area and resprayed.
While that was going on, the chassis was painted gloss black. Then I lost interest and the whole ball of wax was stuck back in the box where it stayed for about 10 months (!). When I got back to it, the engine block was assembled and painted light blue. The interior was painted a medium tan and then brown flocking was put on the floor, mostly to hide the huge ejector pin marks that are there. The flocking wasn't very well done as it tended to clump on me. Guess I have a lot to learn about using it!
|
PAINT & DECALS |
|
CONSTRUCTION CONTINUES |
|
CONCLUSIONS |
|
REFERENCES |
Review copy courtesy of me and my wallet! If you would like your product reviewed fairly and quickly by a site that has over 800 visits a day, please contact me or see other details in the Note to Contributors.