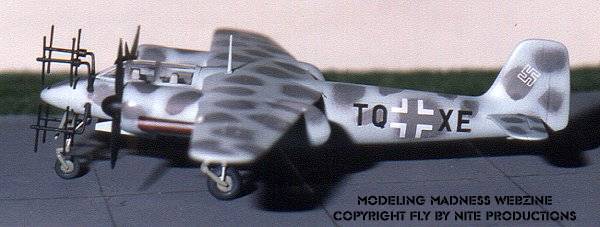
Kit: TA-154
Scale: 1/72
Kit Number: 4001
Manufacturer: Pioneer
Price: $6.00
Media: Injected Plastic
Decals: basic insignia
Date of Review: 10 Feb 98
Review and Photos by: Scott Van Aken

The Ta-154 Moskito was designed as a night fighter using non-strategic materials, which meant using wood and wood laminates, much like the British Mosquito. However, the project was plagued by the lack of a good glue and many problems were encountered stemming from the glue debonding and pieces flying off the aircraft at inopportune moments. Initially the aircraft was found wanting in the area of stability, but an increase in fin area and the extension of the engine nacelles helped cure that problem. The final result of the program was cancellation in mid 1944, although the aircraft would have made a fine night fighter. The glue problem was never solved and while some were used in their intended role, most of the surviving aircraft were used in various test programs.
Pioneer's kit of this aircraft was eagerly scarfed up by yours truly when it appeared in 1987. You may have read on R.M.S. about this kit. Much has been said about it. Upon opening the box, I was confronted by several sprues of thick and crudely molded grey plastic with a very distorted and non-clear canopy and a sheet of basic insignia. Disappointment as I had built several Pioneer kits and they seemed to be improving. Oh well, the only other choice was the Wings 72 vacuform and I thought an injected kit would be easier. Not exactly.
First I had to saw off the gates that attached the pieces to the sprue. Then I had to file all the seam lines off the parts, a chore that took quite a while. When I dry fitted the parts, I saw a real need for lots of putty. Well, off I went. The "interior" is two seats and sticks. The nose has to be jam packed with weight as the real aircraft sits tail low like an S-2 Tracker. Fortunately, there is lots of room. Attachment of the wings and stabilizers required the expected multiple applications of putty, as did the fitment of the engine nacelles. You really have to dry fit all the bits and pieces a number of times to reduce the amount of filing and puttying. It is fortunate that this is a wooden aircraft so there are few panel lines to eradicate during construction.
The landing gear are convincing enough for the empty wheel wells and sturdy enough to carry the weight of the model. Props and hubs are useable, but the spinners seem to be a bit blunt. Engine exhausts are part of the nacelles so drilling out and painting are about the best they can hope for. The canopy is a rather poor fit as well, and the radar antennas are not only way too thick, but I doubt if the real ones had large mounting holes in them! I also think they are mounted too far aft.
It was painted with Gunze acrylics with RLM76 overall and large blotches of RLM 75. The interior and gear were done in RLM 02 although I now think the interior was probably RLM 66. I used the kit insignia and robbed the codes from a Modeldecal sheet.
The end result is sort of a Ta-154. If I had it to do again, I'd use the Pioneer landing gear and build the vacuform. Not recommended for the serious modeler unless you are willing to put a ton of work into it. Get the Wings 72 vacuform and pray for a decent injected kit.