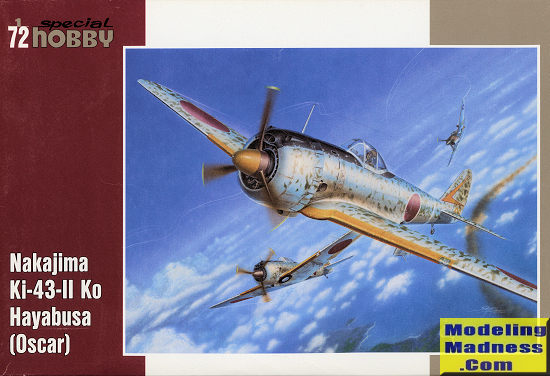
Special Hobby 1/72 Ki-43-II ko Hayabusa
| KIT #: | SH 72170 |
| PRICE: | $25.00 or so delivered |
| DECALS: | Four options |
| REVIEWER: | Scott Van Aken |
| NOTES: |
| HISTORY |
The Ki-43 is to the Japanese Army what the A6M was to the Japanese Navy during WWII. It was the first modern, low winged, retractable landing gear fighter of either service. Both were designed with maneuverability as the major factor in their design. The result was that the aircraft were lacking in other areas that were considered just as important to other powers. They did not have adequate armor protection, and the Ki-43 had rather weak armament of twin 12.7mm machine guns, even compared to the A6M which also had two 20mm cannon. The Ki-43 also had very good range, but this was a result of the lightweight airframe construction and lack of heavy things like armor plating and self-sealing fuel tanks.
Initially the Army did not like the Ki-43 as it was not as maneuverable as the lighter and smaller fixed undercarriage Ki-27. However, it did have much superior range and the war in China required a longer ranged fighter. Despite not being considered maneuverable enough, Allied pilots who attempted to dogfight with the Ki-43 soon found themselves in trouble. Fortunately, the lack of heavy armament of the Oscar often saved the foolish Allied pilots. Despite the known shortcomings of the Ki-43, the type was continually modified and produced even after the type was obsolescent. Many were expended in suicide attacks near the end of the war.
| THE KIT |
 For
decades the Hasegawa Ki-43 was considered to be the best in this scale.
While not a bad kit, it is showing its age and this one has a lot more
detail. Of course with that detail comes smaller parts and more of them.
Also part of the deal is a bit more guesswork in terms of where bits go.
For
decades the Hasegawa Ki-43 was considered to be the best in this scale.
While not a bad kit, it is showing its age and this one has a lot more
detail. Of course with that detail comes smaller parts and more of them.
Also part of the deal is a bit more guesswork in terms of where bits go.
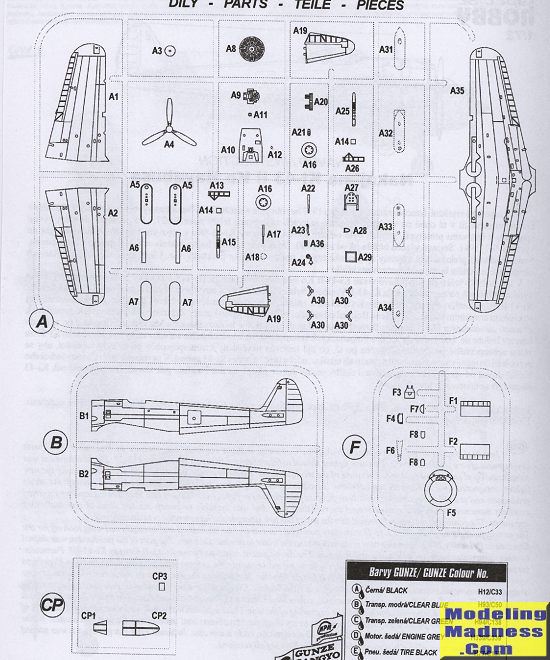
The cockpit is nicely done with a two part seat that fits onto a floor piece along with the control stick and rudder pedals. There is nice sidewall detail and a few bits to attach to it. The main instrument panel attaches to one of the fuselage halves before closing them. The instructions call for you to mix up a Gunze equivalent of Aotake, but I'm betting these planes were Nakajima Interior Green, a sort of greenish yellow color available in some paint brands. Once you close the fuselage halves, you attach the horizontal stabs and the three piece wing. No holes to open for the pylons as there aren't any holes for these items.
With that done the engine cowling, which is a center and upper piece with two side pieces, gets the engine face trapped within. The prop is glued to the front of the engine unless you modify both to allow it to spin. This is the 'early' -II which, like the -I, has exhaust that point out to the side rather than to the rear as on later versions. The engine oil cooler is three parts and you have a headrest assembly to place aft of the cockpit before attaching the separate windsreen and canopy.
The kit does provide pylons, anti-sway braces and fuel tanks for under the wings, but there is no placement guide on the lower wings, just a drawing that shows each pylon 29mm from the centerline. Landing gear and main gear doors are nicely done and while the tail gear is shown attached early in the assembly, I'd leave it off until as late as possible to keep from breaking it.
Instructions are well drawn with detail images as
needed. All four markings options are unpainted metal with IJAAF grey-green
control surfaces, black anti-glare panels and yellow wing ID bands. All the
props are in red-brown primer as ar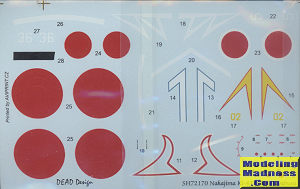 e
most of the spinners. The first option is shown on the box art from the 63rd
Sentai in New Guinea in late 1943. It has a yellow spinner and very light
mottling. All options are mottled to some extend and in a green shade. Next is
77 Sentai plane in early 1944 based at Hollandia in New Guinea. Its mottling is
in two green shades and done in a squiggle pattern. Third is a 33rd Sentai plane
also at Hollandia. It has a fairly dense mottle pattern. The final option is
with the 47th Sentai in late 1944 based near Tokyo. It has white defense
'bandages' on the wings and fuselage. Mottling on this one is quite heavy and
done with a brush. The decal sheet is nicely printed and you'll note that it
does not include the white defense bandages so you'll have to paint those.
e
most of the spinners. The first option is shown on the box art from the 63rd
Sentai in New Guinea in late 1943. It has a yellow spinner and very light
mottling. All options are mottled to some extend and in a green shade. Next is
77 Sentai plane in early 1944 based at Hollandia in New Guinea. Its mottling is
in two green shades and done in a squiggle pattern. Third is a 33rd Sentai plane
also at Hollandia. It has a fairly dense mottle pattern. The final option is
with the 47th Sentai in late 1944 based near Tokyo. It has white defense
'bandages' on the wings and fuselage. Mottling on this one is quite heavy and
done with a brush. The decal sheet is nicely printed and you'll note that it
does not include the white defense bandages so you'll have to paint those.
| CONCLUSIONS |
Back to the Main Page Back to the Previews Index Page
Back to the Previews Index Page