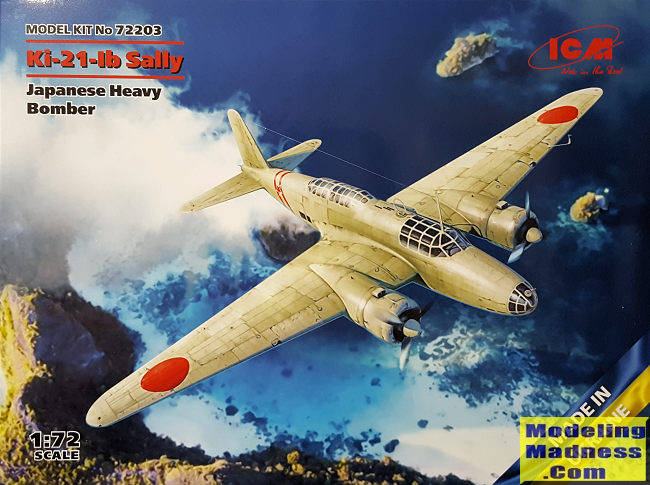
| KIT #: | 72203 |
| PRICE: | $31.99 plus shipping |
| DECALS: | Four options |
| REVIEWER: | Scott Van Aken |
| NOTES: | 2022 release |

| HISTORY |
The Ki-21-Ia was used in combat in the war with China by the 60th Sentai from autumn 1938, carrying out long-range unescorted bombing missions in conjunction with the BR.20 equipped 12th and 98th Sentais. The Ki-21 proved to be more successful than the BR.20, having a longer range and being more robust and reliable. Two more Sentais, the 58th and 61st deployed to Manchuria in the summer of 1939 for operations against China, with aircraft from the 61st also being heavily used against Russian and Mongolian Forces during the Nomonhan Incident in June–July 1939.
Losses were high during early combat operations, with weaknesses including a lack of armament and self-sealing fuel tanks, while the aircraft's oxygen system also proved unreliable. The Ki-21-Ib was an improved version designed to address the armament issue by increasing the number of 7.7 mm (.303 in) Type 89 machine guns to five, and incorporating improvements to the horizontal tail surfaces and trailing edge flaps. In addition, the bomb bay was enlarged. The tail gun was a 'stinger' installation, and was remotely controlled. Also, the fuel tanks were partially protected with laminated rubber sheets. However, by the attack on Pearl Harbor and the start of the Pacific War, improvements in the ROC Air Force caused losses to mount, and most Ki-21-1a, -1b and -1c were relegated to training or second-line duties.
| THE KIT |
 It
was with much excitement that the announcement of a new tool Ki-21 was received
by modelers everywhere. Prior to this, in 1/72 only the MPM and even older and
more elusive Revell kits were produced of this aircraft.
A look at the sprues shows that this one is not for beginners as there are a considerable number of small parts provided. The fuselage has a separate rear fuselage that holds the fin. This is because later versions of the Ki-21 had a larger fin. Note also that the forward fuselage halves are a separate sprue to deal with the later version with a turret. This one starts by attaching the separate rear fuselage and several fuselage inserts prior to going into building the cockpit and interior pieces. There is a lot of detail here including fuel tanks, bulkheads and all the various weapons positions. There seems to be several part of the interior detailing that will be hidden from view once the fuselage halves are sealed so you may wish to do a bit of test fitting before putting the effort into adding these bits.
Once the halves are together, the transparencies are attached. The instructions have a mask template and attachment guide for these as there are a LOT of small panes. So far, no one does an aftermarket mask set for this kit though Dead Design does them for the Revell and MPM kit. Hopefully one will come soon as this is a kit that needs it.
 Wings
and tailplanes are upper and lower halves and all the flight control surfaces
are separate. Landing gear need to be built up and attached to the wing before
the engine nacelles are attached. Engines provide both banks of cylinders and a
pushrod piece for the front bank. The cowlings are four pieces a rear section,
two large center halves and a forward piece.
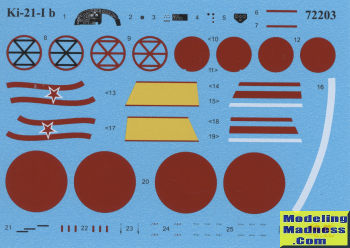
Instructions are nicely done and provide color info with ICM, Revell, and Tamiya paints. The four options are all overall grey-green. Two options are 60 Sentai with one from the 58 Sentai and the fourth with the Hamamatsu bomber training school. The decal sheet is nicely done and should prove to be quite thin.
| CONCLUSIONS |
| REFERENCES |
https://en.wikipedia.org/wiki/Mitsubishi_Ki-21
November 2022 Copyright
ModelingMadness.com. All rights reserved. No reproduction in part or in whole
without express permission from the editor. If you would like your product reviewed fairly and fairly quickly, please
contact
the editor or see other details in the
Note to
Contributors.