| KIT #: | 84189 |
| PRICE: | $29.89 |
| DECALS: | Four options |
| REVIEWER: | Scott Van Aken |
| NOTES: | 2023 release. Weekend Edition |
| HISTORY |
While the navy was testing the first two A6M prototypes, they suggested that the third be fitted with the 700 kW (940 hp) Nakajima Sakae 12 engine instead. Mitsubishi had its own engine of this class in the form of the Kinsei, so they were somewhat reluctant to use the Sakae. Nevertheless, when the first A6M2 was completed in January 1940, the Sakae's extra power pushed the performance of the Zero well past the original specifications.
The new version was so promising that the Navy had 15 built and shipped to China before they had completed testing. They arrived in Manchuria in July 1940, and first saw combat over Chungking in August. There they proved to be completely untouchable by the Polikarpov I-16s and I-153s that had been such a problem for the A5Ms when in service. In one encounter, 13 Zeros shot down 27 I-15s and I-16s in under three minutes without loss. After hearing of these reports, the navy immediately ordered the A6M2 into production as the Type 0 Carrier Fighter, Model 11. Reports of the Zero's performance filtered back to the US slowly. There they were dismissed by most military officials, who thought it was impossible for the Japanese to build such an aircraft. All Model 11 aircraft were land based.
After the delivery of the 65th aircraft, a further change was worked into the production lines, which introduced folding wingtips to allow them to fit on aircraft carriers. The resulting Model 21 would become one of the most produced versions early in the war. A feature was the improved range with 520 l (140 US gal) wing tank and 320 l (85 US gal) drop tank. When the lines switched to updated models, 740 Model 21s had been completed by Mitsubishi, and another 800 by Nakajima. Two other versions of the Model 21 were built in small numbers, the Nakajima-built A6M2-N "Rufe" floatplane (based on the Model 11 with a slightly modified tail), and the A6M2-K two-seat trainer of which a total of 508 were built by Hitachi and the Sasebo Naval Air Arsenal.
| THE KIT |
 Despite
there being good kits of the A6M from both Hasegawa and Tamiya, Eduard has taken
the plunge into doing this aircraft. It is probably because they see the
opportunity for good sales as the Zero is one of the best selling WWII aircraft
kits. Adding to this, Eduard has so far done a Wildcat and P-40 series to add to
their F6F Hellcat. One of their earlier kits was the P-39, which also had
widespread use in New Guinea. All this points to their focus turning to the
Pacific War. I would have to assume that a Ki-43 and F4U are also in the works.
Despite
there being good kits of the A6M from both Hasegawa and Tamiya, Eduard has taken
the plunge into doing this aircraft. It is probably because they see the
opportunity for good sales as the Zero is one of the best selling WWII aircraft
kits. Adding to this, Eduard has so far done a Wildcat and P-40 series to add to
their F6F Hellcat. One of their earlier kits was the P-39, which also had
widespread use in New Guinea. All this points to their focus turning to the
Pacific War. I would have to assume that a Ki-43 and F4U are also in the works.
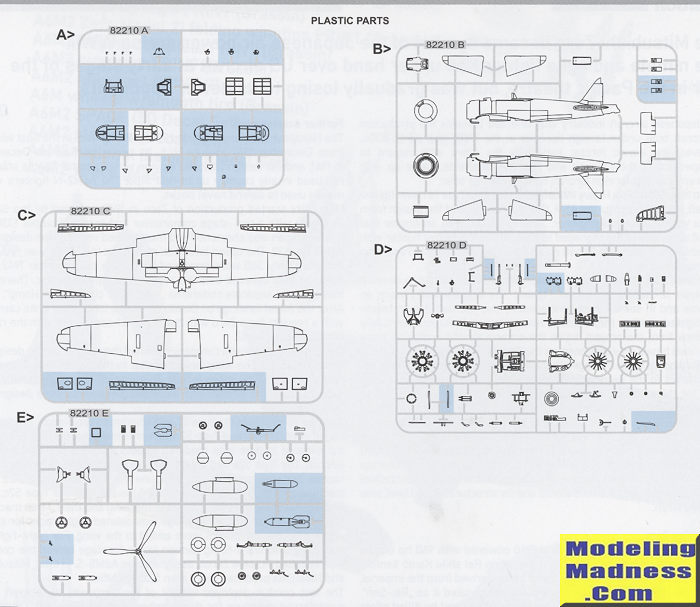
As you would expect from Eduard, the kit is highly modular so that one can do
all the variants. For instance, on several sprues there are parts that are not
used on this particular kit, something that is particularly evident in regard to
the clear sprue.
The cockpit is quite complete, with all the various sidewall items being
separate, some that consist of several pieces. As this is a Weekend boxing,
there are no p.e. items. For instruments, decals are provided. Note also
that there are differences in some interior items between the various markings
options so if using kit decals (and I see no reason not to), you need to know
which one you'll be building fairly early in construction.
All of the control surfaces are separate, but looking at period photos of
operational A6Ms on the ground, the only surfaces I saw deflected were the
ailerons. Flaps, elevators and rudders were all in the neutral position. There
are also two different aileron options. There are holes in the lower wing that
you might want to open up so check instructions to see which are appropriate.
Once the fuselage halves are assembled, the interior sub-assembly can be
installed from the underside.
The gear wells are all made up of separate sections. There are also lower wing
inserts for the shell ejection chutes. I was somewhat surprised that there is no
wingtip fold option, even though the tips are engraved on the inside to where
you could cut them off to install a folding mechanism. However, the extensive
listing of aftermarket on the back of the instructions does show a resin
conversion set for this.
The engine is nicely done with pushrods on both sets of cylinders. The cowling
is seven pieces, eight if you count the exhaust outlet. However, Eduard has
provided a form over which you can assemble this so it won't be the nightmare it
initially appears to be. The main wheels have separate inserts so you can paint
the tire separately from the hub. There are two different hub options provided
so you can use the ones you want. No indication of if one is specifically for a
certain markings option or not.
 You are
provided two tail hook options, one raised and one lowered. Note that some land
based planes had this removed to save weight. For things under wings, you are
provided a drop tank and bombs depending on the markings option you'll be using.
Also an option are wing mass balances and prop spinners. The mass balances were
only used on very early A6M2s. When attaching the canopy to the cockpit
greenhouse, you are provided two options here as well. One for open and the
other for closed. I would recommend getting a canopy mask set for this. Another
note is that not all options use the radio mast as Japanese radios were fairly
unreliable and were often removed.
You are
provided two tail hook options, one raised and one lowered. Note that some land
based planes had this removed to save weight. For things under wings, you are
provided a drop tank and bombs depending on the markings option you'll be using.
Also an option are wing mass balances and prop spinners. The mass balances were
only used on very early A6M2s. When attaching the canopy to the cockpit
greenhouse, you are provided two options here as well. One for open and the
other for closed. I would recommend getting a canopy mask set for this. Another
note is that not all options use the radio mast as Japanese radios were fairly
unreliable and were often removed.
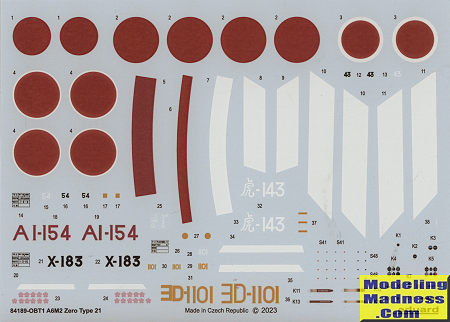
Unlike the first batch of Weekend Edition kits, this one offers four decal options. Two of them are in overall grey with the first one from the Akagi fighter squadron on 7 December 1941. The other is with the 3rd Kokutai based at Kendari AB in March 1942. The next two are in dark green over grey with the yellow wing leading edge ID areas. The first was with the 302 Kokutai based at Atsugi AB in August 1945. This plane has black undersides for the wings and tailplanes. The other is from the 261 Kokutai based at Kagoshima AB in 1944. This one has white bands on the wings and fuselage. The decal sheet is nicely done and you are provided a full stencil set.

| CONCLUSIONS |
Those who have already built this kit have nothing but praise for how well it goes together. I've not yet assembled one so I'm looking forward to giving it a go in the near future.
| REFERENCES |
https://en.wikipedia.org/wiki/Mitsubishi_A6M_Zero#A6M2b_Type_0_Model_21
February 2026
Copyright ModelingMadness.com. All rights reserved. No reproduction in
any form without express permission from the editor.
If you would like your product reviewed fairly and fairly quickly, please
contact
the editor or see other details in the
Note to
Contributors. Back to the Main Page
Back to the Review
Index Page
Back to the Previews Index Page