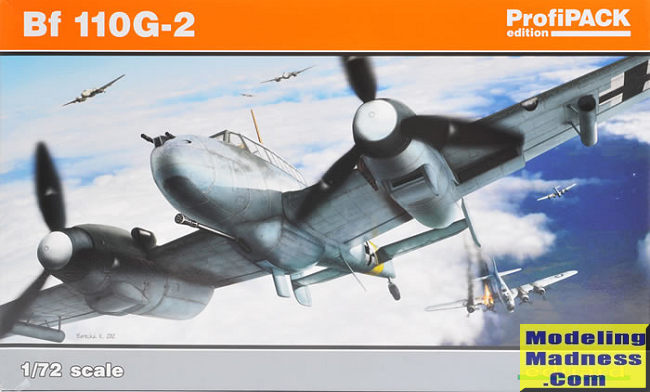
Eduard 1/72 Bf-110G-2
| KIT #: | 7085 |
| PRICE: | $25.0 'Used' |
| DECALS: | Four options |
| REVIEWER: | Scott Van Aken |
| NOTES: | Profipack |
| HISTORY |
Although the Me 210 entered service in mid-1941, it was plagued with problems and was withdrawn from service for further development. In the wake of the failure of the Me 210, the Bf 110G was designed. The G model was fitted with DB 605B engines, producing 1,085 kW (1,475 PS) at their Notleistung (war emergency) top-level setting, and 997 kW (1,355 PS) at 5.8 km (19,000 ft) altitude. The Bf 110G also had upgraded nose armament, and underwent some changes which improved the aerodynamics of the aircraft. The rear cockpit access was moved forward from the transversely-hinged, "tilt-open" rearmost canopy glazing to a side/top hinged opening section of the main canopy, opening to port, with a new rearmost framed glazing section fixed in place. No Bf 110 G-1 existed, so the Bf 110 G-2 became the baseline Bf 110G. A large number of Rüstsätze field conversion packs were available, making the G subtype the most versatile production version of the Bf 110. The initial batch of six pre-series production G-0 aircraft built in June 1942 were followed by 797 G-2, 172 G-3 and 2,293 of the night fighter-dedicated, three-seater G-4 models; built between December 1942 and April 1945. Pilots reported the Bf 110G to be a "mixed bag" in the air, in part due to all changes between the G and F series. The Bf 110G was considered a superior gun platform with excellent all-around visibility, and considered, until the advent of the Heinkel He 219, to be one of the Luftwaffe's best night fighters.
| THE KIT |
 Eduard is not the first to do a nice Bf-110, but their G kit stands out from
the ones by Italeri and Revell in this scale, much because it is a newer
tooling. This kit is the profipack version that includes canopy/wheel masks and
a color photo etch fret.
Eduard is not the first to do a nice Bf-110, but their G kit stands out from
the ones by Italeri and Revell in this scale, much because it is a newer
tooling. This kit is the profipack version that includes canopy/wheel masks and
a color photo etch fret.
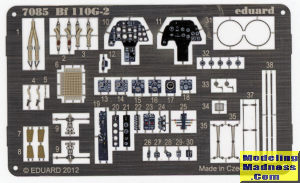 note about the p.e.
bits. They are not absolutely needed and are simply used to enhance what is
there. This set includes instrument faces, rudder pedals, and antennas. In
some cases you need to trim old bits to install them. The only new item are
the seat harness/belts. Most of the fret is used in the cockpit, which is
very nicely detailed. You even have some sidewall detail and there is an
insert for each side to cover the holes where the wing attaches.
note about the p.e.
bits. They are not absolutely needed and are simply used to enhance what is
there. This set includes instrument faces, rudder pedals, and antennas. In
some cases you need to trim old bits to install them. The only new item are
the seat harness/belts. Most of the fret is used in the cockpit, which is
very nicely detailed. You even have some sidewall detail and there is an
insert for each side to cover the holes where the wing attaches. 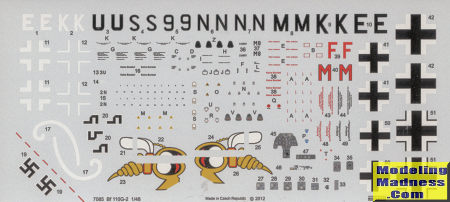 The color
instruction booklet is well done with Gunze paint references. All options
are in RLM 74/75/76 with various degrees of mottling. Units provided are
4./ZG 76 in Czechoslovakia in early 1944, 5./ZG 76 in itial during mid 1943,
10./ZG 76 in Norway in early 1945 and 5./ZG 76 in Austria during the winter
of 1943/44. The fairly large decal sheet is well printed and provides all
you need in the way of stencils and other markings. A separate stencil guide
is provided.
The color
instruction booklet is well done with Gunze paint references. All options
are in RLM 74/75/76 with various degrees of mottling. Units provided are
4./ZG 76 in Czechoslovakia in early 1944, 5./ZG 76 in itial during mid 1943,
10./ZG 76 in Norway in early 1945 and 5./ZG 76 in Austria during the winter
of 1943/44. The fairly large decal sheet is well printed and provides all
you need in the way of stencils and other markings. A separate stencil guide
is provided.
| CONCLUSIONS |
In all, it looks like it will make into a great model. Those not fond of p.e. will want to gravitate towards the weekend edition, but you'll need to get the masks separately.
| REFERENCES |
https://en.wikipedia.org/wiki/Messerschmitt_Bf_110
December 2019 Copyright ModelingMadness.com. All rights
reserved. If you would like your product reviewed fairly and
fairly quickly, please
contact
the editor
or see other details in the
Note to
Contributors.
Back to the Main Page
Back to the Review
Index Page
Back to the Previews Index Page