Meng 1/72 Kayaba Ku-4 Katsuodori
| KIT #: | DS-001 |
| PRICE: | $20.00 |
| DECALS: | Two options |
| REVIEWER: | Scott Van Aken |
| NOTES: |
|
| HISTORY |
The origin
of this Kayaba private design began in 1937 with the Kayaba Ramjet Study Group
who had been seeking to develop and produce a ramjet engine. In comparison to
the pulse-jet engine which injects fuel into the thrust chamber for ignition at
specific intervals, as demonstrated by the German V-1 missile, the ramjet
maintains a constant flow of fuel, thereby producing constant thrust. While the
Germans perfected both the pulse-jet and axial-flow turbojet, the result of the
Kayaba team research was the Kayaba Model 1 ramjet.
 Japanese as well due to the similarity to the
Katsoudori. No
known specific date was given for the
Katsoudori design on paper, but is believed to have been
started in the middle of the war, just prior to the Kikka and
Shusui. The He P.1078C
originated in early 1944. It is possible that the Japanese adapted the
Katsoudori’s ramjet
aircraft around the German design once it had become known. The similarities are
striking.
Japanese as well due to the similarity to the
Katsoudori. No
known specific date was given for the
Katsoudori design on paper, but is believed to have been
started in the middle of the war, just prior to the Kikka and
Shusui. The He P.1078C
originated in early 1944. It is possible that the Japanese adapted the
Katsoudori’s ramjet
aircraft around the German design once it had become known. The similarities are
striking.
With
a total fuel reserve of 3,306 lbs. the
Katsoudori had an
estimated thirty minute combat flight duration. However,
fate intervened with the arrival of the German technology. The
Katsoudori project was
shelved when the Me
163-based rocket-powered designs were born, due to the fact that the 163 was
already a flight-proven design and the
Katsoudori was not. There was no time to further develop
the Kayaba ramjet and perform flight testing on an untried aircraft.
The Katsoudori would have had a projected 559 mph top speed with a climb to 32,808 feet in 3-minutes. This was much slower than the Me 163’s phenomenal climb of 16,000 fpm, but an acceptable range of 248 miles was expected during the thirty minutes of powered flight. A top ceiling of 49,212 feet would have enabled the Katsoudori to intercept any plane in 1945, including the formidable B-29 Superfortress plaguing the home islands.
| THE KIT |
This is one of Meng's first kits and if not the first overall, is probably their first aircraft kit. An interesting choice of subjects considering that the whole 'Luft 46' fad had died down considerably by 2011 when this was released.
There are two kits in the
box with two markings options, though you could easily adapt pretty much
anything you want in terms of markings and camouflage. Right off the bat you
have to make decisions. This invol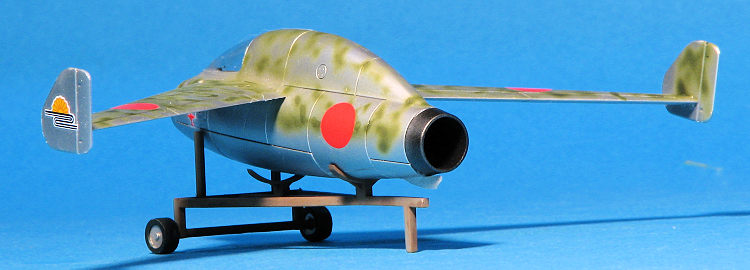 ved drilling holes in the wings or fuselage.
You see, you can display the model hanging from a mother aircraft which requires
one set of holes. You can model it with the rocket assist units on the side of
the fuselage, and you can install ground handling wheels.
ved drilling holes in the wings or fuselage.
You see, you can display the model hanging from a mother aircraft which requires
one set of holes. You can model it with the rocket assist units on the side of
the fuselage, and you can install ground handling wheels.
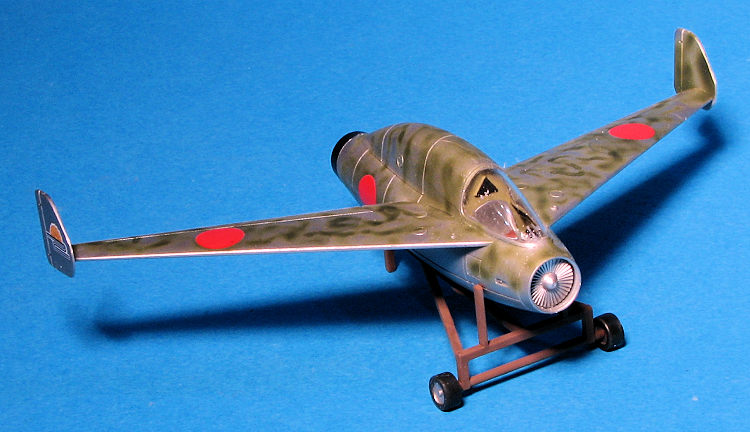
All this needs to be done before the fuselage halves and wing halves are closed up. Most will probably go for the version that is mounted on the ground handling trolley, but it is nice to have the options as this would look neat hanging under a Ki-67, for example.
The cockpit is fairly minimalist with a floor, rear bulkhead, seat, stick, and instrument panel. Both the intake and exhaust sections have their respective compressor stages, though I'm not sure if a ramjet would actually have these features. The one piece wings have the fins and rudders mounted on the tips. Once the canopy is installed, after the fuselage halves have been closed, that pretty well completes the airframe.
The rest of the construction sequences concern the attachment of the side rocket packs, the building of the ground handling dolly, the attachment of the wheeled undercarriage and the apparatus used to hang it from a bomb bay.
| CONSTRUCTION |
The kit itself is pretty simple, but as we have seen before, simple does not always mean easy. First the cockpit was built up. This is little more than a floor, rear bulkhead, seat, stick, and instrument panel. When removing the control stick, it went flying away, never to be found so I substituted a piece of stretched sprue. The interior and side walls were painted with Aeromaster Nakajima Interior Green, which is more like Italian Interior Green, but lighter. The seat was painted aluminum and I used some Eduard belts.
I then painted the intake
and exhaust areas. Note that the exhaust pieces need to be installed before
closing the fuselage halves. I did not do this and had to cut on the seam to
install it. Note also that the alignment pins ar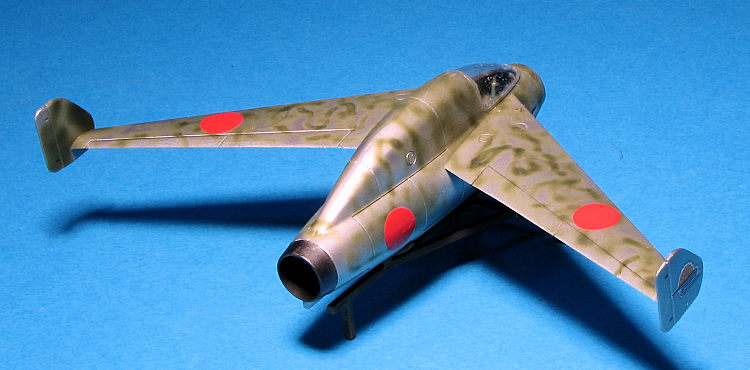 e
very small and will easily melt when glue is applied. Once that was done, a
series of filler/sanding sessions using super glue as a filler began. I also
noted that one fuselage half was short shot at the very front. This had to be
filled and I used a section of plastic card for this.
e
very small and will easily melt when glue is applied. Once that was done, a
series of filler/sanding sessions using super glue as a filler began. I also
noted that one fuselage half was short shot at the very front. This had to be
filled and I used a section of plastic card for this.
Meanwhile I built up the wing/tail pieces and when dry, glued the wings in place. The wing fit is excellent. Note that there are several options on building this. I chose the simplest of them as I wanted to have the kit finished relatively quickly. This meant building up the transport dolly and not installing either the JATO packs or the ground handling wheels. To use either of those, holes in the fuselage need to be opened.
The canopy was then glued in place and masked prior to painting.
| COLORS & MARKINGS |
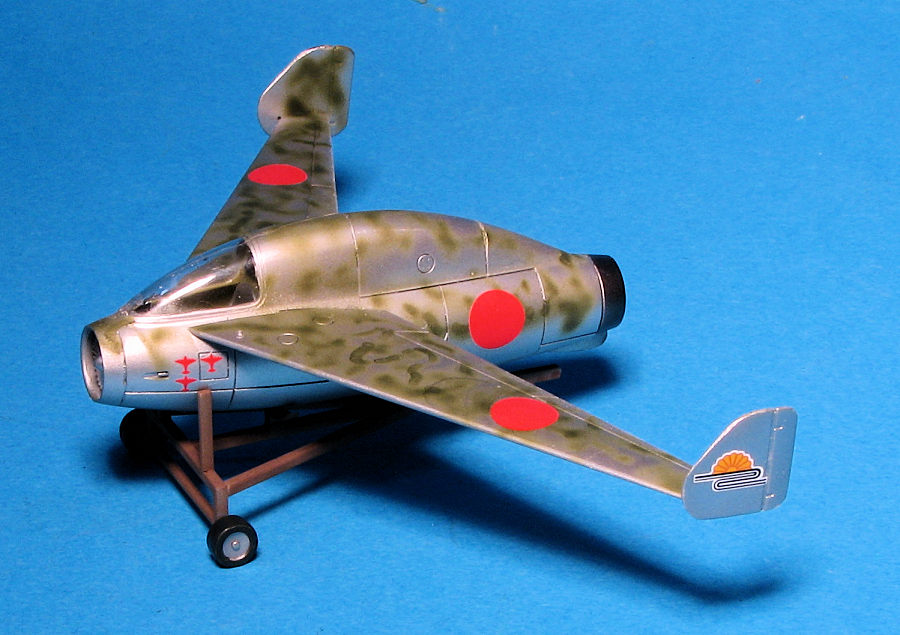
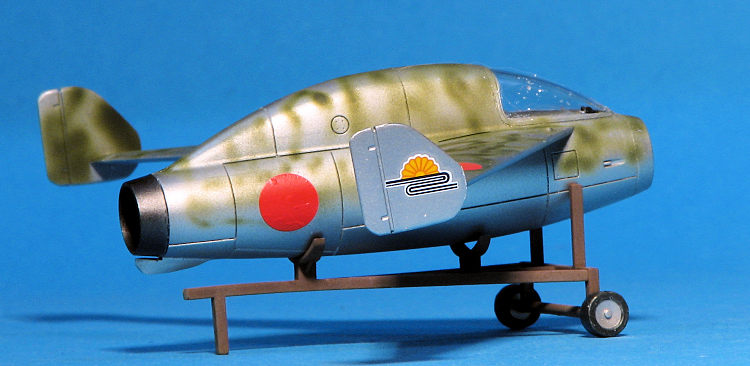
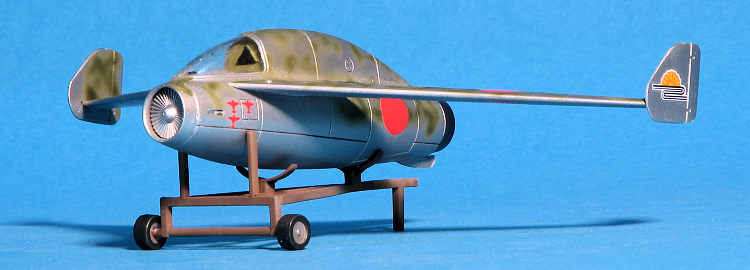 There really
isn't much to this part. I painted the airframe and the dolly wheels aluminum.
The exhaust area was painted steel. Both these colors were Alclad II and sprayed
on bare plastic. The dolly was painted a dark brown as I have to assume it was
wood and given a primer protective coat. I then sprayed little squiggles of dark
green on the upper surface. Not very neat, but effective. I had no issues with
the decals other than to mention that the glue on the sheet goes away fairly
quickly so do only a couple at a time. I used Microsol to help the decals and
that seemed to work just fine.
There really
isn't much to this part. I painted the airframe and the dolly wheels aluminum.
The exhaust area was painted steel. Both these colors were Alclad II and sprayed
on bare plastic. The dolly was painted a dark brown as I have to assume it was
wood and given a primer protective coat. I then sprayed little squiggles of dark
green on the upper surface. Not very neat, but effective. I had no issues with
the decals other than to mention that the glue on the sheet goes away fairly
quickly so do only a couple at a time. I used Microsol to help the decals and
that seemed to work just fine.
The last thing I did was to take off the masking, attach the wheels to the dolly and plunk the model atop it. Note that the completed model is about 3 inches long with a span of probably 4 and a bit.
| FINAL CONSTRUCTION |
This sort of kit is a nice diversion from the norm. It fits fairly well and for most of you, could easily be finished in a few days. It just takes me longer as I'm easily distracted! The end result is something nice that does not take up a lot of space.
| CONCLUSIONS |
 An easy looking build,
especially if you leave off some of the accessories. The result will be a model
that won't take up a lot of shelf space and you have two of them to build. Best
of all, no issues with color police or accuracy experts so go nuts. Those who
understand how airplanes work will also realize that having a compressor fan in
the very front would be difficult at best and require some rather convoluted
ducting either going under or around the cockpit section. Hey, it is a paper
project so reality doesn't need to raise its ugly head on this one.
An easy looking build,
especially if you leave off some of the accessories. The result will be a model
that won't take up a lot of shelf space and you have two of them to build. Best
of all, no issues with color police or accuracy experts so go nuts. Those who
understand how airplanes work will also realize that having a compressor fan in
the very front would be difficult at best and require some rather convoluted
ducting either going under or around the cockpit section. Hey, it is a paper
project so reality doesn't need to raise its ugly head on this one.
| REFERENCES |
http://discaircraft.greyfalcon.us/Kayaba%20Katsoudori.htm
If you would like your product reviewed fairly and fairly quickly, please contact the editor or see other details in the Note to Contributors.
Back to the Main Page Back to the Review Index Page Back to the Previews Index Page