Heller 1/72 Arado Ar-96B
| KIT #: | 239 |
| PRICE: | $2.00 (started) |
| DECALS: | Two Options |
| REVIEWER: | Scott Van Aken |
| NOTES: |
| HISTORY |
The Arado Ar 96 was a successful single-engine, two -seat advanced trainer used
by the German Luftwaffe during and immediately prior to World War II. Designed
in 1936 in response to a Reich Air Ministry requirement as a clean, low-wing
monoplane of all-metal construction, the Arado trainer was quite modern at the
time, using many light alloys. It was
 designed to fill the gap between the
biplanes employed for basic training and the advanced monoplane fighters just
entering service, in particular the Messerschmitt Bf 109.
designed to fill the gap between the
biplanes employed for basic training and the advanced monoplane fighters just
entering service, in particular the Messerschmitt Bf 109.
The Arado Ar 96 prototype flew for the first time in 1937, powered by a 179 kW (240 hp) Argus As 10c engine. Over 11,000 were build, most of them by companies other than Arado.
The Ar 96 was used for advanced, night and instrument-flying training. Famously, during the evening of 28 April 1945, pilot Hanna Reitsch and then-Luftwaffe head Generalfeldmarschall Robert Ritter von Greim were flown out of Berlin under Soviet fire in an Arado Ar 96 trainer. The aircraft took off from an improvised airstrip in the Tiergarten, piloted by a Luftwaffe sergeant.
Production was also undertaken by Letov and the Avia factory in occupied Czechoslovakia, where manufacturing continued for some years after the war, being designated the Avia C-2B.
A wooden version, known as the Ar 396, was built in France and was designated the SIPA S.10. Further developments were the SIPA S.11 (armed version), and the SIPA S.12, a metal version; 188 of all versions were produced until 1958. The S.11 was operated with some success in Algeria, carrying machine guns, rockets and light bombs.
| THE KIT |
Heller was an industry leader in the late 1970s and very early 1980s, producing a new kit seemingly every week. These are 'old school' kits with raised panel detailing, but it doesn't detract from the kit at all. This is one of the smaller boxings usually dedicated to single engine aircraft.
The cockpit area consists of a flat
floor with little ruder pedal triangles molded in place. The two seats
and control sticks fit into this. There is no sidewall detailing. The front
instrument panel fits just under the front opening in the fuselage and the rear
one is part of the separating panel between the front and rear seats.
The wing has a single lower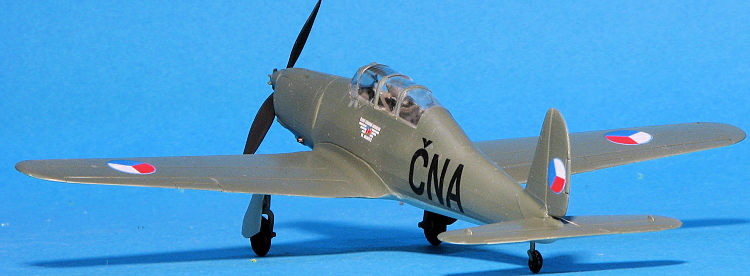 piece and separate upper halves. The tailplane is a
single piece.
piece and separate upper halves. The tailplane is a
single piece.
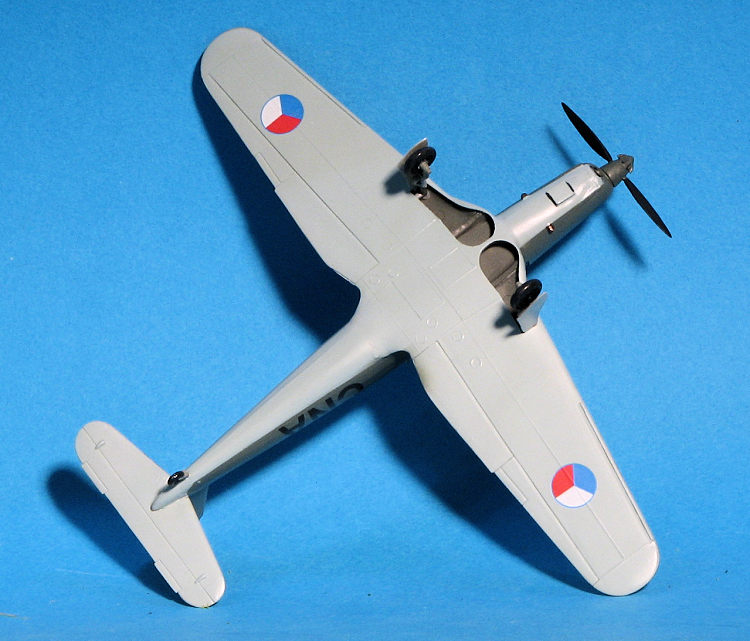
In the front of the fuselage is a forward cowling piece where the prop is attached before gluing onto the front of the fuselage. There are to different cowlings, with one of them having a trough to handle a separate machine gun. There is a single piece canopy that is fairly clear with prominent frame lines. Inside this fits the roll brace. A df loop and radio mast fit behind the canopy. On the underside are single gear legs, wheels and gear doors. The legs are such that they need to be installed prior to gluing the wing halves. The tail gear is molded in the fuselage.
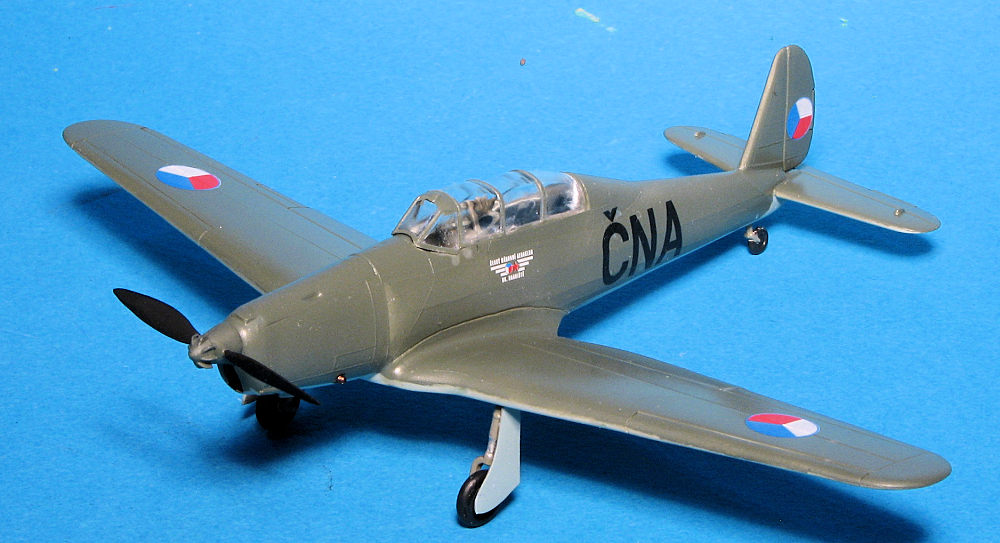
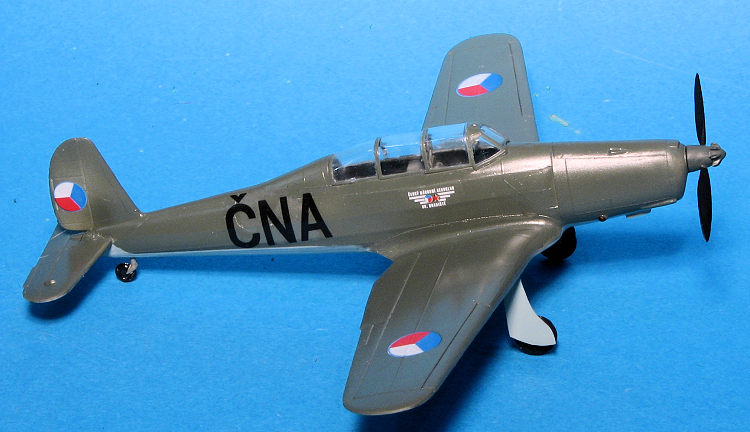
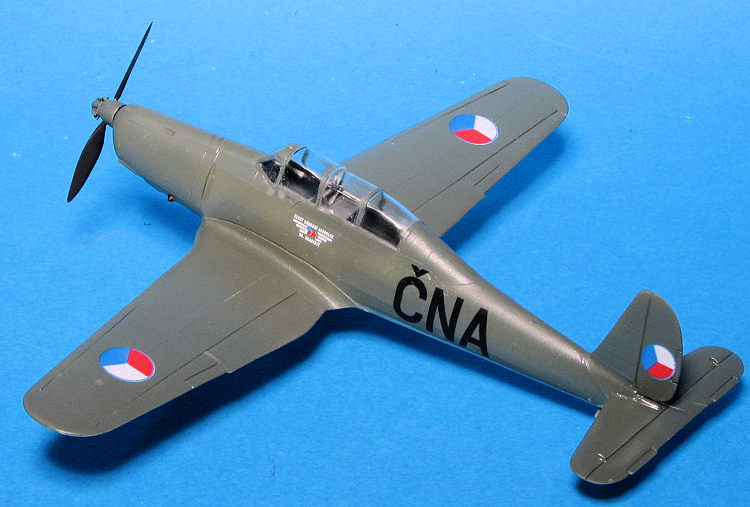
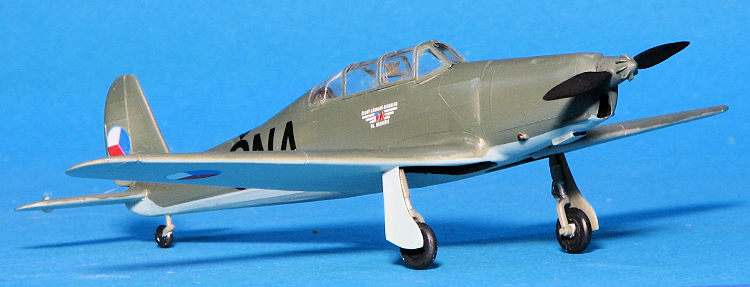
Markings options are for the box art plane from Fighter School #2 at Zerbst in an overall RLM 02 71, while the second is from the 'Piloting School of the Luftwaffe'. This second plane is in what appears to be RLM 71/65 with the undercolor extending pretty far up the fuselage and fin, becoming more mottled as it goes up the airframe. This aircraft also has yellow on the engine side panels, lower wing tips, and a yellow fuselage band. I doubt the decals are still viable and they do not include swastikas. There are aftermarket out there.
| CONSTRUCTION |
I bought this kit second hand as a
started kit. The previous owner had painted the interior bits and assembled the
wings. I glued all the inside bits together and added some tape seat harnesses.
The instrument panels were dry brushed after
 being painted black. The separator
between cockpits was installed and the fuselage halves cemented together. I
chose the upper cowling section that did not take the machine gun.
being painted black. The separator
between cockpits was installed and the fuselage halves cemented together. I
chose the upper cowling section that did not take the machine gun.
The wings and the tailplane were then glued onto the fuselage. This is not the first time I've built this kit and like the previous one done in the 80s, the wing/fuselage join was not good and needed considerable filler. The horizontal stab was also a fairly loose construct and it took a while to get things fairly level. While all that was going on, I glued the prop shaft to the forward cowling piece and then glued that to the front of the fuselage.
The kit was missing the tail gear so I went to my Aeroclub spares bin and found a metal one that looked pretty close and glued that in place. Next the canopy was masked and after installing the roll brace, that was cemented in place. Meanwhile the prop was assembled and painted. I then filled the wheel wells with Silly Putty and headed for the paint shop.
| COLORS & MARKINGS |
As usual, when starting to paint, I wasn't positive as to what scheme I was going to use. I knew that I'd be using RLM 65 for the underside so that was the first shade sprayed. After reviewing the APC Decals sheet on the Ar-96/C-2 (APC 72104), I decided to use the simpler scheme that had dark green on the upper surfaces so for that I used RLM 71. Both shades were from the Testors Model Master enamel line thinned with lacquer thinner.
 Once both had time to cure, I
started applying the decals. These are similar to ALPS printed so each marking needs to be
cut from the sheet separately. I used Microsol setting solution first to see how
the markings would react to them. Well, the first thing I noticed is that they
are a tad off register as even cutting as close as I could, I could see white
peeking from under the blue surround to the roundels. Secondly, the white is not
all that opaque and darkened when applied to the dark green background. Other
than that, they went on without any issues and the Microsol was all that was
really needed. For those wondering what CNA stands for, I have been
informed that it is Czech National Aeroclub.
Once both had time to cure, I
started applying the decals. These are similar to ALPS printed so each marking needs to be
cut from the sheet separately. I used Microsol setting solution first to see how
the markings would react to them. Well, the first thing I noticed is that they
are a tad off register as even cutting as close as I could, I could see white
peeking from under the blue surround to the roundels. Secondly, the white is not
all that opaque and darkened when applied to the dark green background. Other
than that, they went on without any issues and the Microsol was all that was
really needed. For those wondering what CNA stands for, I have been
informed that it is Czech National Aeroclub.
With the decals on, I did some touch up painting and when that was dry, applied a coat of semi-matte to seal things in. The the main wheels and gear doors were attached. I then installed the prop and removed the masking from the canopy. That was it.
| CONCLUSIONS |
 Despite the
kit's age, it builds into a very nice model and does so without a lot of fuss.
The Special Hobby version is undoubtedly much more detailed (I've not seen it as
of this writing) but it is more expensive. This one is nice enough for most and
if you want better kit decals, look for the SMER boxing. I like the kit so much
I've found and ordered the SMER offering as well as the Special Hobby boxing. It
is one of those planes that simply looks right. I should also point out
that the kit comes with a radio mast and a DF antenna, but photos I found of the Avia planes did not have these so I didn't add them.
Despite the
kit's age, it builds into a very nice model and does so without a lot of fuss.
The Special Hobby version is undoubtedly much more detailed (I've not seen it as
of this writing) but it is more expensive. This one is nice enough for most and
if you want better kit decals, look for the SMER boxing. I like the kit so much
I've found and ordered the SMER offering as well as the Special Hobby boxing. It
is one of those planes that simply looks right. I should also point out
that the kit comes with a radio mast and a DF antenna, but photos I found of the Avia planes did not have these so I didn't add them.
| REFERNCES |
https://en.wikipedia.org/wiki/Arado_Ar_96
7 June 2019
Copyright ModelingMadness.com. All rights reserved.
If you would like your product reviewed fairly and fairly quickly, please contact the editor or see other details in the Note to Contributors.
Back to the Main Page Back to the Review Index Page Back to the Previews Index Page