| KIT #: | HM0023 |
| PRICE: | £ |
| DECALS: | One option |
| REVIEWER: | Scott Van Aken |
| NOTES: |
1980s release |
| HISTORY |
The Arado Ar 396 was a training aircraft developed from the successful Arado Ar 96B, but using as little metal as possible in its construction. Despite its name the Ar 396 was developed in France, and none reached the Luftwaffe.
 The Arado Ar 96 was a low-wing monoplane trainer, off all metal
construction and built with light alloys. It was the standard advanced trainer
in the Luftwaffe during the Second World War, and work began on an improved
version, the Ar 296, which would have been powered by the Argus As 411 engine.
The Arado Ar 96 was a low-wing monoplane trainer, off all metal
construction and built with light alloys. It was the standard advanced trainer
in the Luftwaffe during the Second World War, and work began on an improved
version, the Ar 296, which would have been powered by the Argus As 411 engine.
By 1944 Germany was running short of strategic materials such as light alloys, and so work moved onto the Arado Ar 396, a version of the Ar 296 re-engineered to use as little wood as possible. The new aircraft was designed by the Société Industrielle pour l'Aéronautique, or SIPA, in occupied France. Although work on the new aircraft proceeded at some speed, the Allied invasion moved quicker, and the new aircraft didn't make its maiden flight until 29 December 1944, after the SIPA works near Paris had been liberated.
The Ar 396 was a simplified version of the Ar 96, with hand operated flaps and a semi-retractable undercarriage. The instructor and pupil sat in tandem in the long glazed cockpit. Two versions were to have been produced - the Ar 396A-1 fighter trainer, with a single machine-gun, bomb racks and gun sight and the un-armed Ar 396A-2, designed for blind flying training.
SIPA built 200 Ar 396s after the war, as the S.10, S.11 and S.12. During the war the Letov factory in Czechoslovakia also began work on the Ar 396, with records showing that four reached the Luftwaffe, but none made it to units.
| THE KIT |
F
or a period of time, Huma was a very prolific kit maker, concentrating on what if as well as lesser known production types. Initially, all their smaller kits, such as this one, came in a bag. It wasn't until several years later, when they started producing larger kits that all of their kits cam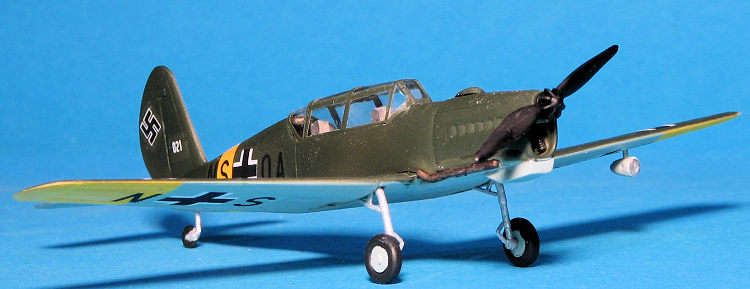 e in a
standard two-piece box. This kit is an early production with a bag.
e in a
standard two-piece box. This kit is an early production with a bag.
There is a single sprue of light grey plastic and an injected canopy. The plastic is somewhat soft with soft detailing in terms of panel lines. While no actual flash is on the parts, the mold seams are generally larger than you'd expect on more mainstream kits.
There is no interior detailing on the inside of the fuselage and your interior is basically a floor with seats into which you are to place two crew figures. A pair of control sticks and instrument panels that take decals will complete the inside. After installing the engine face piece, the fuselage halves can be closed.
Having a one piece wing and tailplane speeds construction. The rudder is also separate. There is a forward cowling piece onto which the prop assembly is attached prior to installation if you want the prop to spin. Most of the rest of the build concentrates on the landing gear. There are bomb racks and bombs if you wish to install those. Last bits are the oil cooler and exhaust.
 Instructions are fairly basic, but more than adequate. No color info is
provided during the build, but one can pretty well use RLM 66 for the
cockpit. A decal sheet offers a single option in RLM 71 over RLM 65. This
shows the gear wells in the underside color. The decal option is for the
only plane that has been photographed in Luftwaffe markings. The decals look
to be fair, but use will be the true tale. Unusually, for a German company,
swastikas are included.
Instructions are fairly basic, but more than adequate. No color info is
provided during the build, but one can pretty well use RLM 66 for the
cockpit. A decal sheet offers a single option in RLM 71 over RLM 65. This
shows the gear wells in the underside color. The decal option is for the
only plane that has been photographed in Luftwaffe markings. The decals look
to be fair, but use will be the true tale. Unusually, for a German company,
swastikas are included. | CONSTRUCTION |
Huma kits are not always the simple slap-together kits that it appears when looking at the minimal parts on the sprue. But they are not difficult (usually). For this one, the first thing I did was to fill all the holes in the wings and remove the gun barrels as I wasn't building the armament trainer version. Then I built up the cockpit and painted all the bits RLM 66. Tape was used to make seat harnesses. Then I put the decals on the instrument panels that I had painted.
 Test fitting the
fuselage showed two things. One is that there is no molded on interior
attachment point. I taped the nose section together to see how I could get it to
fit. In the end, I attached sections of sprue to the underside so it wouldn't
fit too low. I glued in the engine façade and then the front instrument panel,
trapping those in the forward fuselage section, which I also glued together. The
two fuselage halves are not exactly the same so you have to fudge the fit to the
parts you think are more important. With that dry, I tried the interior again
and saw that things were much better.
Test fitting the
fuselage showed two things. One is that there is no molded on interior
attachment point. I taped the nose section together to see how I could get it to
fit. In the end, I attached sections of sprue to the underside so it wouldn't
fit too low. I glued in the engine façade and then the front instrument panel,
trapping those in the forward fuselage section, which I also glued together. The
two fuselage halves are not exactly the same so you have to fudge the fit to the
parts you think are more important. With that dry, I tried the interior again
and saw that things were much better.
Next, I installed the interior while attaching the rear instrument panel and then gluing the rear fuselage halves. This showed that the cockpit opening was a bit longer on one side than on the other with the nose and tail lined up. This mismatch also extended to the lower opening for the wing, which had to be trimmed to get the wing to fit squarely. Eventually it was in place. The tailplane and rudder were also attached, the tailplane being quite difficult to line up due to the small attachment area. I also attached the forward cowling piece.
After the usual filler and sanding (repeat), I glued on the oil radiator, the little bump on the top of the cowling, and then, after masking, the canopy. The canopy required some trimming as well to fit and while I could get one side on rather well, I ended up with gaps on the other side. These were filled with Cementine.
| COLORS & MARKINGS |
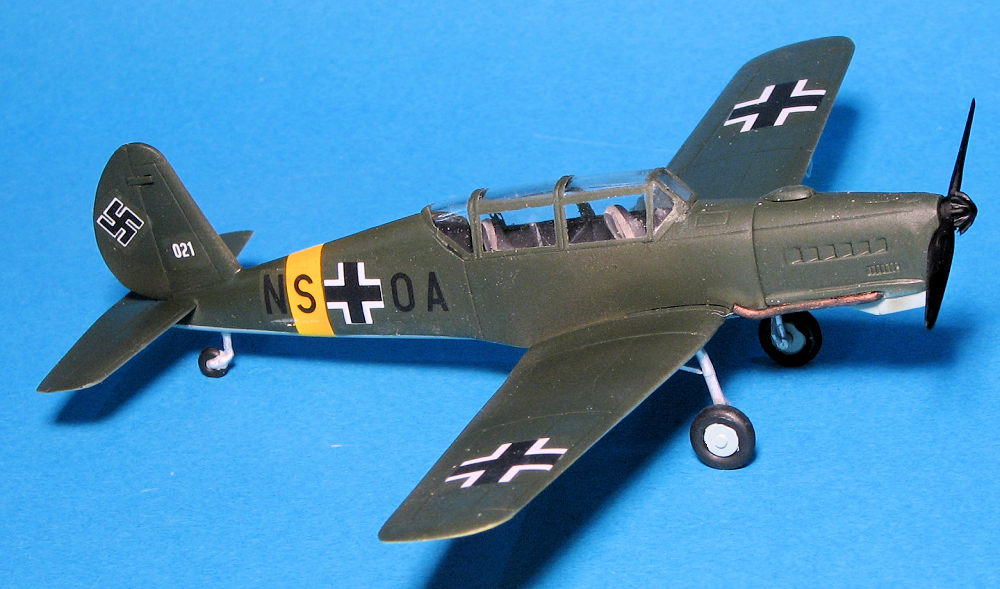
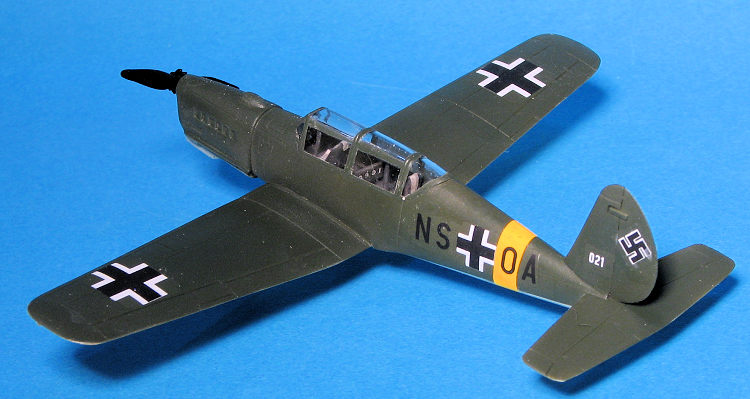
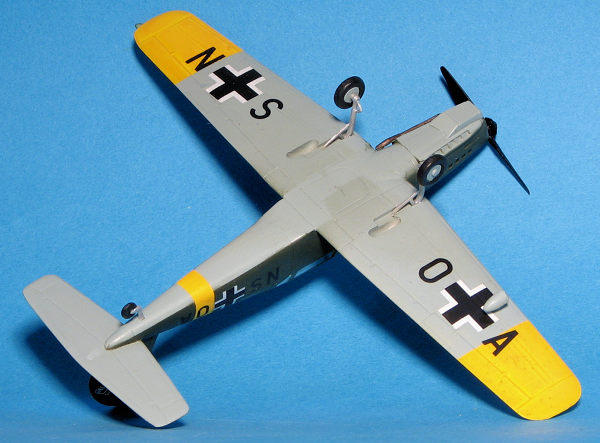
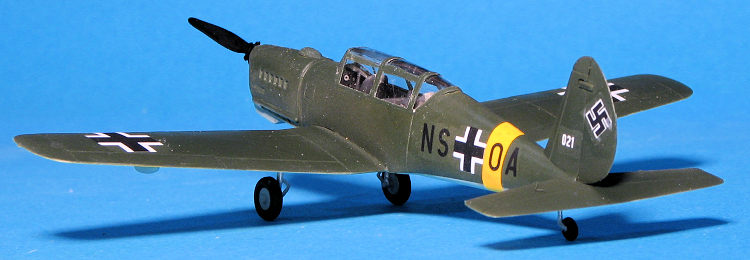 With the
airframe pretty much complete, it seemed like a good time to paint. The option
given is RLM 71 over RLM 65 with yellow lower wing tips and a thin yellow
fuselage band. I first painted the areas to be yellow with Tamiya flat white.
Then I used Aeromaster RLM 04 over those areas. Those were masked and before
continuing with painting, I installed the fairly large landing light. This has
two sink marks on it. One on the lens which I sanded down, and a much bigger one
on the inner side, which I left alone. The underside was painted using Model
Master enamels. That was masked and the upper surface was painted RLM 71 with
Agama's enamels thinned with AK interactive's nitrocellulose thinner. The Agama
is very matte and it is not color corrected so it looks like fresh RLM 71. This
is definitely darker than most other RLM 71 offerings.
With the
airframe pretty much complete, it seemed like a good time to paint. The option
given is RLM 71 over RLM 65 with yellow lower wing tips and a thin yellow
fuselage band. I first painted the areas to be yellow with Tamiya flat white.
Then I used Aeromaster RLM 04 over those areas. Those were masked and before
continuing with painting, I installed the fairly large landing light. This has
two sink marks on it. One on the lens which I sanded down, and a much bigger one
on the inner side, which I left alone. The underside was painted using Model
Master enamels. That was masked and the upper surface was painted RLM 71 with
Agama's enamels thinned with AK interactive's nitrocellulose thinner. The Agama
is very matte and it is not color corrected so it looks like fresh RLM 71. This
is definitely darker than most other RLM 71 offerings.
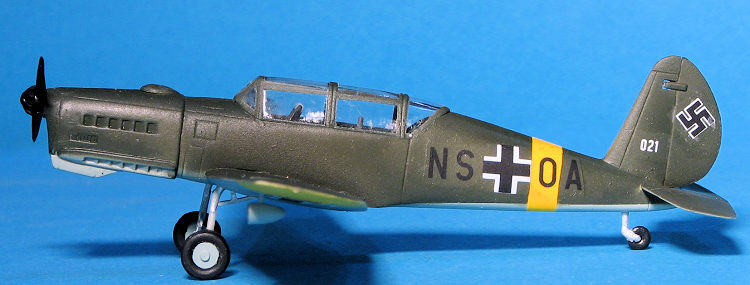
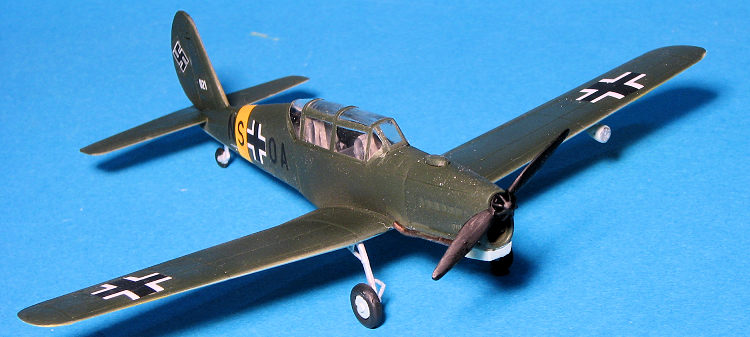 Returning to the
workbench,m the masking was removed and the landing gear was installed. Then the
airframe was provided a gloss coat using Future. The kit decals worked fairly
well. They are a bit thick and have large areas of carrier that it would be
useful to trim away. I did have some silvering issues, despite using setting
solution but overall I was pleased with the opacity of the whites.
Returning to the
workbench,m the masking was removed and the landing gear was installed. Then the
airframe was provided a gloss coat using Future. The kit decals worked fairly
well. They are a bit thick and have large areas of carrier that it would be
useful to trim away. I did have some silvering issues, despite using setting
solution but overall I was pleased with the opacity of the whites.
Once those were on, I gave the airframe an overall coat of thinned Tamiya matte coat which returned the finish something closer to what I like. It is not as matte as the Agama paint by itself, thankfully. I had to drill out the wheels a bit to get them to fit on the axles. Finally, I installed the prop assembly and removed the masking from the kit.
| CONCLUSIONS |
| REFERENCES |
http://www.historyofwar.org/articles/weapons_arado_ar_396.html
Kit instructions
27 March 2020
Copyright ModelingMadness.com. All rights reserved.
If you would like your product reviewed fairly and fairly quickly, please contact the editor or see other details in the Note to Contributors.
Back to the Main Page Back to the Review Index Page Back to the Previews Index Page