| KIT #: | 11148 |
| PRICE: | $89.00 SRP |
| DECALS: | Eleven options |
| REVIEWER: | Scott Van Aken |
| NOTES: | Two complete kits with p.e. and resin. |
| HISTORY |
Referred to as the "bastard aircraft of the Erla factory" in the Luftwaffe's
Aircraft Variants Book of December 1944, the G-10 was a Bf 109 G airframe
combined with the new DB 605 D-2 engine, created to maintain production levels
with minimal disruption of the assembly lines until production of K-series
airframes would reach sufficient levels. Despite what the designation would
suggest, it appeared in service after the G-14 in November 1944, largely
replacing previous G-series aircraft on the production lines of Erla, WNF and
Messerschmitt Regensburg factories. Contrary to popular belief the G-10 were not
rebuilt older airframes but new production. Early
 production G-10 may have had
two data plates (one stamped G-14) as these airframes were originally intended
for G-14 assembly but were diverted to G-10 assembly.
production G-10 may have had
two data plates (one stamped G-14) as these airframes were originally intended
for G-14 assembly but were diverted to G-10 assembly.
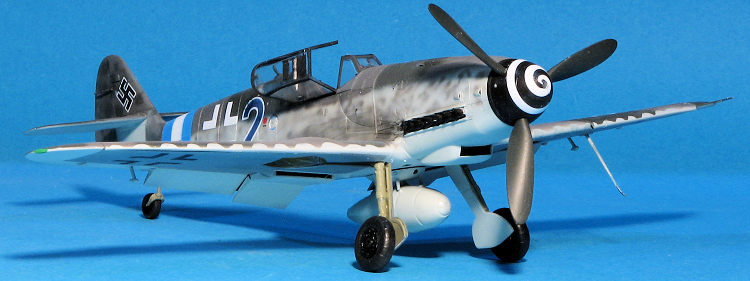
The most recognizable external change was the use of the three-panel Erla-Haube clear-view canopy, which filled the entire canopy length behind the four-panel windscreen unit, which eliminated the older, rear fixed canopy section. Internal changes included inheriting the new 2,000 W generator and the DB 605 D-2 engine of the 109K. Apart from the standardised streamlined engine cowlings, G-10s with the DB605 D-2 were equipped as standard with the MW-50 booster system (DB 605DM, later 605DB) and had a larger Fo 987 oil cooler housed in a deeper fairing. Also, because of the engine's enlarged crankcase and the oil return lines which ran in front of it, these G-10s had small blister fairings incorporated into the lower engine cowlings, forward of and below the exhaust stacks, except for Erla-built aircraft, which had modified cowlings without the little bulges in front of the exhaust stacks. This became a distinguishing feature between Erla-built G-10s and those of other factories. The radio antenna mast was also removed from atop the rear fuselage turtledeck, and replaced with a standard late-war Luftwaffe ventral whip aerial antenna under the wing. 2,600 airframes were built between October 1944 and the end of the war.
| THE KIT |
This is part of one of Eduard's double kits that provides two complete Profipak offerings. This means you get photo etch (mostly for the interior), canopy and wheel masks, as well as some resin parts. In this case, the resin consists of mainwheels and tail wheels.
 Unlike the previous boxing, this one provides one G-10 and one G-14/AS. It also
provides three sets of wings, two of them with the smaller wheel bulges and one
with the large. Note that the resin wheels are for one small and one larger
wheel so if doing both kits with the small bulges, you'll need to use the
plastic wheels for one of them. As mentioned, a
fair amount of the photo etch is for the interior in the form of seat harness,
rudder pedals, trim wheel chain, some placards, as well as the instrument
panels. You don't have to use all of the p.e. options and can use plastic parts
in their place if you so wish. In terms of the instrument panels, decals are
provided as well.
Unlike the previous boxing, this one provides one G-10 and one G-14/AS. It also
provides three sets of wings, two of them with the smaller wheel bulges and one
with the large. Note that the resin wheels are for one small and one larger
wheel so if doing both kits with the small bulges, you'll need to use the
plastic wheels for one of them. As mentioned, a
fair amount of the photo etch is for the interior in the form of seat harness,
rudder pedals, trim wheel chain, some placards, as well as the instrument
panels. You don't have to use all of the p.e. options and can use plastic parts
in their place if you so wish. In terms of the instrument panels, decals are
provided as well.
This same optional ability is offered for the exhaust where you can use the p.e. for the exhaust shields or the one piece plastic ones. Note that not all markings options use the same p.e. shields so follow the instructions. The rudders are not all the same and Eduard provides separate control surfaces for the rear, though they are designed to be modeled in the neutral position.
Separate flaps, slats, and radiator exhaust flaps are provided. You also have a choice of p.e. or plastic radiator screens. When doing the head armor, there are a variety of options and are dependent again on your choice of markings option. All options have the Erla canopy and this can be posed open or closed. Finally, on the underside, there are options for the centerline tank, though these are not markings specific.
 Instruction
booklet is very well done and it behooves the builder to pay close attention to
the notes within to ensure the best accuracy of the option being done. There are
ten different markings options, all from JG 300/301. Half of the options are for
the G-10 and the others are for the G-14. You get a very large decal
sheet along with two others (not shown) that have stencils. I should mention
that for the options with the painted over insignia, you have to apply a
standard insignia and paint it over yourself. Decals are quite nicely done and
one really should do one of what is provided. Note that the fuselage bands will
have to be painted. I ordered this kit from Germany, hence the full swastikas
were cut out of the decal sheet.
Instruction
booklet is very well done and it behooves the builder to pay close attention to
the notes within to ensure the best accuracy of the option being done. There are
ten different markings options, all from JG 300/301. Half of the options are for
the G-10 and the others are for the G-14. You get a very large decal
sheet along with two others (not shown) that have stencils. I should mention
that for the options with the painted over insignia, you have to apply a
standard insignia and paint it over yourself. Decals are quite nicely done and
one really should do one of what is provided. Note that the fuselage bands will
have to be painted. I ordered this kit from Germany, hence the full swastikas
were cut out of the decal sheet.
| CONSTRUCTON |
I decided to build one of the Bf-109G-10 options from this kit as it has been a long time since I've done a G-10 version. This is also the first time I've built one of the Eduard 109G kits. The previous Eduard 109 I built was one of their 109E offerings and I found it to be a very frustrating experience with generally poor fit and a lot of teeny parts. Well, this kit also has a bunch of teeny parts but I'd heard good things about it so decided to give it a go.
In this case I started off with the interior. I prepainted everything with an
eye on what areas needed to be kept free of paint for the photo etch parts. I
used Mr. Color RLM 66 for this. Since the kit came with photo etch, I decided to
use as much as I could handle. Not surprising is that I lost a few of them, and
I had the rudder pedals break when I tried to bend them. Building up the
interior took sev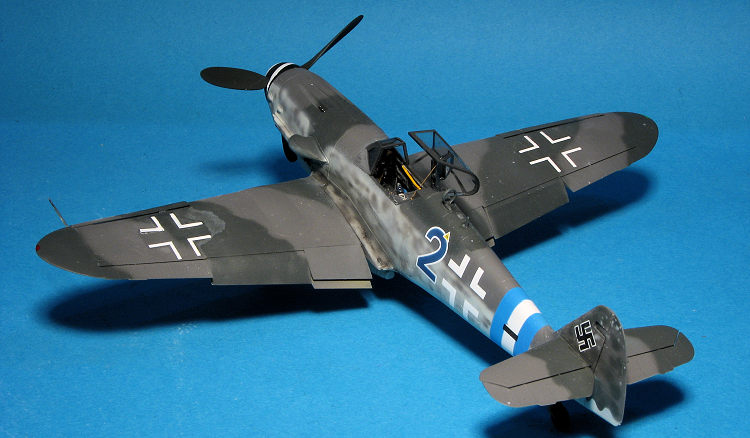 eral weeks. One thing I discovered is that the fuel line piece
really needs to have holes drilled out for it as the tiny depressions that this
and several other parts are to fit into are simply inadequate. I also found the
dark grey plastic a real pain to use as it was not only difficult to find
mounting areas, but the part numbers on the sprues were particularly difficult
to read. I also had to enlarge a mounting hole on one of the floor mounted boxes
as what was molded there was far too small to accept the part's tab.
eral weeks. One thing I discovered is that the fuel line piece
really needs to have holes drilled out for it as the tiny depressions that this
and several other parts are to fit into are simply inadequate. I also found the
dark grey plastic a real pain to use as it was not only difficult to find
mounting areas, but the part numbers on the sprues were particularly difficult
to read. I also had to enlarge a mounting hole on one of the floor mounted boxes
as what was molded there was far too small to accept the part's tab.
With the interior done, it, the exhaust, the nose blanking plate, and the tail strut were installed and the fuselage halves closed. I would have preferred the exhaust to install from the outside but there it is. I did use the versions that accepted the p.e. shields and those were a fairly tight fit. I needed filler on the lower and upper nose area. The upper cowling piece has to have the gun troughs installed from the underside. It also has a separate hinge piece. Come on now, can't Eduard mold that in place?
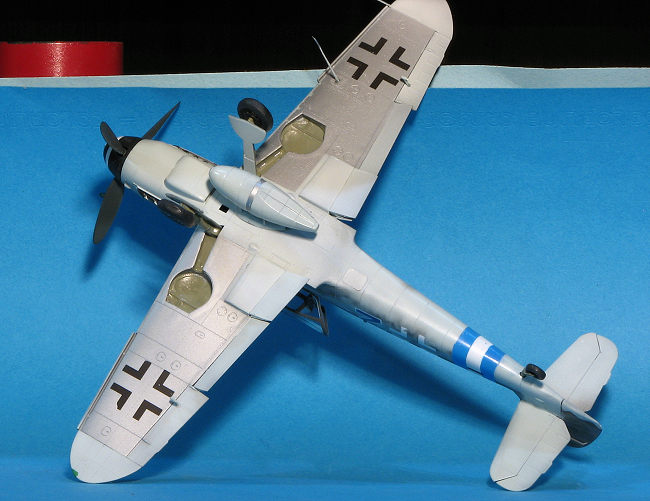
Wheel wells were installed into the lower wing, the centerline tank holes opened and the radiators and screens were installed. After that, the upper wing was attached. The wing was then attached to the fuselage. Fit is pretty good though there are some gaps that need filled in the front. With that done, the oil cooler was built up and installed. Then the slats and ailerons were glued on, then the flaps were attached. Note that these have long sink areas on them. I did not fill them as that would have basically ruined all the rivet detail.
Next, the radiator exhaust doors were installed. These are molded to be in the lowered position. To be honest, you can't see the rear p.e. screens unless you poke a flashlight beam so unless you feel you need to install them, save yourself the effort. It was then time to start painting.
| COLORS & MARKINGS |
 I filled various openings that were not to be painted with Silly Putty or
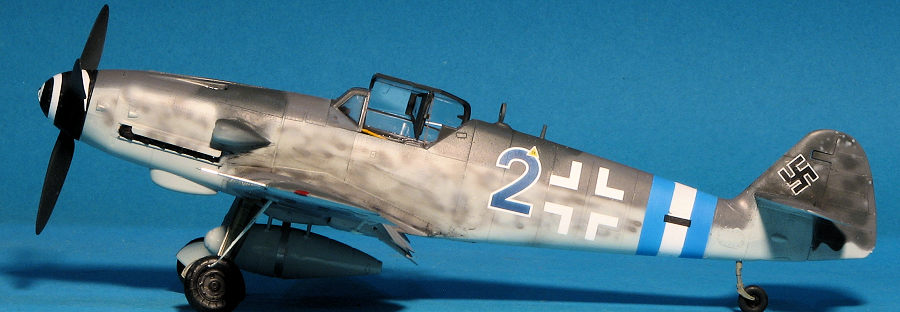
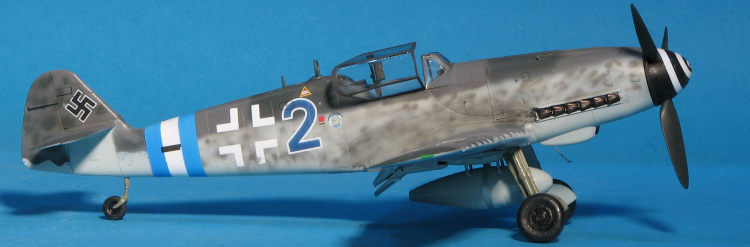
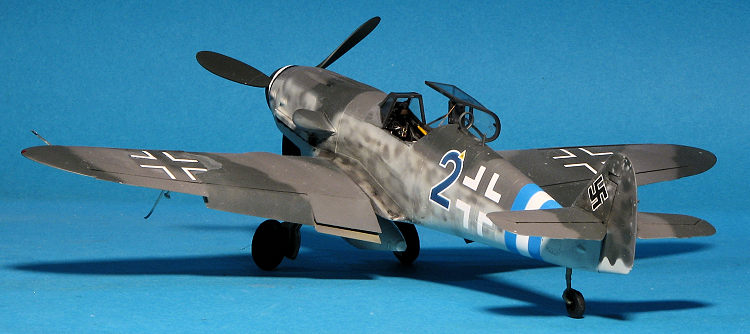
tissue. I decided on option 'I' from the instruction booklet. This plane has
portions of the lower wing unpainted so I first gave the area a dose of Tamiya
primer, followed by a coat of Alclad II aluminum. That was masked off and a
white band was painted around the fuselage. After letting that cure, I masked
the central part and pained it with Tamiya Sky Blue. That was then masked and
the rest of the camo in RLM 74/75/76 was done with Mr Color.
I filled various openings that were not to be painted with Silly Putty or
tissue. I decided on option 'I' from the instruction booklet. This plane has
portions of the lower wing unpainted so I first gave the area a dose of Tamiya
primer, followed by a coat of Alclad II aluminum. That was masked off and a
white band was painted around the fuselage. After letting that cure, I masked
the central part and pained it with Tamiya Sky Blue. That was then masked and
the rest of the camo in RLM 74/75/76 was done with Mr Color.
Then the kit had the landing gear installed. This was a somewhat loose fit. The resin wheels were painted with Tamiya's black and tire black. I had to enlarge the axle holes to get them to fit on the axles. As a note, these come with separate inner inserts, but frankly, I don't see why they bother as part of the wheel is also molded on the tire section so it has to be either carefully painted or masked, your choice as wheel masks are included. Those and the gear doors were installed.
Next step was to repair the broken tail gear, which I did by cutting the broken area flush then used one of the other gear pieces to repair it after drilling holes in both strut sections to take a section of wire. The airframe was then given a clear gloss coat using what passes for Future nowdays.
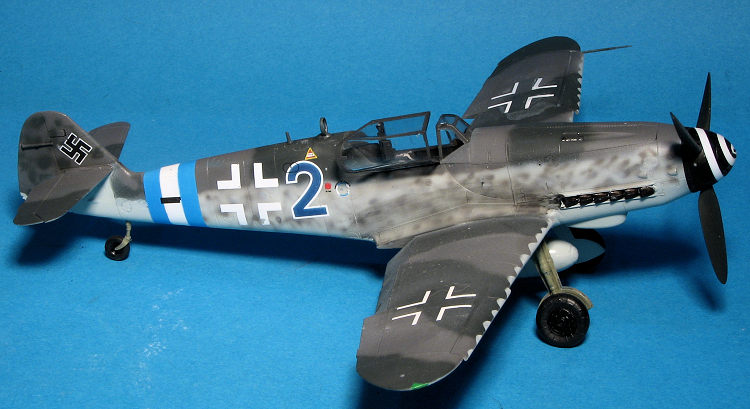
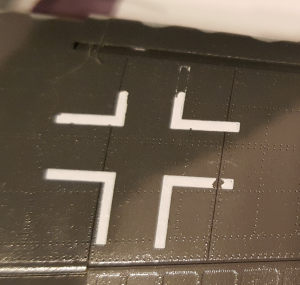 I then started applying decals,
beginning with the insignia. Now I've used similar decals to these from MYK of
Japan and had zero issues with them. Not so these. I found that they regularly
tore part of the underlying decal when removing the clear film. I'd heard that
others had these issues and can only verify their comments in this regard. The
image shown is not the worst case, with few decals surviving unscathed. Even
using the decals for the second kit did not improve things and for some markings
I had to raid the decal stash for replacement insignia.
I then started applying decals,
beginning with the insignia. Now I've used similar decals to these from MYK of
Japan and had zero issues with them. Not so these. I found that they regularly
tore part of the underlying decal when removing the clear film. I'd heard that
others had these issues and can only verify their comments in this regard. The
image shown is not the worst case, with few decals surviving unscathed. Even
using the decals for the second kit did not improve things and for some markings
I had to raid the decal stash for replacement insignia.
Eventually, I got on a sufficient number of decals and then gave the model a clear matte coat. Next I had to paint the exhaust, wing tip lights, and the drop tank. The morane antenna was installed, though I had to do some trimming on the clear mount to get it to fit. The prop was attached as were the aileron mass balances. It would have been nice if Eduard had engineered a positive attachment for an open canopy, but they didn't. Getting the canopy to fit in the open position wasn't easy and I had to use tape to hold it in place while the Cementine dried. I uses a short section of .008 wire for the canopy cable and painted it dark khaki. A p.e. one is supplied, but it is flat and not very convincing. As the attached wing pitot had broken during shipping, I used the additional one supplied on the sprue as a replacement after drilling a hole for it. A bit of touch up painting, the drop tank was attached and that was it.
| CONCLUSIONS |
 This one took
me nearly three months to finish. I'm sure others can do it in less, but I found
that generally, the kit was quite fiddly and some of the parts attachment was
not well thought out (tail gear, for instance, could have been designed so it
could be attached later rather than when the fuselage halves were closed). Not
sure why Eduard's decals are causing so much trouble. I've had reports from
friends who ran into the same issue with tearing. It would be better in my
opinion, if they'd return to standard water slide as apparently these are not
ready for prime time. I'm sure that those who build a lot of these kits will
find them easier and easier to construct, but for me, the first time was not
user friendly. We'll see how the second kit in the box goes.
This one took
me nearly three months to finish. I'm sure others can do it in less, but I found
that generally, the kit was quite fiddly and some of the parts attachment was
not well thought out (tail gear, for instance, could have been designed so it
could be attached later rather than when the fuselage halves were closed). Not
sure why Eduard's decals are causing so much trouble. I've had reports from
friends who ran into the same issue with tearing. It would be better in my
opinion, if they'd return to standard water slide as apparently these are not
ready for prime time. I'm sure that those who build a lot of these kits will
find them easier and easier to construct, but for me, the first time was not
user friendly. We'll see how the second kit in the box goes.
Having said that, one cannot fault Eduard for wanting to produce the most accurate representation of this aircraft yet done and I do believe they have succeeded in that regard. I'd have to say that this kit is not for the tyro, but is recommended to more experienced modelers.
| REFERENCES |
https://en.wikipedia.org/wiki/Messerschmitt_Bf_109_variants#G-10
10 June 2022
Copyright ModelingMadness.com. All rights reserved. No reproduction in part
or in whole without express permission from the editor.
If you would like your product reviewed fairly and fairly quickly, please
contact
the editor or see other details in the
Note to
Contributors. Back to the Main Page
Back to the Review
Index Page
Back to the Previews Index Page